Canon PowerShot SX60 HS User Guide - Page 54
Helpful Shooting Features
 |
View all Canon PowerShot SX60 HS manuals
Add to My Manuals
Save this manual to your list of manuals |
Page 54 highlights
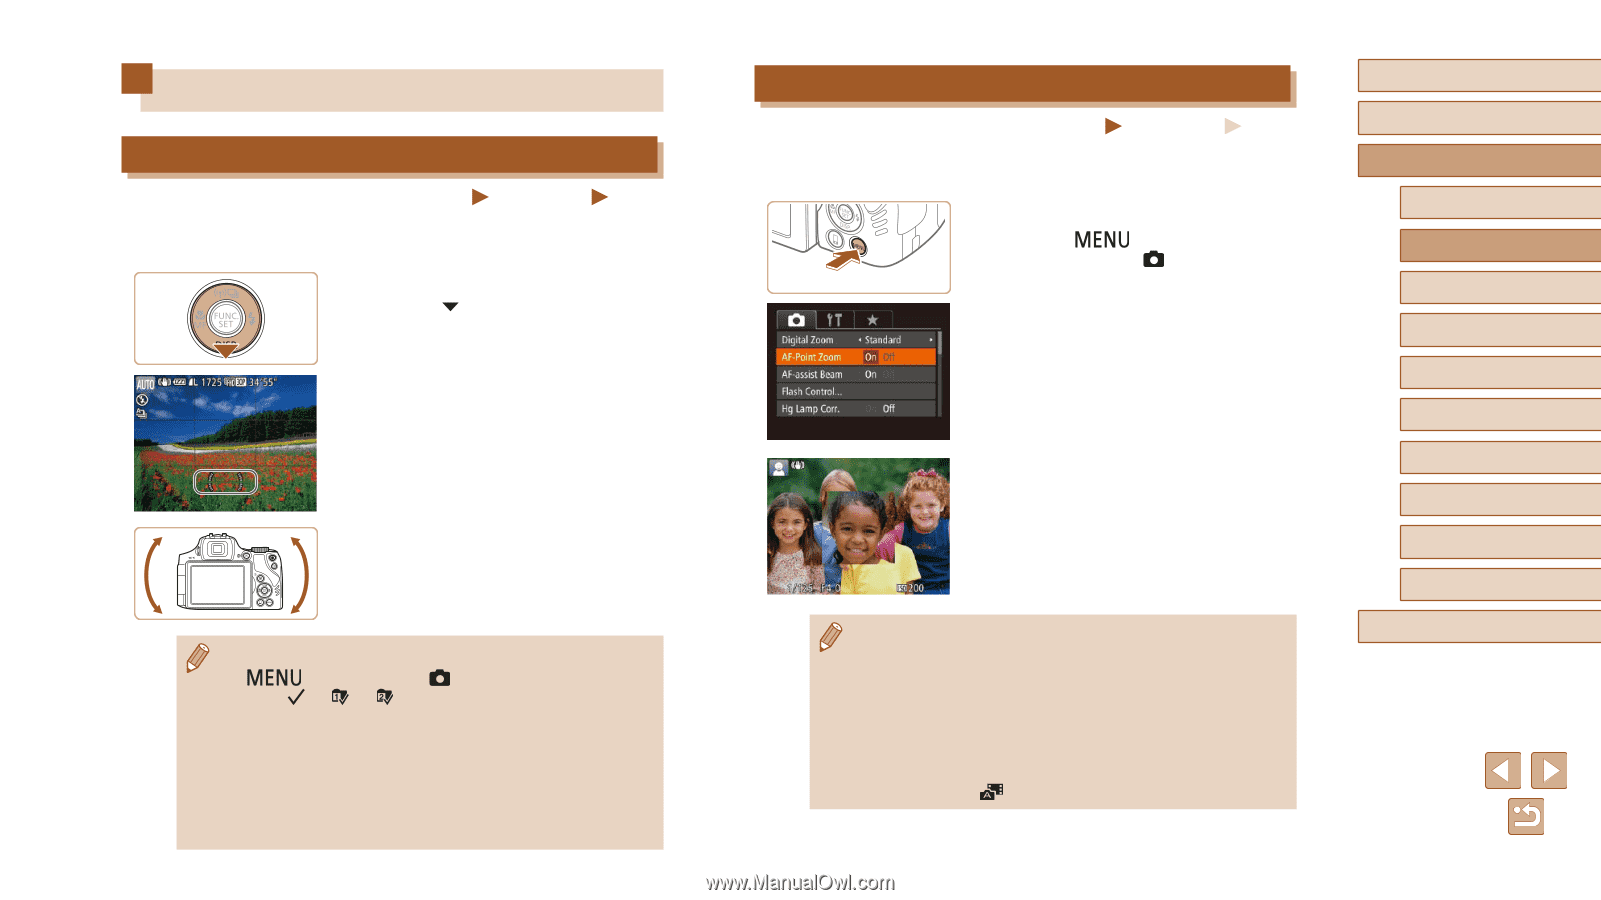
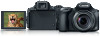
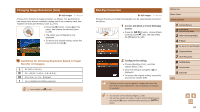
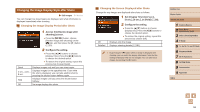
Helpful Shooting Features Using the Electronic Level Still Images Movies An electronic level can be displayed on the screen when shooting as a guideline to determine if the camera is level. 1 Display the electronic level. ●●Press the [ ] button several times to display the electronic level. 2 Level the camera as needed. ●●Level the camera so that the center of the electronic level is green. ●● If the electronic level is not displayed in step 1, press the [ ] button, and on the [ ] tab, choose [Custom Display]. Add a [ ] to [ ] or [ ] to choose the electronic level. ●● Tilting the camera too far forward or backward will prevent you from using the electronic level, which will turn gray. ●● The electronic level is not displayed during movie recording. ●● If you hold the camera vertically, the orientation of the electronic level will be updated automatically to match the camera orientation. ●● If your shots are not level even if you use the electronic level, try calibrating the electronic level (=150). Magnifying the Area in Focus Still Images Movies You can check the focus by pressing the shutter button halfway, which will enlarge the portion of the image in focus in the AF frame. 1 Configure the setting. ●●Press the [ ] button, choose [AF- Point Zoom] on the [ ] tab, and then choose [On] (=30). 2 Check the focus. ●●Press the shutter button halfway. The face detected as the main subject is now magnified. ●●To restore the original setting, choose [Off] in step 1. ●● The area in focus is not magnified in the following cases when the shutter button is pressed halfway. -- If a face was not detected, if the person is too close to the camera and their face is too large for the screen, or if the camera detects subject movement -- When digital zoom is used (=40) -- When Tracking AF is used (=83) -- When a TV is used as a display (=157) ●● Not available in [ ] mode. Before Use Basic Guide Advanced Guide 1 Camera Basics 2 Auto Mode / Hybrid Auto Mode 3 Other Shooting Modes 4 P Mode 5 Tv, Av, M, C1, and C2 Mode 6 Playback Mode 7 Wi-Fi Functions 8 Setting Menu 9 Accessories 10 Appendix Index 54
-
 1
1 -
2
-
3
-
4
-
5
-
6
-
7
-
8
-
9
-
10
-
11
-
12
-
13
-
14
-
15
-
16
-
17
-
18
-
19
-
20
-
21
-
22
-
23
-
24
-
25
-
26
-
27
-
28
-
29
-
30
-
31
-
32
-
33
-
34
-
35
-
36
-
37
-
38
-
39
-
40
-
41
-
42
-
43
-
44
-
45
-
46
-
47
-
48
-
 49
49 -
 50
50 -
 51
51 -
 52
52 -
 53
53 -
 54
54 -
 55
55 -
 56
56 -
 57
57 -
 58
58 -
 59
59 -
60
-
61
-
62
-
63
-
64
-
65
-
66
-
67
-
68
-
69
-
70
-
71
-
72
-
73
-
74
-
75
-
76
-
77
-
78
-
79
-
80
-
81
-
82
-
83
-
84
-
85
-
86
-
87
-
88
-
89
-
90
-
91
-
92
-
93
-
94
-
95
-
96
-
97
-
98
-
99
-
100
-
101
-
102
-
103
-
104
-
105
-
106
-
107
-
108
-
109
-
110
-
111
-
112
-
113
-
114
-
115
-
116
-
117
-
118
-
119
-
120
-
121
-
122
-
123
-
124
-
125
-
126
-
127
-
128
-
129
-
130
-
131
-
132
-
133
-
134
-
135
-
136
-
137
-
138
-
139
-
140
-
141
-
142
-
143
-
144
-
145
-
146
-
147
-
148
-
149
-
150
-
151
-
152
-
153
-
154
-
155
-
156
-
157
-
158
-
159
-
160
-
161
-
162
-
163
-
164
-
165
-
166
-
167
-
168
-
169
-
170
-
171
-
172
-
173
-
174
-
175
-
176
-
177
-
178
-
179
-
180
-
181
-
182
-
183
-
184
-
185
-
186
-
187
-
188
-
189
-
190
-
191
-
192
-
193
-
194
-
195
-
196
-
197
-
198
-
199
-
200
-
201
-
202
-
203
 |
 |