Canon PowerShot SX60 HS User Guide - Page 97
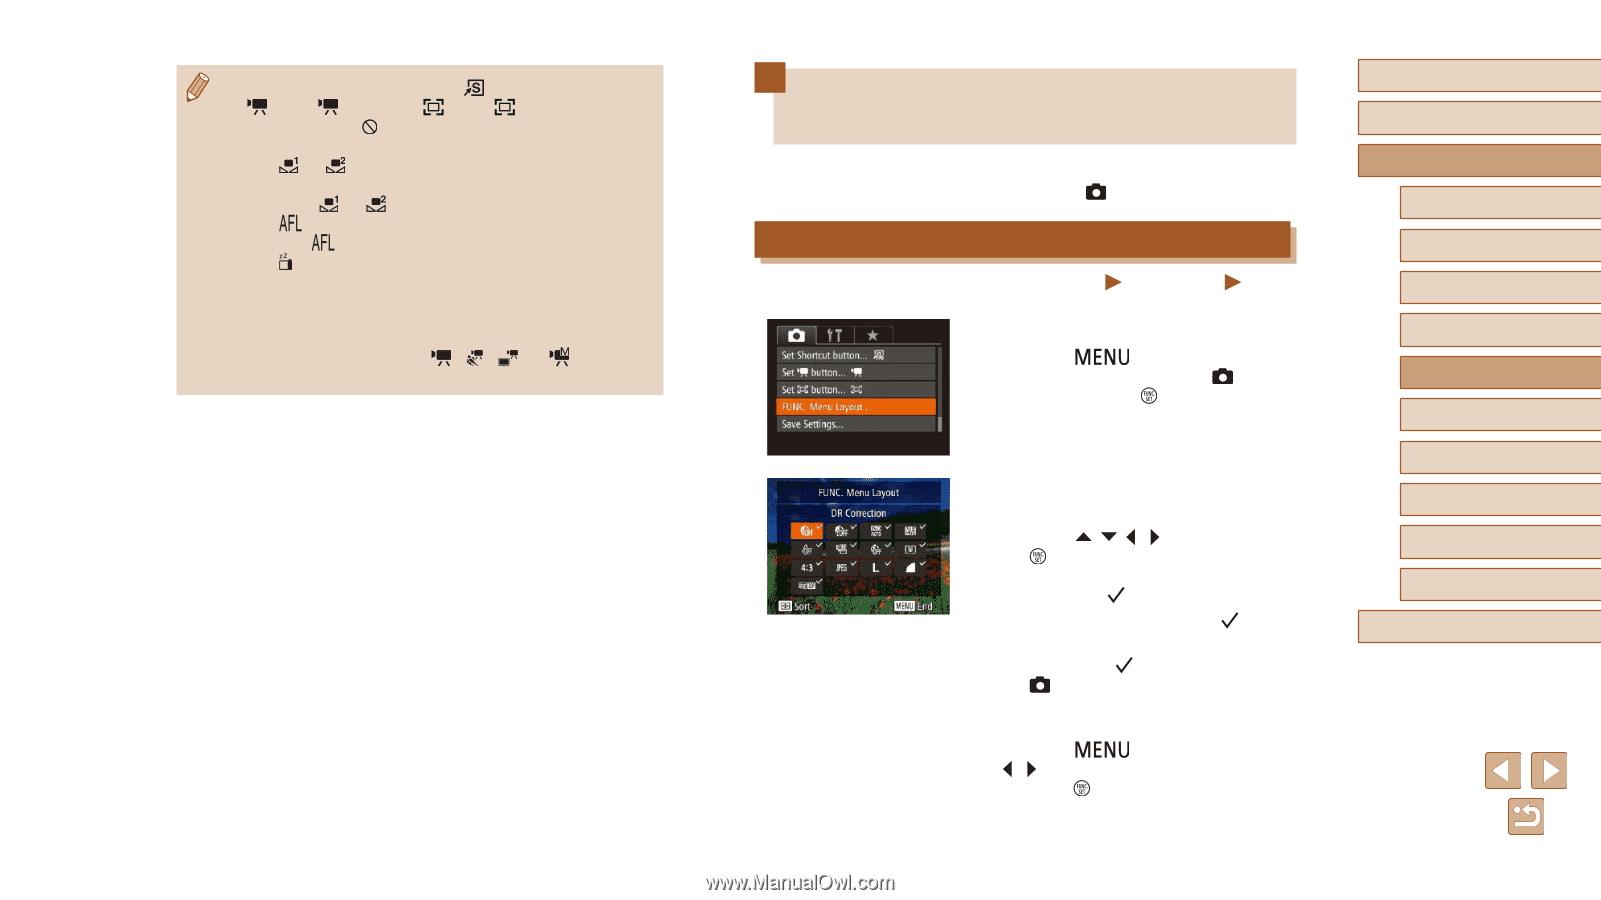
Customizing the FUNC. Menu, FUNC. Menu Layout
 |
View all Canon PowerShot SX60 HS manuals
Add to My Manuals
Save this manual to your list of manuals |
Page 97 highlights
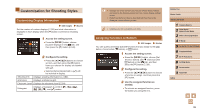
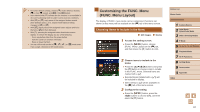
●● To restore default settings, choose [ ] in [Set Shortcut button], [ ] in [Set button], and [ ] in [Set button]. ●● Icons labeled with [ ] indicate that the function is not available in the current shooting mode or under current function conditions. ●● With [ ] or [ ], each press of the assigned button records white balance data (=77), and the white balance setting changes to [ ] or [ ]. ●● With [ ], each press of the assigned button adjusts and locks the focus. [ ] is then displayed. ●● With [ ], pressing the assigned button deactivates screen display. To restore the display, do any of the following. -- Press any button other than the power button -- Hold the camera in another orientation -- Raise or lower the flash ●● You can still record movies in or [ ] mode even if you assign a function to the movie button. Customizing the FUNC. Menu (FUNC. Menu Layout) The display of FUNC. menu items can be customized. Functions not shown on this menu will be available on the [ ] tab of the menu screen. Choosing Items to Include in the Menu Still Images Movies 1 Access the setting screen. ●●Press the [ ] button, choose [FUNC. Menu Layout] on the [ ] tab, and then press the [ ] button (=30). 2 Choose icons to include in the menu. ●●Press the buttons and press the [ ] button to choose icons to include in the FUNC. menu. Selected icons are marked with a [ ]. ●●Selected items (labeled with a [ ]) will be included in display. ●●Items without a [ ] will be available on the [ ] tab of the menu screen. 3 Configure the setting. ●●Press the [ ] button, press the [ ][ ] buttons to choose [OK], and then press the [ ] button. Before Use Basic Guide Advanced Guide 1 Camera Basics 2 Auto Mode / Hybrid Auto Mode 3 Other Shooting Modes 4 P Mode 5 Tv, Av, M, C1, and C2 Mode 6 Playback Mode 7 Wi-Fi Functions 8 Setting Menu 9 Accessories 10 Appendix Index 97
-
 1
1 -
2
-
3
-
4
-
5
-
6
-
7
-
8
-
9
-
10
-
11
-
12
-
13
-
14
-
15
-
16
-
17
-
18
-
19
-
20
-
21
-
22
-
23
-
24
-
25
-
26
-
27
-
28
-
29
-
30
-
31
-
32
-
33
-
34
-
35
-
36
-
37
-
38
-
39
-
40
-
41
-
42
-
43
-
44
-
45
-
46
-
47
-
48
-
49
-
50
-
51
-
52
-
53
-
54
-
55
-
56
-
57
-
58
-
59
-
60
-
61
-
62
-
63
-
64
-
65
-
66
-
67
-
68
-
69
-
70
-
71
-
72
-
73
-
74
-
75
-
76
-
77
-
78
-
79
-
80
-
81
-
82
-
83
-
84
-
85
-
86
-
87
-
88
-
89
-
90
-
91
-
 92
92 -
 93
93 -
 94
94 -
 95
95 -
 96
96 -
 97
97 -
 98
98 -
 99
99 -
 100
100 -
 101
101 -
 102
102 -
103
-
104
-
105
-
106
-
107
-
108
-
109
-
110
-
111
-
112
-
113
-
114
-
115
-
116
-
117
-
118
-
119
-
120
-
121
-
122
-
123
-
124
-
125
-
126
-
127
-
128
-
129
-
130
-
131
-
132
-
133
-
134
-
135
-
136
-
137
-
138
-
139
-
140
-
141
-
142
-
143
-
144
-
145
-
146
-
147
-
148
-
149
-
150
-
151
-
152
-
153
-
154
-
155
-
156
-
157
-
158
-
159
-
160
-
161
-
162
-
163
-
164
-
165
-
166
-
167
-
168
-
169
-
170
-
171
-
172
-
173
-
174
-
175
-
176
-
177
-
178
-
179
-
180
-
181
-
182
-
183
-
184
-
185
-
186
-
187
-
188
-
189
-
190
-
191
-
192
-
193
-
194
-
195
-
196
-
197
-
198
-
199
-
200
-
201
-
202
-
203
 |
 |