Canon PowerShot SX60 HS User Guide - Page 69
Shooting iFrame Movies - video
 |
View all Canon PowerShot SX60 HS manuals
Add to My Manuals
Save this manual to your list of manuals |
Page 69 highlights
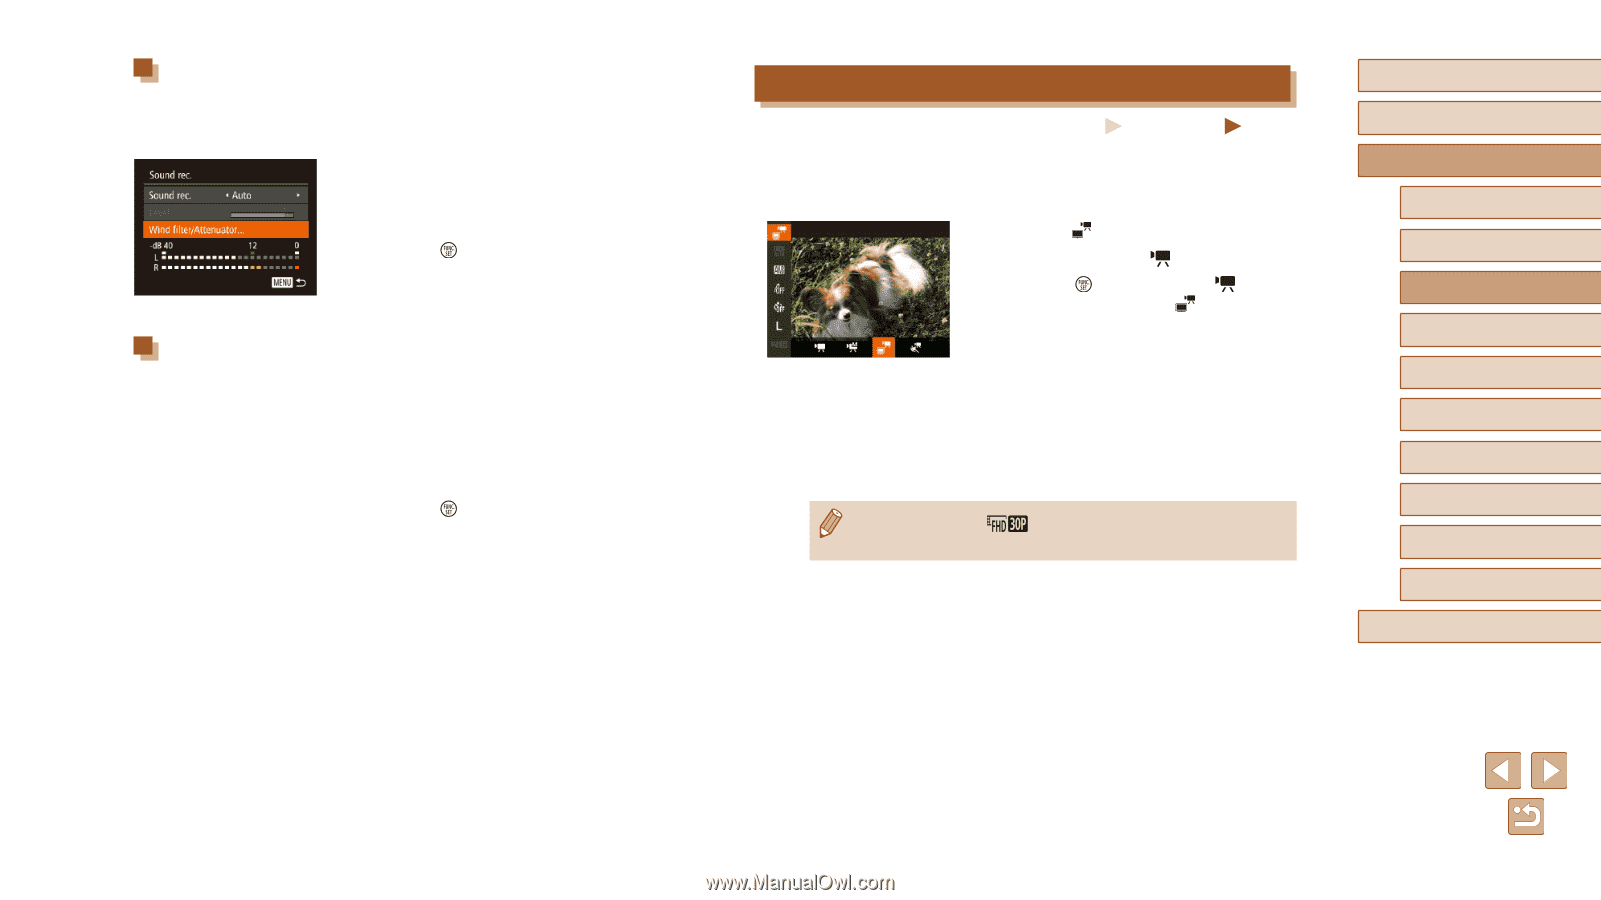
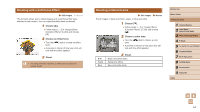
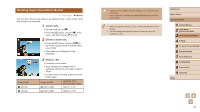
Deactivating the Wind Filter Reduce audio distortion from strong wind. (To ensure natural sound, do not use unless there is wind.) In this case, you can deactivate the wind filter. ●●Access the [Sound rec.] screen as described in step 1 of "Adjusting the Recording Volume". ●●Choose [Wind filter/Attenuator], and then press the [ ] button. ●●Choose [Wind Filter], and then choose [Off] (=30). Using the Attenuator The attenuator can reduce audio distortion in noisy environments. However, in quiet environments, it lowers the sound-recording level. ●●Access the [Sound rec.] screen as described in step 1 of "Adjusting the Recording Volume". ●●Choose [Wind filter/Attenuator], and then press the [ ] button. ●●Choose [Attenuator], and then choose [On] (=30). Shooting iFrame Movies Still Images Movies Shoot movies that can be edited with iFrame-compatible software or devices. You can quickly edit, save, and manage your iFrame movies using the software (=164). 1 Choose [ ]. ●●Set the mode dial to [ ]. ●●Press the [ ] button, choose [ ] in the menu, and then choose [ ] (=29). ●●Black bars displayed on the top and bottom edges of the screen indicate image areas not recorded. 2 Shoot (=67). ●●Press the movie button. ●●To stop movie recording, press the movie button again. ●● The resolution is [ ] (=53) and cannot be changed. ●● iFrame is a video format developed by Apple Inc. Before Use Basic Guide Advanced Guide 1 Camera Basics 2 Auto Mode / Hybrid Auto Mode 3 Other Shooting Modes 4 P Mode 5 Tv, Av, M, C1, and C2 Mode 6 Playback Mode 7 Wi-Fi Functions 8 Setting Menu 9 Accessories 10 Appendix Index 69
-
 1
1 -
2
-
3
-
4
-
5
-
6
-
7
-
8
-
9
-
10
-
11
-
12
-
13
-
14
-
15
-
16
-
17
-
18
-
19
-
20
-
21
-
22
-
23
-
24
-
25
-
26
-
27
-
28
-
29
-
30
-
31
-
32
-
33
-
34
-
35
-
36
-
37
-
38
-
39
-
40
-
41
-
42
-
43
-
44
-
45
-
46
-
47
-
48
-
49
-
50
-
51
-
52
-
53
-
54
-
55
-
56
-
57
-
58
-
59
-
60
-
61
-
62
-
63
-
 64
64 -
 65
65 -
 66
66 -
 67
67 -
 68
68 -
 69
69 -
 70
70 -
 71
71 -
 72
72 -
 73
73 -
 74
74 -
75
-
76
-
77
-
78
-
79
-
80
-
81
-
82
-
83
-
84
-
85
-
86
-
87
-
88
-
89
-
90
-
91
-
92
-
93
-
94
-
95
-
96
-
97
-
98
-
99
-
100
-
101
-
102
-
103
-
104
-
105
-
106
-
107
-
108
-
109
-
110
-
111
-
112
-
113
-
114
-
115
-
116
-
117
-
118
-
119
-
120
-
121
-
122
-
123
-
124
-
125
-
126
-
127
-
128
-
129
-
130
-
131
-
132
-
133
-
134
-
135
-
136
-
137
-
138
-
139
-
140
-
141
-
142
-
143
-
144
-
145
-
146
-
147
-
148
-
149
-
150
-
151
-
152
-
153
-
154
-
155
-
156
-
157
-
158
-
159
-
160
-
161
-
162
-
163
-
164
-
165
-
166
-
167
-
168
-
169
-
170
-
171
-
172
-
173
-
174
-
175
-
176
-
177
-
178
-
179
-
180
-
181
-
182
-
183
-
184
-
185
-
186
-
187
-
188
-
189
-
190
-
191
-
192
-
193
-
194
-
195
-
196
-
197
-
198
-
199
-
200
-
201
-
202
-
203
 |
 |