Canon PowerShot SX60 HS User Guide - Page 65
Special Modes for Other Purposes
 |
View all Canon PowerShot SX60 HS manuals
Add to My Manuals
Save this manual to your list of manuals |
Page 65 highlights
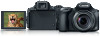
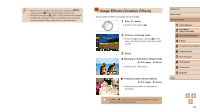
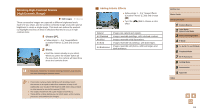
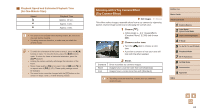
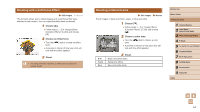
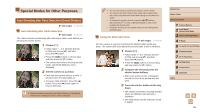
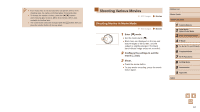
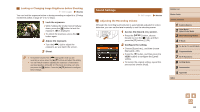
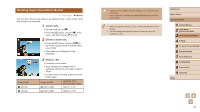
Special Modes for Other Purposes Auto Shooting after Face Detection (Smart Shutter) Still Images Movies Auto Shooting after Smile Detection Still Images Movies The camera shoots automatically after detecting a smile, even without you pressing the shutter button. 1 Choose [ ]. ●●Follow steps 1 - 2 in "Specific Scenes" (=59) and choose [ ], and then press the [ ] button. ●●Press the [ ][ ] buttons to choose [ ], and then press the [ ] button. ●●The camera now enters shooting standby mode, and [Smile Detection on] is displayed. 2 Aim the camera at a person. ●●Each time the camera detects a smile, it will shoot after the lamp lights up. ●●To pause smile detection, press the [ ] button. Press the [ ] button again to resume detection. ●● Switch to another mode when you finish shooting, or the camera will continue shooting each time a smile is detected. ●● You can also shoot as usual by pressing the shutter button. ●● The camera can detect smiles more easily when subjects face the camera and open their mouth wide enough so that teeth are visible. ●● To change the number of shots, press the [ ][ ] buttons after choosing [ ] in step 1. [Blink Detection] (=55) is only available for the final shot. ●● Automatic shooting is not available while you are holding down the [ ] button. Using the Wink Self-Timer Still Images Movies Aim the camera at a person and press the shutter button all the way down. The camera will shoot about two seconds after a wink is detected. 1 Choose [ ]. ●●Follow steps 1 - 2 in "Specific Scenes" (=59) and choose [ ], and then press the [ ] button. ●●Press the [ ][ ] buttons to choose [ ], and then press the [ ] button. 2 Compose the shot and press the shutter button halfway. ●●Make sure a green frame is displayed around the face of the person who will wink. 3 Press the shutter button all the way down. ●●The camera now enters shooting standby mode, and [Wink to take picture] is displayed. ●●The lamp blinks and the self-timer sound is played. Before Use Basic Guide Advanced Guide 1 Camera Basics 2 Auto Mode / Hybrid Auto Mode 3 Other Shooting Modes 4 P Mode 5 Tv, Av, M, C1, and C2 Mode 6 Playback Mode 7 Wi-Fi Functions 8 Setting Menu 9 Accessories 10 Appendix Index 65
-
 1
1 -
2
-
3
-
4
-
5
-
6
-
7
-
8
-
9
-
10
-
11
-
12
-
13
-
14
-
15
-
16
-
17
-
18
-
19
-
20
-
21
-
22
-
23
-
24
-
25
-
26
-
27
-
28
-
29
-
30
-
31
-
32
-
33
-
34
-
35
-
36
-
37
-
38
-
39
-
40
-
41
-
42
-
43
-
44
-
45
-
46
-
47
-
48
-
49
-
50
-
51
-
52
-
53
-
54
-
55
-
56
-
57
-
58
-
59
-
 60
60 -
 61
61 -
 62
62 -
 63
63 -
 64
64 -
 65
65 -
 66
66 -
 67
67 -
 68
68 -
 69
69 -
 70
70 -
71
-
72
-
73
-
74
-
75
-
76
-
77
-
78
-
79
-
80
-
81
-
82
-
83
-
84
-
85
-
86
-
87
-
88
-
89
-
90
-
91
-
92
-
93
-
94
-
95
-
96
-
97
-
98
-
99
-
100
-
101
-
102
-
103
-
104
-
105
-
106
-
107
-
108
-
109
-
110
-
111
-
112
-
113
-
114
-
115
-
116
-
117
-
118
-
119
-
120
-
121
-
122
-
123
-
124
-
125
-
126
-
127
-
128
-
129
-
130
-
131
-
132
-
133
-
134
-
135
-
136
-
137
-
138
-
139
-
140
-
141
-
142
-
143
-
144
-
145
-
146
-
147
-
148
-
149
-
150
-
151
-
152
-
153
-
154
-
155
-
156
-
157
-
158
-
159
-
160
-
161
-
162
-
163
-
164
-
165
-
166
-
167
-
168
-
169
-
170
-
171
-
172
-
173
-
174
-
175
-
176
-
177
-
178
-
179
-
180
-
181
-
182
-
183
-
184
-
185
-
186
-
187
-
188
-
189
-
190
-
191
-
192
-
193
-
194
-
195
-
196
-
197
-
198
-
199
-
200
-
201
-
202
-
203
 |
 |