Garmin GPS 152 Owner's Manual - Page 14
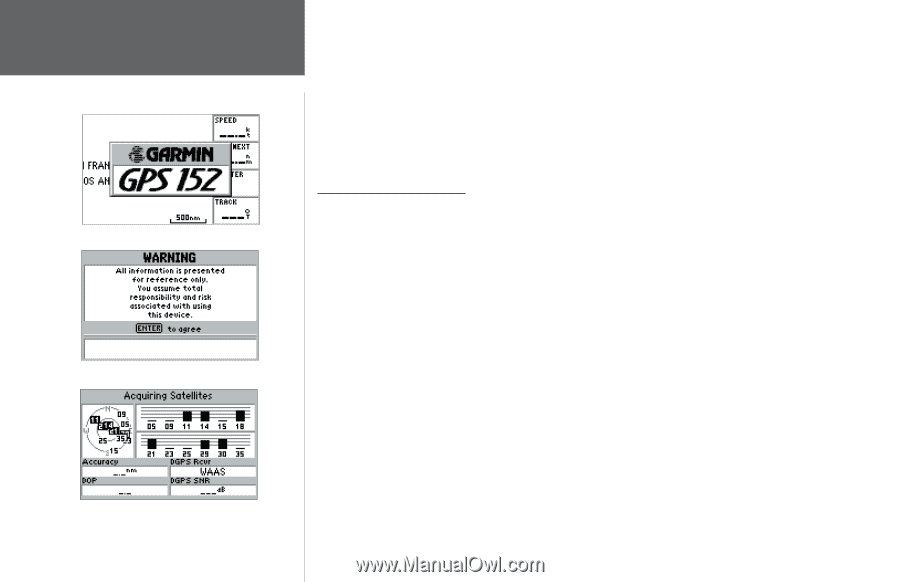
To turn the GPS 152 on, To acknowledge the warning - with internal antenna
 |
UPC - 753759028145
View all Garmin GPS 152 manuals
Add to My Manuals
Save this manual to your list of manuals |
Page 14 highlights
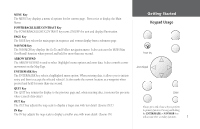
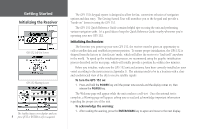
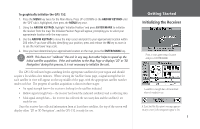
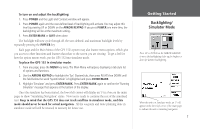
Getting Started Initializing the Receiver GPS 152 Self-Test Screen GPS 152 Warning Screen The Satellite Status screen displays until you 4 press QUIT or ENTER or a fix is acquired. The GPS 152's keypad system is designed to allow for fast, convenient selection of navigation options and data entry. The Getting Started Tour will introduce you to the keypad and provide a "hands-on" lesson in using the GPS 152. The GPS 152 Quick Reference Guide contains helpful tips on using the unit and performing various navigation tasks. It's a good idea to keep the Quick Reference Guide nearby whenever you're operating your new GPS 152. Initializing the Receiver The first time you power up your new GPS 152, the receiver must be given an opportunity to collect satellite data and establish its present position. To ensure proper initialization, the GPS 152 is shipped from the factory in 'AutoLocate' mode, which will allow the receiver to "find itself" anywhere in the world. To speed up the initialization process, we recommend using the graphic initialization process described on the next page, which will usually provide a position fix within a few minutes. Before you initialize, make sure the GPS 152 unit and antenna have been correctly installed on your vessel according to the instructions in Appendix G. The antenna needs to be in a location with a clear and unobstructed view of the sky to receive satellite signals. To turn the GPS 152 on: 1. Press and hold the POWER key until the power tone sounds and the display comes on, then release the POWER key. The Welcome page will appear while the unit conducts a self-test. Once the internal test is complete, a Warning page will appear, asking you to read and acknowledge important information regarding the proper use of the unit. To acknowledge the warning: 1. After reading the warning, press the ENTER/MARK key to agree and move to the next display.
-
 1
1 -
2
-
3
-
4
-
5
-
6
-
7
-
8
-
 9
9 -
 10
10 -
 11
11 -
 12
12 -
 13
13 -
 14
14 -
 15
15 -
 16
16 -
 17
17 -
 18
18 -
 19
19 -
20
-
21
-
22
-
23
-
24
-
25
-
26
-
27
-
28
-
29
-
30
-
31
-
32
-
33
-
34
-
35
-
36
-
37
-
38
-
39
-
40
-
41
-
42
-
43
-
44
-
45
-
46
-
47
-
48
-
49
-
50
-
51
-
52
-
53
-
54
-
55
-
56
-
57
-
58
-
59
-
60
-
61
-
62
-
63
-
64
-
65
-
66
-
67
-
68
-
69
-
70
-
71
-
72
-
73
-
74
-
75
-
76
-
77
-
78
-
79
-
80
-
81
-
82
-
83
-
84
-
85
-
86
-
87
-
88
-
89
-
90
-
91
-
92
-
93
-
94
-
95
-
96
-
97
-
98
 |
 |