HTC P6300 User Manual - Page 119
Send and receive messages
 |
View all HTC P6300 manuals
Add to My Manuals
Save this manual to your list of manuals |
Page 119 highlights
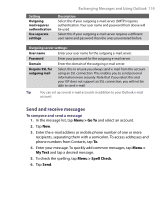
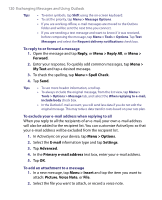
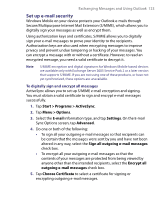
Setting Outgoing mail requires authentication Use separate settings Exchanging Messages and Using Outlook 119 Description Select this if your outgoing e-mail server (SMTP) requires authentication. Your user name and password from above will be used. Select this if your outgoing e-mail server requires a different user name and password than the ones you entered before. Outgoing server settings: User name Enter your user name for the outgoing e-mail server. Password Enter your password for the outgoing e-mail server. Domain Enter the domain of the outgoing e-mail server. Require SSL for outgoing mail Select this to ensure you always send e-mail from this account using an SSL connection. This enables you to send personal information more securely. Note that if you select this and your ISP does not support an SSL connection, you will not be able to send e-mail. Tip You can set up several e-mail accounts in addition to your Outlook e-mail account. Send and receive messages To compose and send a message 1. In the message list, tap Menu > Go To and select an account. 2. Tap New. 3. Enter the e-mail address or mobile phone number of one or more recipients, separating them with a semicolon. To access addresses and phone numbers from Contacts, tap To. 4. Enter your message. To quickly add common messages, tap Menu > My Text and tap a desired message. 5. To check the spelling, tap Menu > Spell Check. 6. Tap Send.
-
 1
1 -
2
-
3
-
4
-
5
-
6
-
7
-
8
-
9
-
10
-
11
-
12
-
13
-
14
-
15
-
16
-
17
-
18
-
19
-
20
-
21
-
22
-
23
-
24
-
25
-
26
-
27
-
28
-
29
-
30
-
31
-
32
-
33
-
34
-
35
-
36
-
37
-
38
-
39
-
40
-
41
-
42
-
43
-
44
-
45
-
46
-
47
-
48
-
49
-
50
-
51
-
52
-
53
-
54
-
55
-
56
-
57
-
58
-
59
-
60
-
61
-
62
-
63
-
64
-
65
-
66
-
67
-
68
-
69
-
70
-
71
-
72
-
73
-
74
-
75
-
76
-
77
-
78
-
79
-
80
-
81
-
82
-
83
-
84
-
85
-
86
-
87
-
88
-
89
-
90
-
91
-
92
-
93
-
94
-
95
-
96
-
97
-
98
-
99
-
100
-
101
-
102
-
103
-
104
-
105
-
106
-
107
-
108
-
109
-
110
-
111
-
112
-
113
-
 114
114 -
 115
115 -
 116
116 -
 117
117 -
 118
118 -
 119
119 -
 120
120 -
 121
121 -
 122
122 -
 123
123 -
 124
124 -
125
-
126
-
127
-
128
-
129
-
130
-
131
-
132
-
133
-
134
-
135
-
136
-
137
-
138
-
139
-
140
-
141
-
142
-
143
-
144
-
145
-
146
-
147
-
148
-
149
-
150
-
151
-
152
-
153
-
154
-
155
-
156
-
157
-
158
-
159
-
160
-
161
-
162
-
163
-
164
-
165
-
166
-
167
-
168
-
169
-
170
-
171
-
172
-
173
-
174
-
175
-
176
-
177
-
178
-
179
-
180
-
181
-
182
-
183
-
184
-
185
-
186
-
187
-
188
-
189
-
190
-
191
-
192
-
193
-
194
-
195
-
196
-
197
-
198
-
199
-
200
-
201
-
202
-
203
-
204
-
205
-
206
-
207
-
208
 |
 |
