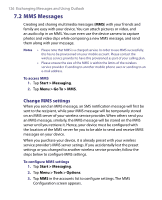
HTC P6300 User Manual - Page 127
Preferences, Servers, Server name, Gateway, Port number, Server address, Connect via, Sending size
 |
View all HTC P6300 manuals
Add to My Manuals
Save this manual to your list of manuals |
Page 127 highlights
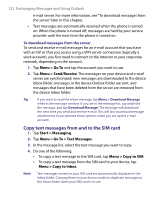
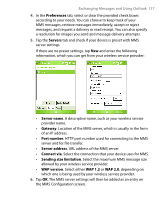
Exchanging Messages and Using Outlook 127 4. In the Preferences tab, select or clear the provided check boxes according to your needs. You can choose to keep track of your MMS messages, retrieve messages immediately, accept or reject messages, and request a delivery or read receipt. You can also specify a resolution for images you send and message delivery attempts. 5. Tap the Servers tab and check if your device is preset with MMS server settings. If there are no preset settings, tap New and enter the following information, which you can get from your wireless service provider: • Server name. A descriptive name, such as your wireless service provider name. • Gateway. Location of the MMS server, which is usually in the form of an IP address. • Port number. HTTP port number used for connecting to the MMS server and for file transfer. • Server address. URL address of the MMS server. • Connect via. Select the connection that your device uses for MMS. • Sending size limitation. Select the maximum MMS message size allowed by your wireless service provider. • WAP version. Select either WAP 1.2 or WAP 2.0, depending on which one is being used by your wireless service provider. 6. Tap OK. The MMS server settings will then be added as an entry on the MMS Configuration screen.
-
 1
1 -
2
-
3
-
4
-
5
-
6
-
7
-
8
-
9
-
10
-
11
-
12
-
13
-
14
-
15
-
16
-
17
-
18
-
19
-
20
-
21
-
22
-
23
-
24
-
25
-
26
-
27
-
28
-
29
-
30
-
31
-
32
-
33
-
34
-
35
-
36
-
37
-
38
-
39
-
40
-
41
-
42
-
43
-
44
-
45
-
46
-
47
-
48
-
49
-
50
-
51
-
52
-
53
-
54
-
55
-
56
-
57
-
58
-
59
-
60
-
61
-
62
-
63
-
64
-
65
-
66
-
67
-
68
-
69
-
70
-
71
-
72
-
73
-
74
-
75
-
76
-
77
-
78
-
79
-
80
-
81
-
82
-
83
-
84
-
85
-
86
-
87
-
88
-
89
-
90
-
91
-
92
-
93
-
94
-
95
-
96
-
97
-
98
-
99
-
100
-
101
-
102
-
103
-
104
-
105
-
106
-
107
-
108
-
109
-
110
-
111
-
112
-
113
-
114
-
115
-
116
-
117
-
118
-
119
-
120
-
121
-
 122
122 -
 123
123 -
 124
124 -
 125
125 -
 126
126 -
 127
127 -
 128
128 -
 129
129 -
 130
130 -
 131
131 -
 132
132 -
133
-
134
-
135
-
136
-
137
-
138
-
139
-
140
-
141
-
142
-
143
-
144
-
145
-
146
-
147
-
148
-
149
-
150
-
151
-
152
-
153
-
154
-
155
-
156
-
157
-
158
-
159
-
160
-
161
-
162
-
163
-
164
-
165
-
166
-
167
-
168
-
169
-
170
-
171
-
172
-
173
-
174
-
175
-
176
-
177
-
178
-
179
-
180
-
181
-
182
-
183
-
184
-
185
-
186
-
187
-
188
-
189
-
190
-
191
-
192
-
193
-
194
-
195
-
196
-
197
-
198
-
199
-
200
-
201
-
202
-
203
-
204
-
205
-
206
-
207
-
208
 |
 |
