HP Deskjet 6940 User Guide - Pre-Windows 2000 - Page 106
PictBridge problems, Fading occurs near the edges of a photo, Paper/Quality, Print quality
 |
UPC - 882780263406
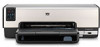
View all HP Deskjet 6940 manuals
Add to My Manuals
Save this manual to your list of manuals |
Page 106 highlights
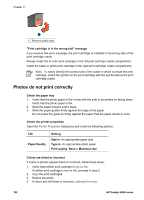
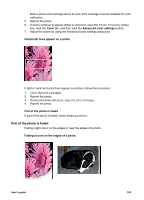
Chapter 11 Verify that the photo paper is not curled. If the photo paper is curled, place the paper in a plastic bag and gently bend it in the opposite direction of the curl until the paper lies flat. If the problem persists, then use photo paper that is not curled. For instructions about preventing photo paper from curling, see Store and handle photo paper. Fading occurs near the edges of a photo If fading occurs approximately 25 to 63 mm (1.0 to 2.5 inches) from the edge of a photo, try the following solutions: ● Install a photo print cartridge and a tri-color print cartridge in the printer. ● Open the Printer Properties dialog box, click the Paper/Quality tab, and then set the Print quality to Maximum dpi. ● Rotate the image 180°. PictBridge problems Images in a connected digital camera do not print There are several reasons why images in a connected digital camera do not print: ● The digital camera is not PictBridge-compatible. ● The digital camera is not in PictBridge mode. ● The images are not in a supported format. ● You did not select any photos on the camera for printing. Check the documentation that came with the camera to ensure it supports PictBridge. If the camera does support PictBridge, make sure the camera is set to PictBridge mode. For instructions on setting the camera to PictBridge mode, see the documentation that came with the camera. Verify that the digital camera is saving photos in a file format that the PictBridge transfer feature supports: ● EXIF/JPEG ● JPEG Before you connect the digital camera to the front USB port on the printer, select some photos on the camera for printing. 104 HP Deskjet 6940 series
-
 1
1 -
2
-
3
-
4
-
5
-
6
-
7
-
8
-
9
-
10
-
11
-
12
-
13
-
14
-
15
-
16
-
17
-
18
-
19
-
20
-
21
-
22
-
23
-
24
-
25
-
26
-
27
-
28
-
29
-
30
-
31
-
32
-
33
-
34
-
35
-
36
-
37
-
38
-
39
-
40
-
41
-
42
-
43
-
44
-
45
-
46
-
47
-
48
-
49
-
50
-
51
-
52
-
53
-
54
-
55
-
56
-
57
-
58
-
59
-
60
-
61
-
62
-
63
-
64
-
65
-
66
-
67
-
68
-
69
-
70
-
71
-
72
-
73
-
74
-
75
-
76
-
77
-
78
-
79
-
80
-
81
-
82
-
83
-
84
-
85
-
86
-
87
-
88
-
89
-
90
-
91
-
92
-
93
-
94
-
95
-
96
-
97
-
98
-
99
-
100
-
 101
101 -
 102
102 -
 103
103 -
 104
104 -
 105
105 -
 106
106 -
 107
107 -
 108
108 -
 109
109 -
 110
110 -
 111
111 -
112
-
113
-
114
-
115
-
116
-
117
-
118
-
119
-
120
-
121
-
122
-
123
-
124
-
125
-
126
-
127
-
128
-
129
-
130
-
131
-
132
-
133
-
134
-
135
-
136
-
137
-
138
-
139
-
140
-
141
-
142
-
143
-
144
-
145
-
146
-
147
-
148
-
149
-
150
 |
 |
