HP Deskjet 6940 User Guide - Pre-Windows 2000 - Page 50
Use a Bluetooth camera phone, optional HP Bluetooth Wireless Printer Adapter - blinking lights
 |
UPC - 882780263406
View all HP Deskjet 6940 manuals
Add to My Manuals
Save this manual to your list of manuals |
Page 50 highlights
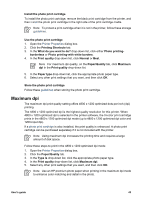
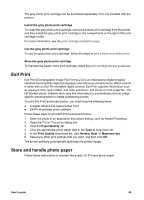
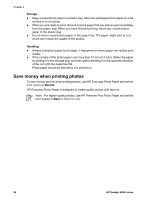
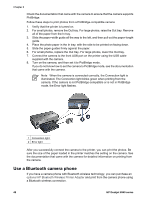
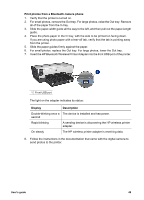
Chapter 6 Check the documentation that came with the camera to ensure that the camera supports PictBridge. Follow these steps to print photos from a PictBridge-compatible camera: 1. Verify that the printer is turned on. 2. For small photos, remove the Out tray. For large photos, raise the Out tray. Remove all of the paper from the In tray. 3. Slide the paper-width guide all the way to the left, and then pull out the paper-length guide. 4. Place the photo paper in the In tray, with the side to be printed on facing down. 5. Slide the paper guides firmly against the paper. 6. For small photos, replace the Out tray. For large photos, lower the Out tray. 7. Connect the camera to the front USB port on the printer using the USB cable supplied with the camera. 8. Turn on the camera, and then set it to PictBridge mode. If you do not know how to set the camera to PictBridge mode, see the documentation that came with the camera. Note When the camera is connected correctly, the Connection light is illuminated. The Connection light blinks green when printing from the camera. If the camera is not PictBridge-compatible or is not in PictBridge mode, the Error light flashes. 1 Connection light 2 Error light After you successfully connect the camera to the printer, you can print the photos. Be sure the size of the paper loaded in the printer matches the setting on the camera. See the documentation that came with the camera for detailed information on printing from the camera. Use a Bluetooth camera phone If you have a camera phone with Bluetooth wireless technology, you can purchase an optional HP Bluetooth Wireless Printer Adapter and print from the camera phone using a Bluetooth wireless connection. 48 HP Deskjet 6940 series
-
 1
1 -
2
-
3
-
4
-
5
-
6
-
7
-
8
-
9
-
10
-
11
-
12
-
13
-
14
-
15
-
16
-
17
-
18
-
19
-
20
-
21
-
22
-
23
-
24
-
25
-
26
-
27
-
28
-
29
-
30
-
31
-
32
-
33
-
34
-
35
-
36
-
37
-
38
-
39
-
40
-
41
-
42
-
43
-
44
-
 45
45 -
 46
46 -
 47
47 -
 48
48 -
 49
49 -
 50
50 -
 51
51 -
 52
52 -
 53
53 -
 54
54 -
 55
55 -
56
-
57
-
58
-
59
-
60
-
61
-
62
-
63
-
64
-
65
-
66
-
67
-
68
-
69
-
70
-
71
-
72
-
73
-
74
-
75
-
76
-
77
-
78
-
79
-
80
-
81
-
82
-
83
-
84
-
85
-
86
-
87
-
88
-
89
-
90
-
91
-
92
-
93
-
94
-
95
-
96
-
97
-
98
-
99
-
100
-
101
-
102
-
103
-
104
-
105
-
106
-
107
-
108
-
109
-
110
-
111
-
112
-
113
-
114
-
115
-
116
-
117
-
118
-
119
-
120
-
121
-
122
-
123
-
124
-
125
-
126
-
127
-
128
-
129
-
130
-
131
-
132
-
133
-
134
-
135
-
136
-
137
-
138
-
139
-
140
-
141
-
142
-
143
-
144
-
145
-
146
-
147
-
148
-
149
-
150
 |
 |