HP Deskjet 6940 User Guide - Pre-Windows 2000 - Page 60
Transparencies, Print, Paper/Quality, Size is, Type is, Automatic, Source is, Upper tray
 |
UPC - 882780263406
View all HP Deskjet 6940 manuals
Add to My Manuals
Save this manual to your list of manuals |
Page 60 highlights
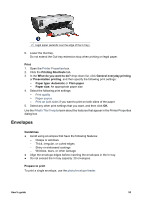
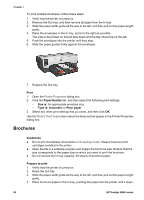
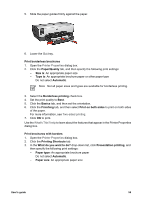
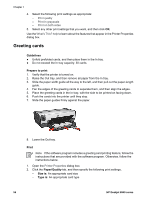
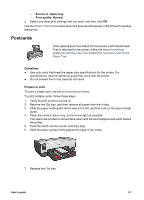
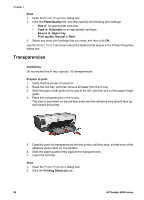
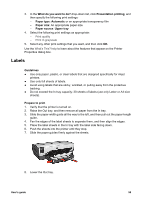
Chapter 7 Print 1. Open the Printer Properties dialog box. 2. Click the Paper/Quality tab, and then specify the following print settings: - Size is: An appropriate card size - Type is: Automatic or an appropriate card type - Source is: Upper tray - Print quality: Normal or Best 3. Select any other print settings that you want, and then click OK. Use the What's This? help to learn about the features that appear in the Printer Properties dialog box. Transparencies Guidelines Do not exceed the In tray capacity: 30 transparencies. Prepare to print 1. Verify that the printer is turned on. 2. Raise the Out tray, and then remove all paper from the In tray. 3. Slide the paper-width guide all the way to the left, and then pull out the paper-length guide. 4. Place the transparencies in the In tray. The side to be printed on should face down and the adhesive strip should face up and toward the printer. 5. Carefully push the transparencies into the printer until they stop, so that none of the adhesive strips catch on one another. 6. Slide the paper guides firmly against the transparencies. 7. Lower the Out tray. Print 1. Open the Printer Properties dialog box. 2. Click the Printing Shortcuts tab. 58 HP Deskjet 6940 series
-
 1
1 -
2
-
3
-
4
-
5
-
6
-
7
-
8
-
9
-
10
-
11
-
12
-
13
-
14
-
15
-
16
-
17
-
18
-
19
-
20
-
21
-
22
-
23
-
24
-
25
-
26
-
27
-
28
-
29
-
30
-
31
-
32
-
33
-
34
-
35
-
36
-
37
-
38
-
39
-
40
-
41
-
42
-
43
-
44
-
45
-
46
-
47
-
48
-
49
-
50
-
51
-
52
-
53
-
54
-
 55
55 -
 56
56 -
 57
57 -
 58
58 -
 59
59 -
 60
60 -
 61
61 -
 62
62 -
 63
63 -
 64
64 -
 65
65 -
66
-
67
-
68
-
69
-
70
-
71
-
72
-
73
-
74
-
75
-
76
-
77
-
78
-
79
-
80
-
81
-
82
-
83
-
84
-
85
-
86
-
87
-
88
-
89
-
90
-
91
-
92
-
93
-
94
-
95
-
96
-
97
-
98
-
99
-
100
-
101
-
102
-
103
-
104
-
105
-
106
-
107
-
108
-
109
-
110
-
111
-
112
-
113
-
114
-
115
-
116
-
117
-
118
-
119
-
120
-
121
-
122
-
123
-
124
-
125
-
126
-
127
-
128
-
129
-
130
-
131
-
132
-
133
-
134
-
135
-
136
-
137
-
138
-
139
-
140
-
141
-
142
-
143
-
144
-
145
-
146
-
147
-
148
-
149
-
150
 |
 |
