HP Deskjet 6940 User Guide - Pre-Windows 2000 - Page 115
Photo has an unwanted border, Paper/Quality, Print quality, Maximum dpi, For most paper types
 |
UPC - 882780263406
View all HP Deskjet 6940 manuals
Add to My Manuals
Save this manual to your list of manuals |
Page 115 highlights
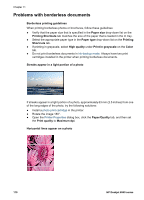
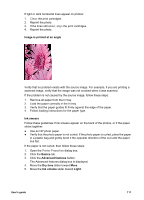
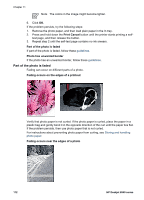
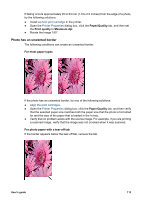
If fading occurs approximately 25 to 63 mm (1.0 to 2.5 inches) from the edge of a photo, try the following solutions: ● Install a photo print cartridge in the printer. ● Open the Printer Properties dialog box, click the Paper/Quality tab, and then set the Print quality to Maximum dpi. ● Rotate the image 180°. Photo has an unwanted border The following conditions can create an unwanted border. For most paper types If the photo has an unwanted border, try one of the following solutions: ● Align the print cartridges. ● Open the Printer Properties dialog box, click the Paper/Quality tab, and then verify that the selected paper size matches both the paper size that the photo is formatted for and the size of the paper that is loaded in the In tray. ● Verify that no problem exists with the source image. For example, if you are printing a scanned image, verify that the image was not crooked when it was scanned. For photo paper with a tear-off tab If the border appears below the tear-off tab, remove the tab. User's guide 113
-
 1
1 -
2
-
3
-
4
-
5
-
6
-
7
-
8
-
9
-
10
-
11
-
12
-
13
-
14
-
15
-
16
-
17
-
18
-
19
-
20
-
21
-
22
-
23
-
24
-
25
-
26
-
27
-
28
-
29
-
30
-
31
-
32
-
33
-
34
-
35
-
36
-
37
-
38
-
39
-
40
-
41
-
42
-
43
-
44
-
45
-
46
-
47
-
48
-
49
-
50
-
51
-
52
-
53
-
54
-
55
-
56
-
57
-
58
-
59
-
60
-
61
-
62
-
63
-
64
-
65
-
66
-
67
-
68
-
69
-
70
-
71
-
72
-
73
-
74
-
75
-
76
-
77
-
78
-
79
-
80
-
81
-
82
-
83
-
84
-
85
-
86
-
87
-
88
-
89
-
90
-
91
-
92
-
93
-
94
-
95
-
96
-
97
-
98
-
99
-
100
-
101
-
102
-
103
-
104
-
105
-
106
-
107
-
108
-
109
-
 110
110 -
 111
111 -
 112
112 -
 113
113 -
 114
114 -
 115
115 -
 116
116 -
 117
117 -
 118
118 -
 119
119 -
 120
120 -
121
-
122
-
123
-
124
-
125
-
126
-
127
-
128
-
129
-
130
-
131
-
132
-
133
-
134
-
135
-
136
-
137
-
138
-
139
-
140
-
141
-
142
-
143
-
144
-
145
-
146
-
147
-
148
-
149
-
150
 |
 |
