HP Pavilion xu100 HP OmniBook 500 - Reference Guide Revision 3 - Page 143
To create a Support Utility disk
 |
View all HP Pavilion xu100 manuals
Add to My Manuals
Save this manual to your list of manuals |
Page 143 highlights
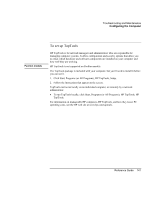
Troubleshooting and Maintenance Reinstalling and Updating Software 4. Turn on or restart the computer. If the computer is running, click Start, Shut Down (or Turn Off Computer), Restart. 5. When you see the HP logo, press ESC to select the boot device: • If you're using a CD-ROM drive in the expansion base, select the CD-ROM drive as the boot device. • If you're using a PC Card or parallel port CD-ROM drive, select the floppy drive ("Removable device") as the boot device. 6. When the Recovery CD dialog box appears, follow the displayed instructions. If prompted, accept the recommended partition size. If you install the factory software, the recovery process can take up to 15 minutes. If you want to create the Utility partition without installing the factory software, click Advanced and select not to install the operating system. If your hard disk is partitioned into several drives, you can install the factory software on drive C without affecting other drives. Click Advanced and select to restore only the C partition. 7. Important: when prompted to reboot the computer, first undock it and remove it from the expansion base if it is docked, then press CTRL+ALT+DEL and follow any instructions that appear. For Windows 2000: if you want to convert drive C from FAT32 to NTSF format, click Start, Run, then type convert c: /fs:ntfs and click OK. Windows XP is installed using NTFS format. To create a Support Utility disk If you want to use the Recovery CD in a PC Card CD-ROM drive or parallel port CD-ROM drive, you'll need a Support Utility disk to recover the factory software. 1. Insert a formatted floppy disk in the floppy drive. 2. Run makesupp.bat from the \hp\Bootdisk directory on the Recovery CD. 3. Copy the MS-DOS device drivers from the installation software provided with the CD-ROM drive to the Support Utility disk into the A:\Tools directory. Reference Guide 143
-
 1
1 -
2
-
3
-
4
-
5
-
6
-
7
-
8
-
9
-
10
-
11
-
12
-
13
-
14
-
15
-
16
-
17
-
18
-
19
-
20
-
21
-
22
-
23
-
24
-
25
-
26
-
27
-
28
-
29
-
30
-
31
-
32
-
33
-
34
-
35
-
36
-
37
-
38
-
39
-
40
-
41
-
42
-
43
-
44
-
45
-
46
-
47
-
48
-
49
-
50
-
51
-
52
-
53
-
54
-
55
-
56
-
57
-
58
-
59
-
60
-
61
-
62
-
63
-
64
-
65
-
66
-
67
-
68
-
69
-
70
-
71
-
72
-
73
-
74
-
75
-
76
-
77
-
78
-
79
-
80
-
81
-
82
-
83
-
84
-
85
-
86
-
87
-
88
-
89
-
90
-
91
-
92
-
93
-
94
-
95
-
96
-
97
-
98
-
99
-
100
-
101
-
102
-
103
-
104
-
105
-
106
-
107
-
108
-
109
-
110
-
111
-
112
-
113
-
114
-
115
-
116
-
117
-
118
-
119
-
120
-
121
-
122
-
123
-
124
-
125
-
126
-
127
-
128
-
129
-
130
-
131
-
132
-
133
-
134
-
135
-
136
-
137
-
 138
138 -
 139
139 -
 140
140 -
 141
141 -
 142
142 -
 143
143 -
 144
144 -
 145
145 -
 146
146 -
 147
147 -
 148
148 -
149
-
150
-
151
-
152
-
153
-
154
-
155
-
156
-
157
-
158
-
159
-
160
-
161
-
162
-
163
-
164
-
165
-
166
-
167
-
168
-
169
-
170
-
171
-
172
-
173
-
174
-
175
-
176
-
177
-
178
-
179
-
180
-
181
 |
 |
