HP Workstation xw3100 HP Workstation xw3100 - Service and Technical Reference - Page 87
Processor and Heatsink, Insert the processor into the ZIF socket.
 |
View all HP Workstation xw3100 manuals
Add to My Manuals
Save this manual to your list of manuals |
Page 87 highlights
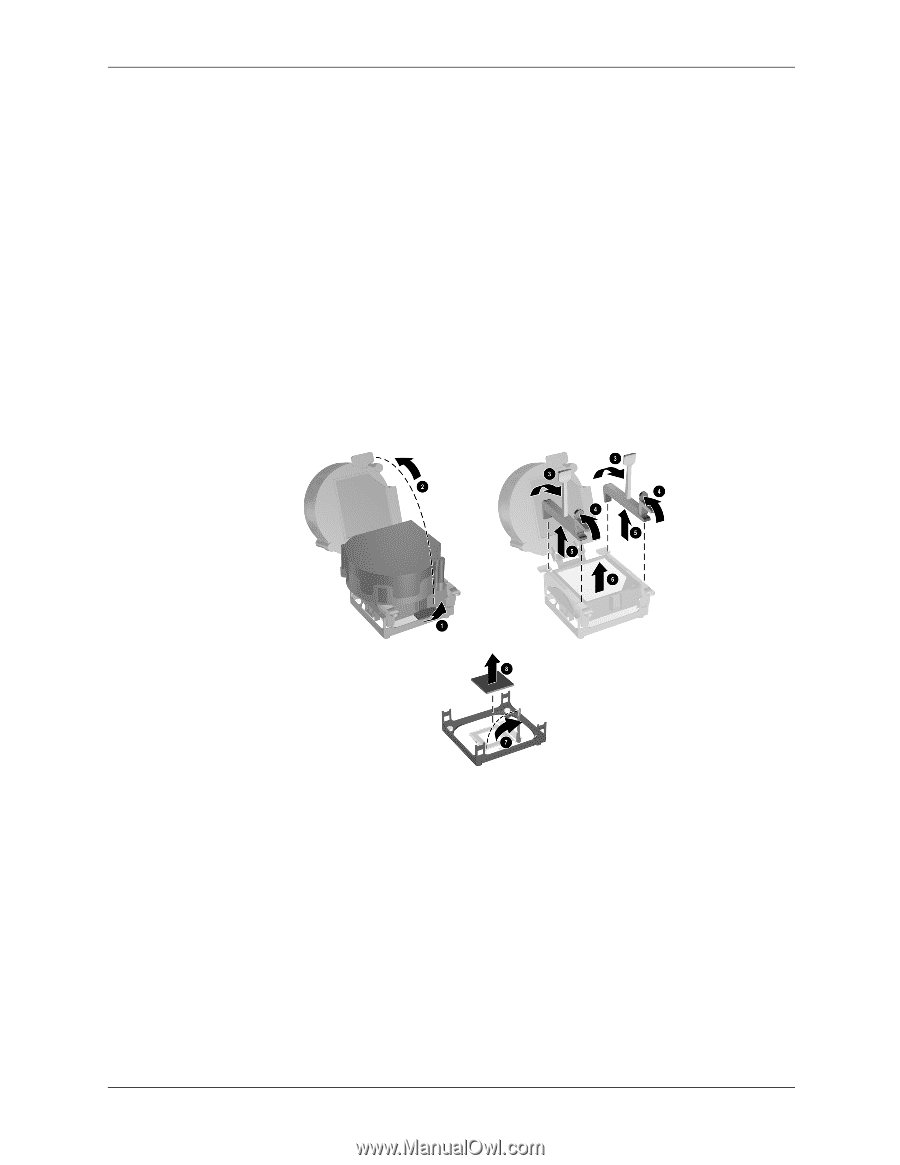
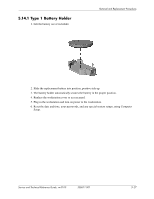
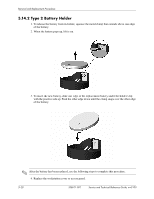
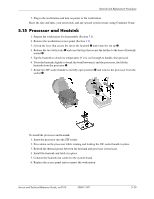
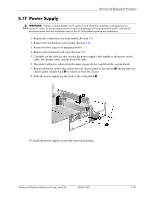
Removal and Replacement Procedures 5. Plug in the workstation and turn on power to the workstation. Reset the date and time, your passwords, and any special system setups, using Computer Setup. 5.15 Processor and Heatsink 1. Prepare the workstation for disassembly (Section 5.1). 2. Remove the workstation access panel (Section 5.5). 3. Lift up the lever that secure the fan to the heatsink 1 and rotate the fan up 2. 4. Release the two latch locks 3 and raise the legs that secure the latches to the base of heatsink mount 4. 5. Tap the heatsink to check its temperature. If it is cool enough to handle, then proceed. 6. Twist the heatsink slightly to break the bond between it and the processor, the lift the heatsink from the processor 5. 7. Rotate the ZIF socket handle to its fully open position 6 and remove the processor from the socket 7. To install the processor and heatsink: 1. Insert the processor into the ZIF socket. 2. Press down on the processor while rotating and locking the ZIF socket handle in place. 3. Refresh the thermal grease between the heatsink and processor if necessary. 4. Install the heatsink and latch it in place. 5. Connect the heatsink fan control to the system board. 6. Replace the access panel and reconnect the workstation. Service and Technical Reference Guide, xw3100 338611-001 5-29
-
 1
1 -
2
-
3
-
4
-
5
-
6
-
7
-
8
-
9
-
10
-
11
-
12
-
13
-
14
-
15
-
16
-
17
-
18
-
19
-
20
-
21
-
22
-
23
-
24
-
25
-
26
-
27
-
28
-
29
-
30
-
31
-
32
-
33
-
34
-
35
-
36
-
37
-
38
-
39
-
40
-
41
-
42
-
43
-
44
-
45
-
46
-
47
-
48
-
49
-
50
-
51
-
52
-
53
-
54
-
55
-
56
-
57
-
58
-
59
-
60
-
61
-
62
-
63
-
64
-
65
-
66
-
67
-
68
-
69
-
70
-
71
-
72
-
73
-
74
-
75
-
76
-
77
-
78
-
79
-
80
-
81
-
 82
82 -
 83
83 -
 84
84 -
 85
85 -
 86
86 -
 87
87 -
 88
88 -
 89
89 -
 90
90 -
 91
91 -
 92
92 -
93
-
94
-
95
-
96
-
97
-
98
-
99
-
100
-
101
-
102
-
103
-
104
-
105
-
106
-
107
-
108
-
109
-
110
-
111
-
112
-
113
-
114
-
115
-
116
-
117
-
118
-
119
-
120
-
121
-
122
-
123
-
124
-
125
-
126
-
127
-
128
-
129
-
130
-
131
-
132
-
133
-
134
-
135
-
136
-
137
-
138
-
139
-
140
-
141
-
142
-
143
-
144
-
145
-
146
-
147
-
148
 |
 |