HP iPAQ 512 HP iPAQ 500 Voice Messenger Series - Product Guide - Page 35
Setting up E‑mail using Exchange Server, Voice Notes, Start, Messaging, Exchange Server
 |
View all HP iPAQ 512 manuals
Add to My Manuals
Save this manual to your list of manuals |
Page 35 highlights
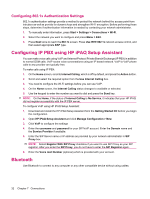
E-mail address Enter your e-mail address Automatic setup Select this feature to enable your HP iPAQ to obtain e-mail settings from the internet. User name Enter your user name Password Enter your password Domain (if necessary) Enter your domain name, if necessary Save password Check this feature to avoid entering your password repeatedly before you send/receive e-mails. Server type Select either POP3 or IMAP4 Account name Enter your account name Network Select The Internet Incoming Server Enter your incoming mail server Require SSL connection Check this feature, if necessary Outgoing Server Enter your outgoing mail server Outgoing server Check this feature, if necessary requires authentication Download the following Use navigation keys to select messages you want to receive messages Connect automatically and check for messages Use navigation keys to select an option Setting up E-mail using Exchange Server 1. Press Start > Messaging > New E-mail Account.... 2. Scroll and select the Exchange Server option from the Your e-mail Source box. 3. Press Next to synchronize outlook with your organization's Exchange e-mail server. 4. In Server address, enter the Outlook Web Access server address. 5. Enter the User name, Password, and Domain on the User Information tab. 6. Select the check box for the items you want to synchronize, and press Finish. Voice Notes You can use Voice recorder to record audio clips. You can attach them as voice notes to e-mails, MMS, and meeting notes. Setting up E-mail using Exchange Server 27
-
 1
1 -
2
-
3
-
4
-
5
-
6
-
7
-
8
-
9
-
10
-
11
-
12
-
13
-
14
-
15
-
16
-
17
-
18
-
19
-
20
-
21
-
22
-
23
-
24
-
25
-
26
-
27
-
28
-
29
-
 30
30 -
 31
31 -
 32
32 -
 33
33 -
 34
34 -
 35
35 -
 36
36 -
 37
37 -
 38
38 -
 39
39 -
 40
40 -
41
-
42
-
43
-
44
-
45
-
46
-
47
-
48
-
49
-
50
-
51
-
52
-
53
-
54
-
55
-
56
-
57
-
58
-
59
-
60
-
61
-
62
-
63
-
64
-
65
-
66
-
67
-
68
-
69
-
70
-
71
-
72
-
73
-
74
-
75
-
76
-
77
-
78
-
79
-
80
-
81
-
82
-
83
-
84
-
85
-
86
-
87
-
88
-
89
 |
 |
