HP iPAQ 512 HP iPAQ 500 Voice Messenger Series - Product Guide - Page 65
HP iPAQ Setup Assistant, Voice Commands, Owner Information, Wireless Network, Proxy, E-mail
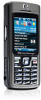 |
View all HP iPAQ 512 manuals
Add to My Manuals
Save this manual to your list of manuals |
Page 65 highlights
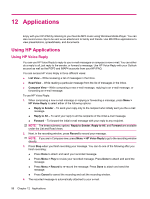
5. Enter any short text message if required. You may also make changes to the editable fields in the e-mail. 6. Press Send to send the message to the recipient. HP iPAQ Setup Assistant Use HP iPAQ Setup Assistant to simplify configuring settings on your HP iPAQ. HP iPAQ Setup Assistant lets you save the settings on your computer. This can help you restore configuration settings on your HP iPAQ at any time. HP iPAQ Setup Assistant also allows you to perform a factory reset on your HP iPAQ and view detailed product information. Using HP iPAQ Setup Assistant, you can manage multiple configurations and apply them quickly to your HP iPAQ. You can create a new configuration, modify existing settings, delete a selected configuration, or apply selected settings to your HP iPAQ. Select the following tabs to configure your settings: ● Owner Information - Enter your identification information and notes to describe you and your HP iPAQ. This is helpful if you lose your HP iPAQ. ● Wireless Network - Wireless Network settings describe the configuration needed to connect to your work, home, or other wireless network. ● Proxy - Proxy servers are located between two networks and are used to help prevent an attacker from invading a private network. You can enter proxy settings to specify the proxy configuration for your network. ● E-mail - E-mail settings describe the configuration required to connect to and check your Internet e-mail accounts. ● Exchange Server - Exchange Server is used to access e-mail, calendars, contacts, tasks, and other mailbox contents while on the go. You can set up Outlook on your HP iPAQ to synchronize directly with your organization's Exchange Server. ● VoIP - Voice over Internet Protocol (VoIP) routes voice conversations using an IP-based network. VoIP to VoIP phone calls to any provider are typically free. SIP Proxy servers are used to implement call-routing policies and provide features to users. ● Speed Dial - HP iPAQ Setup Assistant helps you to create and manage a list of speed dial numbers for your HP iPAQ. NOTE: The first speed dial entry is usually reserved for Voice mail by your phone service provider, and your service provider may also reserve an entry for emergency response. ● Browser Favorite - Use your HP iPAQ Setup Assistant to create and manage a list of your favorite URLs. You can access these URLs using the Internet Explorer on your HP iPAQ. ● Finish - In case of a new configuration, after you click Finish, enter a configuration name and an optional password and then click OK in the save configuration. If this is an existing configuration, the existing name and password will be used. Voice Commands Use voice commands to look up contacts, dial a contact by name, get calendar information, play and control your music, as well as launch applications on your HP iPAQ. Press the Voice Commander button to launch the voice commander application. Wait for the audio cue to say Say command, and then begin saying a command into the microphone. Using HP Applications 57
-
 1
1 -
2
-
3
-
4
-
5
-
6
-
7
-
8
-
9
-
10
-
11
-
12
-
13
-
14
-
15
-
16
-
17
-
18
-
19
-
20
-
21
-
22
-
23
-
24
-
25
-
26
-
27
-
28
-
29
-
30
-
31
-
32
-
33
-
34
-
35
-
36
-
37
-
38
-
39
-
40
-
41
-
42
-
43
-
44
-
45
-
46
-
47
-
48
-
49
-
50
-
51
-
52
-
53
-
54
-
55
-
56
-
57
-
58
-
59
-
 60
60 -
 61
61 -
 62
62 -
 63
63 -
 64
64 -
 65
65 -
 66
66 -
 67
67 -
 68
68 -
 69
69 -
 70
70 -
71
-
72
-
73
-
74
-
75
-
76
-
77
-
78
-
79
-
80
-
81
-
82
-
83
-
84
-
85
-
86
-
87
-
88
-
89
 |
 |