Linksys WIP310 SPA500 Series and WIP310 IP Phone Administration Guide - Page 24
Understanding Administrator and User Views, Accessing Administrative Options, Cisco SPA 525G, admin - admin guide
 |
UPC - 745883580927
View all Linksys WIP310 manuals
Add to My Manuals
Save this manual to your list of manuals |
Page 24 highlights
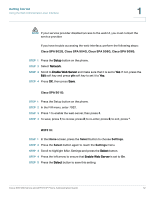
Getting Started Using the Web Administration User Interface Cisco SPA 525G: STEP 1 Press the Setup button. STEP 2 Select Network Configuration. STEP 3 Scroll to Web Server and make sure it is set to On. STEP 4 Press Save. 1 Understanding Administrator and User Views Depending on whether you are a VAR or service provider, you might have different privileges. By default, the Administrator account name is admin, and the User account name is user. These account names cannot be changed. If the service provider set an Administrator account password, you are prompted for it when you click Admin Login. The Administrator account can modify all web profile parameters, including web parameters available to the user login. The Administrator specifies the parameters that a User account can modify using the Provisioning tab of the web UI. NOTE No default passwords are assigned to either the Administrator or User accounts. Only the Administrator account can assign and change passwords. Accessing Administrative Options To access administrative options, either: • Log in to the web interface, then click Admin Login. • Enter the following URL when accessing the interface: http://phone.ip.address/admin/ NOTE To save changes on a web page, click Submit All Changes before switching between User and Admin Login or between basic and advanced views. Switching logins or views discards any unsubmitted changes. Cisco SPA 500 Series and WIP310 IP Phone Administration Guide 13
-
 1
1 -
2
-
3
-
4
-
5
-
6
-
7
-
8
-
9
-
10
-
11
-
12
-
13
-
14
-
15
-
16
-
17
-
18
-
 19
19 -
 20
20 -
 21
21 -
 22
22 -
 23
23 -
 24
24 -
 25
25 -
 26
26 -
 27
27 -
 28
28 -
 29
29 -
30
-
31
-
32
-
33
-
34
-
35
-
36
-
37
-
38
-
39
-
40
-
41
-
42
-
43
-
44
-
45
-
46
-
47
-
48
-
49
-
50
-
51
-
52
-
53
-
54
-
55
-
56
-
57
-
58
-
59
-
60
-
61
-
62
-
63
-
64
-
65
-
66
-
67
-
68
-
69
-
70
-
71
-
72
-
73
-
74
-
75
-
76
-
77
-
78
-
79
-
80
-
81
-
82
-
83
-
84
-
85
-
86
-
87
-
88
-
89
-
90
-
91
-
92
-
93
-
94
-
95
-
96
-
97
-
98
-
99
-
100
-
101
-
102
-
103
-
104
-
105
-
106
-
107
-
108
-
109
-
110
-
111
-
112
-
113
-
114
-
115
-
116
-
117
-
118
-
119
-
120
-
121
-
122
-
123
-
124
-
125
-
126
-
127
-
128
-
129
-
130
-
131
-
132
-
133
-
134
-
135
-
136
-
137
-
138
-
139
-
140
-
141
-
142
-
143
-
144
-
145
-
146
-
147
-
148
-
149
-
150
-
151
-
152
-
153
-
154
-
155
-
156
-
157
-
158
-
159
-
160
-
161
-
162
-
163
-
164
-
165
-
166
-
167
-
168
-
169
-
170
-
171
-
172
-
173
-
174
-
175
-
176
-
177
-
178
-
179
-
180
-
181
-
182
-
183
-
184
-
185
-
186
-
187
-
188
-
189
-
190
-
191
-
192
-
193
-
194
-
195
-
196
-
197
-
198
-
199
-
200
-
201
-
202
-
203
-
204
-
205
-
206
-
207
-
208
-
209
-
210
-
211
-
212
-
213
-
214
-
215
-
216
-
217
-
218
-
219
-
220
-
221
-
222
-
223
-
224
-
225
-
226
-
227
-
228
-
229
-
230
-
231
-
232
-
233
-
234
-
235
-
236
-
237
-
238
-
239
-
240
-
241
-
242
-
243
-
244
-
245
-
246
-
247
-
248
-
249
-
250
-
251
-
252
-
253
-
254
-
255
-
256
-
257
-
258
-
259
-
260
-
261
-
262
-
263
-
264
-
265
-
266
-
267
-
268
-
269
-
270
-
271
-
272
-
273
-
274
-
275
-
276
-
277
-
278
-
279
-
280
-
281
-
282
-
283
-
284
-
285
-
286
-
287
-
288
-
289
-
290
-
291
-
292
-
293
-
294
-
295
-
296
-
297
-
298
-
299
-
300
 |
 |
