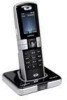
Linksys WIP310 SPA500 Series and WIP310 IP Phone Administration Guide - Page 89
Configuring the User Name and Account on the Camera
 |
UPC - 745883580927
View all Linksys WIP310 manuals
Add to My Manuals
Save this manual to your list of manuals |
Page 89 highlights
Customizing Cisco SPA and Wireless IP Phones Configuring Video Surveillance on the Cisco SPA 525G 3 Configuring the User Name and Account on the Camera STEP 1 Download and install the software release for the camera that provides video monitoring support. For more information, consult the release notes for the camera software. STEP 2 After installing the camera software, use the administration interface to create a user ID and password that will be used by the phone to connect to the camera. The IP phone user account that you create should have viewer privileges. Entering Camera Information Into the Cisco SPA525G Web Administration Interface STEP 1 Log in to the web administration interface. STEP 2 Click the User tab. STEP 3 Under Camera Settings, in the Enable Video VLAN field, choose yes. This option separates camera traffic to a separate VLAN. STEP 4 (Optional) If configuring Virtual LAN (VLAN) support, in the Enable Video VLAN field, choose yes. The default Video VLAN ID is 1, the data VLAN. To separate traffic onto another VLAN (for example, a VLAN for video traffic only), enter the ID for that VLAN. (Video VLAN parameters do not apply to Wi-Fi or VPN.) STEP 5 Under Camera Profile 1, enter the settings for the first camera. Enter the camera name (for example, Lobby). This name is displayed on the phone display screen to identify the camera. STEP 6 In the Access URL field, enter the URL to access the camera, in the following format: rtsp://xxx.xxx.x.xxx/img/jpgvideo.sav where xxx.xxx.x.xxx is the IP address of the camera. STEP 7 In the Access User Name field, enter the username for the phone that you created using the camera's administration interface. STEP 8 In the Access Password field, enter the password for the phone username that you created using the camera's administration interface. Cisco SPA 500 Series and WIP310 IP Phone Administration Guide 78
-
 1
1 -
2
-
3
-
4
-
5
-
6
-
7
-
8
-
9
-
10
-
11
-
12
-
13
-
14
-
15
-
16
-
17
-
18
-
19
-
20
-
21
-
22
-
23
-
24
-
25
-
26
-
27
-
28
-
29
-
30
-
31
-
32
-
33
-
34
-
35
-
36
-
37
-
38
-
39
-
40
-
41
-
42
-
43
-
44
-
45
-
46
-
47
-
48
-
49
-
50
-
51
-
52
-
53
-
54
-
55
-
56
-
57
-
58
-
59
-
60
-
61
-
62
-
63
-
64
-
65
-
66
-
67
-
68
-
69
-
70
-
71
-
72
-
73
-
74
-
75
-
76
-
77
-
78
-
79
-
80
-
81
-
82
-
83
-
 84
84 -
 85
85 -
 86
86 -
 87
87 -
 88
88 -
 89
89 -
 90
90 -
 91
91 -
 92
92 -
 93
93 -
 94
94 -
95
-
96
-
97
-
98
-
99
-
100
-
101
-
102
-
103
-
104
-
105
-
106
-
107
-
108
-
109
-
110
-
111
-
112
-
113
-
114
-
115
-
116
-
117
-
118
-
119
-
120
-
121
-
122
-
123
-
124
-
125
-
126
-
127
-
128
-
129
-
130
-
131
-
132
-
133
-
134
-
135
-
136
-
137
-
138
-
139
-
140
-
141
-
142
-
143
-
144
-
145
-
146
-
147
-
148
-
149
-
150
-
151
-
152
-
153
-
154
-
155
-
156
-
157
-
158
-
159
-
160
-
161
-
162
-
163
-
164
-
165
-
166
-
167
-
168
-
169
-
170
-
171
-
172
-
173
-
174
-
175
-
176
-
177
-
178
-
179
-
180
-
181
-
182
-
183
-
184
-
185
-
186
-
187
-
188
-
189
-
190
-
191
-
192
-
193
-
194
-
195
-
196
-
197
-
198
-
199
-
200
-
201
-
202
-
203
-
204
-
205
-
206
-
207
-
208
-
209
-
210
-
211
-
212
-
213
-
214
-
215
-
216
-
217
-
218
-
219
-
220
-
221
-
222
-
223
-
224
-
225
-
226
-
227
-
228
-
229
-
230
-
231
-
232
-
233
-
234
-
235
-
236
-
237
-
238
-
239
-
240
-
241
-
242
-
243
-
244
-
245
-
246
-
247
-
248
-
249
-
250
-
251
-
252
-
253
-
254
-
255
-
256
-
257
-
258
-
259
-
260
-
261
-
262
-
263
-
264
-
265
-
266
-
267
-
268
-
269
-
270
-
271
-
272
-
273
-
274
-
275
-
276
-
277
-
278
-
279
-
280
-
281
-
282
-
283
-
284
-
285
-
286
-
287
-
288
-
289
-
290
-
291
-
292
-
293
-
294
-
295
-
296
-
297
-
298
-
299
-
300
 |
 |
