Oki MB471 Quick Start Guide - Page 26
Initial Setup for Faxing, Step 1 Setting Country Code, Step 1 Setting
 |
View all Oki MB471 manuals
Add to My Manuals
Save this manual to your list of manuals |
Page 26 highlights
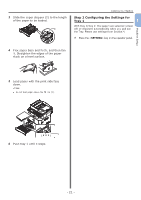
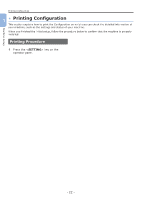
Initial Setup for Faxing ●●Initial Setup for Faxing This section explains the initial setup necessary for the Fax and Fax from Computer functions. To set up the machine for the Fax and Fax from Computer functions, follow the 3 steps below: ●● "Step 1 Setting Country Code" P.26 ●● "Step 2 Connecting a Telephone Line" P.27 ●● "Step 3 Configuring Basic Settings" P.31 3 Step 1 Setting Country Code This section explains how to set the country code. Be sure to select the suitable country code before connecting the telephone line. 3 Press the to select [Admin Setup] and then press . OK Note ●● If you set wrong country code, you may not be able to send or receive faxes. When you cannot send or receive faxes even though you have properly connected the telephone line, check if [Country Code] is set correctly. 1 Hold down the power switch for approximately one second to turn on the power. 4 Enter the administrator password. The factory default password is "aaaaaa". a Press , , , to select the character you want, and then press . OK Faxing (For MB451, MB451w, MB471, MB471w, MB491, MB491+, MB491+LP, ES4191 MFP, MPS4200mb, MPS4700mb only) 2 Press the key on the operator panel. --The selected character is entered as "*" in the text filed. --If you have entered an incorrect value, press the key and then enter the correct value. b Repeat step a until all characters required are entered. - 26 - c Press the and and press . OK to select [Enter]
-
 1
1 -
2
-
3
-
4
-
5
-
6
-
7
-
8
-
9
-
10
-
11
-
12
-
13
-
14
-
15
-
16
-
17
-
18
-
19
-
20
-
 21
21 -
 22
22 -
 23
23 -
 24
24 -
 25
25 -
 26
26 -
 27
27 -
 28
28 -
 29
29 -
 30
30 -
 31
31 -
32
-
33
-
34
-
35
-
36
-
37
-
38
-
39
-
40
-
41
-
42
-
43
-
44
-
45
-
46
-
47
-
48
-
49
-
50
-
51
-
52
-
53
-
54
-
55
-
56
-
57
-
58
-
59
-
60
-
61
-
62
-
63
-
64
-
65
-
66
-
67
-
68
-
69
-
70
-
71
-
72
-
73
-
74
-
75
-
76
-
77
-
78
-
79
-
80
-
81
-
82
-
83
-
84
-
85
-
86
-
87
-
88
-
89
-
90
-
91
-
92
-
93
-
94
-
95
-
96
-
97
-
98
-
99
-
100
-
101
-
102
-
103
-
104
-
105
-
106
-
107
-
108
-
109
-
110
-
111
-
112
-
113
-
114
-
115
-
116
-
117
-
118
-
119
-
120
-
121
-
122
-
123
-
124
-
125
-
126
-
127
-
128
 |
 |
