Oki MB471 Quick Start Guide - Page 33
Step 3-3 Specifying Sender Information, Enter, Date/Time Setting, Manual, SETTING, Easy Setup
 |
View all Oki MB471 manuals
Add to My Manuals
Save this manual to your list of manuals |
Page 33 highlights
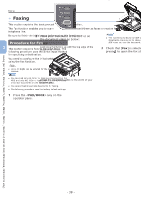
--If you have entered an incorrect value, press the key and then enter the correct value. Initial Setup for Faxing 10 When the setup menu screen is displayed, press to complete the setup. Faxing (For MB451, MB451w, MB471, MB471w, MB491, MB491+, MB491+LP, ES4191 MFP, MPS4200mb, MPS4700mb only) b Repeat step a until all characters required are entered. c Press the and to select [Enter] and press . OK 4 Check that [Date/Time Setting] is selected and then press the . 11 For the confirmation message, check 3 that [Yes] is selected and press . OK Step 3-3 Specifying Sender Information Specify the fax number and sender name for your machine. The information specified here is printed on the top of the faxes you sent from the machine. 1 Press the key on the operator panel. 5 Press the to select the appropriate time zone and then press . OK 6 Press the to select whether summer time is applied or not and then press . OK 7 Check that [Manual] is selected and then press . OK 8 Press the or to select the current date and then press . OK To move to the next box, press the . 2 Press the to select [Easy Setup] and press . OK 9 Press the or to select the current time and then press . OK To move to the next box, press the . When you press OK , a message showing that Date/Time setting is complete appears. 3 Enter the administrator password. The factory default password is "aaaaaa". - 33 -
-
 1
1 -
2
-
3
-
4
-
5
-
6
-
7
-
8
-
9
-
10
-
11
-
12
-
13
-
14
-
15
-
16
-
17
-
18
-
19
-
20
-
21
-
22
-
23
-
24
-
25
-
26
-
27
-
 28
28 -
 29
29 -
 30
30 -
 31
31 -
 32
32 -
 33
33 -
 34
34 -
 35
35 -
 36
36 -
 37
37 -
 38
38 -
39
-
40
-
41
-
42
-
43
-
44
-
45
-
46
-
47
-
48
-
49
-
50
-
51
-
52
-
53
-
54
-
55
-
56
-
57
-
58
-
59
-
60
-
61
-
62
-
63
-
64
-
65
-
66
-
67
-
68
-
69
-
70
-
71
-
72
-
73
-
74
-
75
-
76
-
77
-
78
-
79
-
80
-
81
-
82
-
83
-
84
-
85
-
86
-
87
-
88
-
89
-
90
-
91
-
92
-
93
-
94
-
95
-
96
-
97
-
98
-
99
-
100
-
101
-
102
-
103
-
104
-
105
-
106
-
107
-
108
-
109
-
110
-
111
-
112
-
113
-
114
-
115
-
116
-
117
-
118
-
119
-
120
-
121
-
122
-
123
-
124
-
125
-
126
-
127
-
128
 |
 |
