Ricoh Aficio SP C320DN Software Guide - Page 58
Deleting a Virtual Printer, Printing Using a Virtual Printer, Click [OK].
 |
View all Ricoh Aficio SP C320DN manuals
Add to My Manuals
Save this manual to your list of manuals |
Page 58 highlights
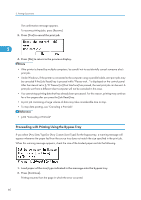
2. Printing Documents 3. Select the virtual printer whose configuration details you want to confirm, and then click [Details]. A configuration list for the selected virtual printer appears. • [Details] is not displayed if you log in to Web Image Monitor as an administrator. To confirm a virtual 2 printer configuration, click [Change]. Deleting a Virtual Printer Use this procedure to delete a virtual printer. • You must have Administrators privilege to delete a virtual printer. Log in using an account that has Administrators privilege. 1. Log in to Web Image Monitor as an administrator. For details about logging in, see "Access in the Administrator Mode". 2. In the menu area, click [Configuration], and then click [Virtual Printer Settings] in the "Printer" category. The list of available virtual printers appears. 3. Select the virtual printer that you want to delete, and then click [Delete]. The delete confirmation screen appears. 4. Click [OK]. • You cannot delete this printer's default virtual printer. • [Delete] appears only if you have already added a virtual printer. • p.155 "Access in the Administrator Mode" Printing Using a Virtual Printer To print directly from a specified virtual printer, assign the virtual printer in the print command. If you use the interrupt printing function, enter the name of the virtual printer that you configured for interrupt printing. Before printing for the first time, specify the virtual printer you want to use. 1. Log in to Web Image Monitor as an administrator. For details about logging in, see "Access in the Administrator Mode". 56
-
 1
1 -
2
-
3
-
4
-
5
-
6
-
7
-
8
-
9
-
10
-
11
-
12
-
13
-
14
-
15
-
16
-
17
-
18
-
19
-
20
-
21
-
22
-
23
-
24
-
25
-
26
-
27
-
28
-
29
-
30
-
31
-
32
-
33
-
34
-
35
-
36
-
37
-
38
-
39
-
40
-
41
-
42
-
43
-
44
-
45
-
46
-
47
-
48
-
49
-
50
-
51
-
52
-
 53
53 -
 54
54 -
 55
55 -
 56
56 -
 57
57 -
 58
58 -
 59
59 -
 60
60 -
 61
61 -
 62
62 -
 63
63 -
64
-
65
-
66
-
67
-
68
-
69
-
70
-
71
-
72
-
73
-
74
-
75
-
76
-
77
-
78
-
79
-
80
-
81
-
82
-
83
-
84
-
85
-
86
-
87
-
88
-
89
-
90
-
91
-
92
-
93
-
94
-
95
-
96
-
97
-
98
-
99
-
100
-
101
-
102
-
103
-
104
-
105
-
106
-
107
-
108
-
109
-
110
-
111
-
112
-
113
-
114
-
115
-
116
-
117
-
118
-
119
-
120
-
121
-
122
-
123
-
124
-
125
-
126
-
127
-
128
-
129
-
130
-
131
-
132
-
133
-
134
-
135
-
136
-
137
-
138
-
139
-
140
-
141
-
142
-
143
-
144
-
145
-
146
-
147
-
148
-
149
-
150
-
151
-
152
-
153
-
154
-
155
-
156
-
157
-
158
-
159
-
160
-
161
-
162
-
163
-
164
-
165
-
166
-
167
-
168
-
169
-
170
-
171
-
172
-
173
-
174
-
175
-
176
-
177
-
178
-
179
-
180
-
181
-
182
-
183
-
184
-
185
-
186
-
187
-
188
-
189
-
190
-
191
-
192
-
193
-
194
-
195
-
196
-
197
-
198
-
199
-
200
-
201
-
202
-
203
-
204
-
205
-
206
-
207
-
208
-
209
-
210
-
211
-
212
-
213
-
214
-
215
-
216
-
217
-
218
-
219
-
220
-
221
-
222
-
223
-
224
-
225
-
226
-
227
-
228
-
229
-
230
-
231
-
232
-
233
-
234
-
235
-
236
-
237
-
238
-
239
-
240
-
241
-
242
-
243
-
244
-
245
-
246
-
247
-
248
 |
 |