Samsung SCX-4623F User Guide - Page 37
Installing wired network or USB connected machine’s driver, Network parameter setting - reset
 |
UPC - 635753615333
View all Samsung SCX-4623F manuals
Add to My Manuals
Save this manual to your list of manuals |
Page 37 highlights
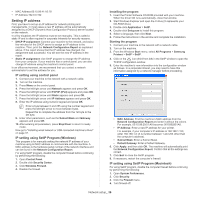
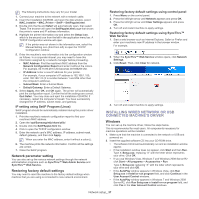
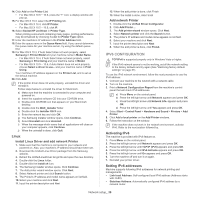
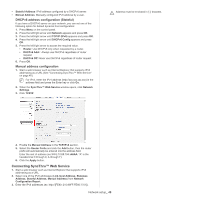
The following instructions may vary for your model. 1. Connect your machine to the network with a network cable. 2. Insert the Installation CD-ROM, and open the disk window, select MAC_Installer > MAC_Printer > SetIP > SetIPapplet.html. 3. Double click the file and Safari will automatically open, then select Trust. The browser will open the SetIPapplet.html page that shows the printer's name and IP address information. 4. Highlight the printer information row and select the Setup icon, which is the second icon from the left in the application menu bar. A TCP/IP Configuration window will open. If the printer was not shown in the information row, select the Manual Setting icon (third from left) to open the TCP/IP Configuration window. 5. Enter the machine's new information into the configuration window as follows. In a corporate intranet, you may need to have this information assigned by a network manager before proceeding. • MAC Address: Find the machine's MAC address from the Network Configuration Report and enter it without the colons. For example, 00:15:99:29:51:A8 becomes 0015992951A8. • IP Address: Enter a new IP address for your printer. For example, if your computer's IP address is 192.168.1.150, enter 192.168.1.X (X is number between 1 and 254 other than the computer's address). • Subnet Mask: Enter a Subnet Mask. • Default Gateway: Enter a Default Gateway. 6. Select Apply, then OK, and OK again. The printer will automatically print the configuration report. Confirm that all the settings are correct. Quit Safari. You may close and eject the installation CD-ROM. If necessary, restart the computer's firewall. You have successfully changed the IP address, subnet mask, and gateway. IP setting using SetIP Program (Linux) SetIP program should be automatically installed during the printer driver installation. 1. Print the machine's network configuration report to find your machine's MAC address. 2. Open the /opt/Samsung/mfp/share/utils/. 3. Double click the SetIPApplet.html file. 4. Click to open the TCP/IP configuration window. 5. Enter the network card's MAC address, IP address, subnet mask, default gateway, and then click Apply. When you enter the MAC address, enter it without a colon(:). 6. The machine prints the network information. Confirm all the settings are correct. 7. Close the SetIP program. Network parameter setting You can also set up the various network settings through the network administration programs such as SyncThru™ Web Admin Service and SyncThru™ Web Service. Restoring factory default settings You may need to reset the machine to the factory default settings when machine that you are using is connected to new network environment. Restoring factory default settings using control panel 1. Press Menu on the control panel. 2. Press the left/right arrow until Network appears and press OK. 3. Press the left/right arrow until Clear Settings appears and press OK. 4. Turn off and restart machine to apply settings. Restoring factory default settings using SyncThru™ Web Service 1. Start a web browser such as Internet Explorer, Safari or Firefox and enter your machine's new IP address in the browser window. For example, 2. When the SyncThru™ Web Service window opens, click Network Settings. 3. Click Reset. Then, click Clear for network. 4. Turn off and restart machine to apply settings. INSTALLING WIRED NETWORK OR USB CONNECTED MACHINE'S DRIVER Windows You can set up the machine driver, follow the steps below. This is recommended for most users. All components necessary for machine operations will be installed. 1. Make sure that the machine is connected to the network or USB and powered on. 2. Insert the supplied software CD into your CD-ROM drive. • The software CD should automatically run and an installation window appear. • If the installation window does not appear, click Start and then Run. Type X:\Setup.exe, replacing "X" with the letter which represents your drive. Click OK. • If you use Windows Vista, Windows 7 and Windows 2008 Server R2 click Start > All programs > Accessories > Run. Type X:\Setup.exe replacing "X" with the letter which represents your drive and click OK. • If the AutoPlay window appears in Windows Vista, click Run Setup.exe in Install or run program field, and click Continue in the User Account Control windows. • If the AutoPlay window appears in Windows 7 and Windows 2008 Server R2, click Run Setup.exe in Install or run program field, and click Yes in the User Account Control windows. Network setup_ 37
-
 1
1 -
2
-
3
-
4
-
5
-
6
-
7
-
8
-
9
-
10
-
11
-
12
-
13
-
14
-
15
-
16
-
17
-
18
-
19
-
20
-
21
-
22
-
23
-
24
-
25
-
26
-
27
-
28
-
29
-
30
-
31
-
 32
32 -
 33
33 -
 34
34 -
 35
35 -
 36
36 -
 37
37 -
 38
38 -
 39
39 -
 40
40 -
 41
41 -
 42
42 -
43
-
44
-
45
-
46
-
47
-
48
-
49
-
50
-
51
-
52
-
53
-
54
-
55
-
56
-
57
-
58
-
59
-
60
-
61
-
62
-
63
-
64
-
65
-
66
-
67
-
68
-
69
-
70
-
71
-
72
-
73
-
74
-
75
-
76
-
77
-
78
-
79
-
80
-
81
-
82
-
83
-
84
-
85
-
86
-
87
-
88
-
89
-
90
-
91
-
92
-
93
-
94
-
95
-
96
-
97
-
98
-
99
-
100
-
101
-
102
-
103
-
104
-
105
-
106
-
107
-
108
-
109
-
110
-
111
-
112
-
113
-
114
-
115
-
116
-
117
-
118
-
119
-
120
-
121
 |
 |
