Samsung SCX-4623F User Guide - Page 84
Using SetIP program, Using SmarThru, Windows - network card
 |
UPC - 635753615333
View all Samsung SCX-4623F manuals
Add to My Manuals
Save this manual to your list of manuals |
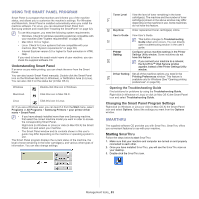
Page 84 highlights
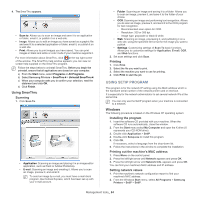
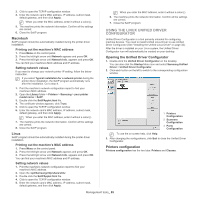
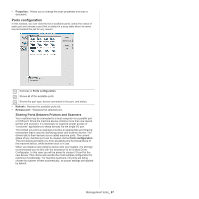
4. The SmarThru appears. • Scan to: Allows you to scan an image and save it to an application or folder, email it, or publish it on a web site. • Image: Allows you to edit an image you have saved as a graphic file and send it to a selected application or folder, email it, or publish it on a web site. • Print: Allows you to print images you have saved. You can print images in black and white or color mode if your machine supports it. For more information about SmarThru, click at the top right corner of the window. The SmarThru help window appears; you can view on screen help supplied on the SmarThru program. Follow the steps below to uninstall SmarThru. Before you begin the uninstall, ensure that all applications are closed on your computer. a) From the Start menu, select Programs or All Programs. b) Select Samsung Printers > SmarThru 4 > Uninstall SmarThru 4. c) When your computer asks you to confirm your selection, read the statement and click OK. d) Click Finish. Using SmarThru Scanning 1. Click Scan To. • Application: Scanning an image and placing it in an image editor application, such as Paint or Adobe Photoshop. • E-mail: Scanning an image and emailing it. Allows you to scan an image, preview it, and email it. To send an image by e-mail, you must have a mail client program, like Outlook Express, which has been set up with your e-mail account. • Folder: Scanning an image and saving it to a folder. Allows you to scan an image, preview it, and save it to the folder of your choice. • OCR: Scanning an image and performing text recognition. Allows you to scan an image, preview it, and send it to the OCR program for text recognition. - Recommended scan option for OCR. - Resolution: 200 or 300 dpi. - Image type: grayscale or black & white. • Web: Scanning an image, previewing it, and publishing it on a web site, using the specified file format for the image you want to publish. • Settings: Customizing settings of Scan To basic functions. Allows you to customize settings for Application, E-mail, OCR, and Web functions. 2. Set scan settings and click Scan. Printing 1. Click Print. 2. Select the file you want to print. 3. Select the machine you want to use for printing. 4. Click Print to start the job. USING SETIP PROGRAM This program is for the network IP setting using the MAC address which is the hardware serial number of the network printer card or interface. It is especially for the network administrator to set several network IPs at the same time. You can only use the SetIP program when your machine is connected to a network. Windows The following procedure is based on the Windows XP operating system. Installing the program 1. Insert the software CD provided with your machine. When the software CD runs automatically, close the window. 2. From the Start menu select My Computer and open the X drive (X represents your CD-ROM drive). 3. Double click Application > SetIP. 4. Double-click Setup.exe to install this program. 5. Click OK. If necessary, select a language from the drop-down list. 6. Follow the instructions in the window to complete the installation. Printing out the machine's MAC address 1. Press Menu on the control panel. 2. Press the left/right arrow until Network appears and press OK. 3. Press the left/right arrow until Network Info. appears and press OK. You can find your machine's MAC address and IP address. Setting network values 1. Print the machine's network configuration report to find your machine's MAC address. 2. From the Windows Start menu, select All Programs > Samsung Printers > SetIP > SetIP. Management tools_ 84
-
 1
1 -
2
-
3
-
4
-
5
-
6
-
7
-
8
-
9
-
10
-
11
-
12
-
13
-
14
-
15
-
16
-
17
-
18
-
19
-
20
-
21
-
22
-
23
-
24
-
25
-
26
-
27
-
28
-
29
-
30
-
31
-
32
-
33
-
34
-
35
-
36
-
37
-
38
-
39
-
40
-
41
-
42
-
43
-
44
-
45
-
46
-
47
-
48
-
49
-
50
-
51
-
52
-
53
-
54
-
55
-
56
-
57
-
58
-
59
-
60
-
61
-
62
-
63
-
64
-
65
-
66
-
67
-
68
-
69
-
70
-
71
-
72
-
73
-
74
-
75
-
76
-
77
-
78
-
 79
79 -
 80
80 -
 81
81 -
 82
82 -
 83
83 -
 84
84 -
 85
85 -
 86
86 -
 87
87 -
 88
88 -
 89
89 -
90
-
91
-
92
-
93
-
94
-
95
-
96
-
97
-
98
-
99
-
100
-
101
-
102
-
103
-
104
-
105
-
106
-
107
-
108
-
109
-
110
-
111
-
112
-
113
-
114
-
115
-
116
-
117
-
118
-
119
-
120
-
121
 |
 |
