Samsung SCX-4623F User Guide - Page 61
Changing the default copy settings, Using special copy features, ID card copying - scanner not available
 |
UPC - 635753615333
View all Samsung SCX-4623F manuals
Add to My Manuals
Save this manual to your list of manuals |
Page 61 highlights
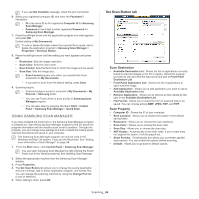
When you make a reduced copy, black lines may appear at the bottom of your copy. CHANGING THE DEFAULT COPY SETTINGS The copy options, including darkness, original type, copy size, collation and number of copies, can be set to those most frequently used. When you copy a document, the default settings are used unless they have been changed by using the corresponding buttons on the control panel. 1. Press (Copy) on the control panel. 2. Press Menu on the control panel. 3. Press the left/right arrow until Copy Setup appears and press OK. 4. Press the left/right arrow until Change Default appears and press OK. 5. Press the left/right arrow until the setup option you want appears and press OK. 6. Press the left/right arrow until the setting you want appears and press OK. 7. Repeat steps 5 through 6, as needed. 8. Press Stop/Clear to return to ready mode. While you are setting copy options, pressing Stop/Clear cancels the changed settings and restores the defaults. USING SPECIAL COPY FEATURES You can use the following copy features: ID card copying Your machine can print 2-sided originals on one sheet of A4-, Letter-, Legal-, Folio-, Executive-, B5, A5, or A6-sized paper. The machine prints one side of the original on the upper half of the paper and the other side on the lower half without reducing the size of the original. This feature is helpful for copying a small-sized item, such as a business card. • This copy feature is available only when you place originals on the scanner glass. • The size of the 2-sided originals should be smaller than A5, if not, some of it won't be copied. 1. Press ID Copy on the control panel. 2. Place Front Side and Press [Start] appears on the display. 3. Place the front side of an original facing down on the scanner glass where arrows indicate as shown, and close the scanner lid. 4. Press OK on the control panel. Your machine begins scanning the front side and shows Place Back Side and Press [Start]. 5. Turn the original over and place it on the scanner glass, where arrows indicate as shown then, close the scanner lid. 6. Press OK on the control panel to begin copying. • If the original is larger than the printable area, some portions may not be printed. • If you don't press the OK button, only the front side will be copied. • If you press Stop/Clear, the machine cancles the copy job and returns to ready mode. 2-up or 4-up copying (N-up) The machine reduces the size of the original images and prints 2 or 4 pages onto one sheet of paper. 1 2 2 3 4 1 1. Press (Copy) on the control panel. 2. Press Menu on the control panel. 3. Press the left/right arrow until Copy Feature appears and press OK. 4. Press the left/right arrow until Layout appears and press OK. 5. Press the left/right arrow until 2-Up or 4-Up appears and press OK. 6. When Yes appears, press OK. 7. Press Start on the control panel to begin copying. You cannot adjust the copy size using Reduce/Enlarge for the N-Up feature. Poster copying Your original will be divided into 9 portions. You can paste the printed pages together to make one poster-sized document. This copy feature is available only when you place originals on the scanner glass. 1. Press (Copy) on the control panel. 2. Press Menu on the control panel. 3. Press the left/right arrow until Copy Feature appears and press OK. 4. Press the left/right arrow until Layout appears and press OK. 5. Press the left/right arrow until Poster Copy appears and press OK. 6. Press Stop/Clear to return to ready mode. 7. Press Start on the control panel to begin copying. Your original is divided into 9 portions. Each portion is scanned and Copying_ 61
-
 1
1 -
2
-
3
-
4
-
5
-
6
-
7
-
8
-
9
-
10
-
11
-
12
-
13
-
14
-
15
-
16
-
17
-
18
-
19
-
20
-
21
-
22
-
23
-
24
-
25
-
26
-
27
-
28
-
29
-
30
-
31
-
32
-
33
-
34
-
35
-
36
-
37
-
38
-
39
-
40
-
41
-
42
-
43
-
44
-
45
-
46
-
47
-
48
-
49
-
50
-
51
-
52
-
53
-
54
-
55
-
 56
56 -
 57
57 -
 58
58 -
 59
59 -
 60
60 -
 61
61 -
 62
62 -
 63
63 -
 64
64 -
 65
65 -
 66
66 -
67
-
68
-
69
-
70
-
71
-
72
-
73
-
74
-
75
-
76
-
77
-
78
-
79
-
80
-
81
-
82
-
83
-
84
-
85
-
86
-
87
-
88
-
89
-
90
-
91
-
92
-
93
-
94
-
95
-
96
-
97
-
98
-
99
-
100
-
101
-
102
-
103
-
104
-
105
-
106
-
107
-
108
-
109
-
110
-
111
-
112
-
113
-
114
-
115
-
116
-
117
-
118
-
119
-
120
-
121
 |
 |
