Samsung SCX-4623F User Guide - Page 50
Setting the paper size and type, Card stock/Custom-sized paper, Letterhead/ Preprinted paper, Photo - ink
 |
UPC - 635753615333
View all Samsung SCX-4623F manuals
Add to My Manuals
Save this manual to your list of manuals |
Page 50 highlights
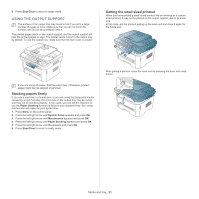
• Do not run a sheet of labels through the machine more than once. The adhesive backing is designed for only a single pass through the machine. • Do not use labels that are separating from the backing sheet or are wrinkled, bubbled, or otherwise damaged. Card stock/Custom-sized paper Postcards, cards and other custom-sized materials can be printed with this machine. • Do not print on media smaller than 76 mm (3.00 inches) wide or 127 mm (5.00 inches) long. • In the software application, set margins at least 6.4 mm (0.25 inches) away from the edges of the material. • If media weight is over 160 g/m2 (43 lb), try printing in the rear cover (face up). Letterhead/ Preprinted paper Tray1 SINGLE-SIDED Face down DOUBLE-SIDED Face up Manual tray Face up Face down • Letterhead/ Preprinted paper must be printed with heat-resistant ink that will not melt, vaporize, or release hazardous emissions when subjected to the machine's fusing temperature for 0.1 second. Check your machine's specification to view the fusing temperature about 170°C(338 °F). • Letterhead/ Preprinted paper ink must be non-flammable and should not adversely affect machine rollers. • Forms and letterhead should be sealed in a moisture-proof wrapping to prevent changes during storage. • Before you load letterhead/preprinted paper, verify that the ink on the paper is dry. During the fusing process, wet ink can come off preprinted paper, reducing print quality. Photo • Make sure not to use the inkjet photo paper with this machine. It could cause damage to the machine. Glossy Load one paper to the manual tray at a time, glossy side facing up. • Recommended media: Glossy paper (Letter) for this machine by HP Brochure Paper (Product: Q6611A) only. • Recommended media: Glossy paper (A4) for this machine by HP Superior Paper 160 glossy (Product: Q6616A). SETTING THE PAPER SIZE AND TYPE After loading paper in the paper tray, set the paper size and type using the control panel. These settings will apply to copy and fax modes. For computer printing, select the paper size and type in the application program you use on your computer (See "Opening printing preferences" on page 53). The settings made from the machine driver override the settings on the control panel. Setting the paper size 1. Press Menu on the control panel. 2. Press the left/right arrow until System Setup appears and press OK. 3. Press the left/right arrow until Paper Setup appears and press OK. 4. Press the left/right arrow until Paper Size appears and press OK. 5. Press the left/right arrow to select the paper tray you want and press OK. 6. Press the left/right arrow to select the paper size you want. 7. Press OK to save the selection. 8. Press Stop/Clear to return to ready mode. If you want to use special-sized paper-such as a billing paper, select Edit... in the Paper tab in the Printing Preferences (See "Opening printing preferences" on page 53). Setting the paper type 1. Press Menu on the control panel. 2. Press the left/right arrow until System Setup appears and press OK. 3. Press the left/right arrow until Paper Setup appears and press OK. 4. Press the left/right arrow until Paper Type appears and press OK. 5. Press the left/right arrow to select the paper tray you want and press OK. 6. Press the left/right arrow to select the paper type you want. 7. Press OK to save the selection. 8. Press Stop/Clear to return to ready mode. Setting the paper source 1. Press Menu on the control panel. 2. Press the left/right arrow until System Setup appears and press OK. 3. Press the left/right arrow until Paper Setup appears and press OK. 4. Press the left/right arrow until Paper Source appears and press OK. 5. Press the left/right arrow until Copy Tray or Fax Tray appears and press OK. 6. Press the left/right arrow to select the paper tray you want. 7. Press OK to save the selection. Media and tray_ 50
-
 1
1 -
2
-
3
-
4
-
5
-
6
-
7
-
8
-
9
-
10
-
11
-
12
-
13
-
14
-
15
-
16
-
17
-
18
-
19
-
20
-
21
-
22
-
23
-
24
-
25
-
26
-
27
-
28
-
29
-
30
-
31
-
32
-
33
-
34
-
35
-
36
-
37
-
38
-
39
-
40
-
41
-
42
-
43
-
44
-
 45
45 -
 46
46 -
 47
47 -
 48
48 -
 49
49 -
 50
50 -
 51
51 -
 52
52 -
 53
53 -
 54
54 -
 55
55 -
56
-
57
-
58
-
59
-
60
-
61
-
62
-
63
-
64
-
65
-
66
-
67
-
68
-
69
-
70
-
71
-
72
-
73
-
74
-
75
-
76
-
77
-
78
-
79
-
80
-
81
-
82
-
83
-
84
-
85
-
86
-
87
-
88
-
89
-
90
-
91
-
92
-
93
-
94
-
95
-
96
-
97
-
98
-
99
-
100
-
101
-
102
-
103
-
104
-
105
-
106
-
107
-
108
-
109
-
110
-
111
-
112
-
113
-
114
-
115
-
116
-
117
-
118
-
119
-
120
-
121
 |
 |
