Samsung SGH-I577 User Manual Ver.lb8_f4 (English(north America)) - Page 60
Adding a New Contact, Auto Sync contacts
 |
View all Samsung SGH-I577 manuals
Add to My Manuals
Save this manual to your list of manuals |
Page 60 highlights
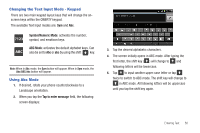
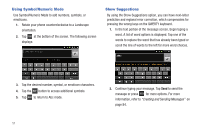
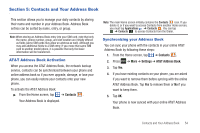
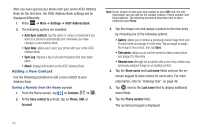
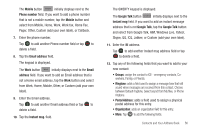
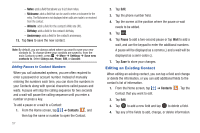
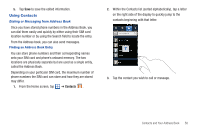
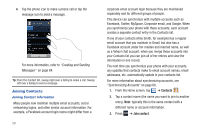
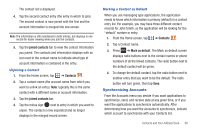
After you have synced your phone with your online AT&T Address Book for the first time, the AT&T Address Book settings will be displayed differently. 1. Press ➔ More ➔ Settings ➔ AT&T Address Book. 2. The following options are available: • Auto Sync contacts: tap this option to create a checkmark if you want your phone to automatically sync whenever you make changes to your Address Book. • Sync Now: allows you to sync your phone with your online AT&T Address Book. • Sync Log: displays a log of all synchronizations that have taken place. • About: displays information on the AT&T Address Book. Adding a New Contact Use the following procedure to add a new contact to your Address Book. Saving a Number from the Home screen 1. From the Home screen, tap ➔ Contacts ➔ . 2. At the Save contact to prompt, tap on Phone, SIM, or Account. Note: If your choose to save your new contact to your SIM card, the only information you can add for the contact is Name, Phone number, and Email address. The following procedure describes how to add a contact to your Phone. 3. Tap the image icon and assign a picture to the new entry by choosing one of the following options: • Gallery: allows you to retrieve a previously stored image from your Pictures folder and assign it to this entry. Tap an image to assign the image to the contact, then tap Save. • Take photo: allows you to use the camera to take a new picture and assign it to this entry. • Remove icon although not an option with a new entry, deletes any previously assigned image on an existing contact. 4. Tap the Given name and Last name fields and use the onscreen keypad to enter names for each entry. For more information, refer to "Entering Text" on page 49. 5. Tap next to the Last name field to display additional name fields. 6. Tap the Phone number field. The numerical keypad is displayed. 55
-
 1
1 -
2
-
3
-
4
-
5
-
6
-
7
-
8
-
9
-
10
-
11
-
12
-
13
-
14
-
15
-
16
-
17
-
18
-
19
-
20
-
21
-
22
-
23
-
24
-
25
-
26
-
27
-
28
-
29
-
30
-
31
-
32
-
33
-
34
-
35
-
36
-
37
-
38
-
39
-
40
-
41
-
42
-
43
-
44
-
45
-
46
-
47
-
48
-
49
-
50
-
51
-
52
-
53
-
54
-
 55
55 -
 56
56 -
 57
57 -
 58
58 -
 59
59 -
 60
60 -
 61
61 -
 62
62 -
 63
63 -
 64
64 -
 65
65 -
66
-
67
-
68
-
69
-
70
-
71
-
72
-
73
-
74
-
75
-
76
-
77
-
78
-
79
-
80
-
81
-
82
-
83
-
84
-
85
-
86
-
87
-
88
-
89
-
90
-
91
-
92
-
93
-
94
-
95
-
96
-
97
-
98
-
99
-
100
-
101
-
102
-
103
-
104
-
105
-
106
-
107
-
108
-
109
-
110
-
111
-
112
-
113
-
114
-
115
-
116
-
117
-
118
-
119
-
120
-
121
-
122
-
123
-
124
-
125
-
126
-
127
-
128
-
129
-
130
-
131
-
132
-
133
-
134
-
135
-
136
-
137
-
138
-
139
-
140
-
141
-
142
-
143
-
144
-
145
-
146
-
147
-
148
-
149
-
150
-
151
-
152
-
153
-
154
-
155
-
156
-
157
-
158
-
159
-
160
-
161
-
162
-
163
-
164
-
165
-
166
-
167
-
168
-
169
-
170
-
171
-
172
-
173
-
174
-
175
-
176
-
177
-
178
-
179
-
180
-
181
-
182
-
183
-
184
-
185
-
186
-
187
-
188
-
189
-
190
-
191
-
192
-
193
-
194
-
195
-
196
-
197
-
198
-
199
-
200
-
201
-
202
-
203
-
204
-
205
-
206
-
207
-
208
-
209
-
210
-
211
-
212
-
213
-
214
-
215
-
216
-
217
-
218
-
219
-
220
 |
 |