Samsung SPH-A523 User Manual (user Manual) (ver.f2) (English) - Page 100
Set Frame, Save Location, Video Camera
 |
View all Samsung SPH-A523 manuals
Add to My Manuals
Save this manual to your list of manuals |
Page 100 highlights
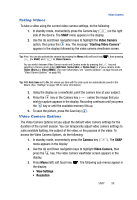
Set Frame Set Frame lets you temporarily apply one of the preloaded picture frames in your device to characterize or enhance one or more pictures. 1. In camera mode, press the Menu (left) soft touch key ( ). The options menu bar appears in the display. 2. Use the Left and Right navigation keys to highlight Set Frame. The following options appear in the display: • No Frame - Lets you take photos without enhancing frames. • Frame 1 - Frame 20 - These options apply any of a series of frames to succeeding photos. 3. Use the Up and Down navigation keys to highlight the desired frame, then press the key. You're returned to the camera viewfinder screen with the selected frame applied to the viewfinder screen. When you take your next picture, the photo will include the selected frame. Save Location Save Location lets you select where a photo will be saved, in the device or on a Memory Card. 1. In camera mode, press the Menu (left) soft touch key ( ). The options menu bar appears in the display. 2. Use the Left and Right navigation keys to highlight Save Location. The following options appear in the display: • Int Album - Lets you save photos in your device. • Ext Album - Lets you save photos on a Memory Card. 3. Use the Up and Down navigation keys to highlight the desired location, then press the key. You're returned to the camera viewfinder screen with the selected location icon ( or ) appearing in the viewfinder screen. When you take your next picture, it will be saved to the selected location. Video Camera Taking video clips with the built-in video camera can be as simple as choosing a subject, using the display as the viewfinder to point the lens (located on the top rear of the device), and pressing a button. Note: The device's slide must be open for the video camera to work. 97
-
 1
1 -
2
-
3
-
4
-
5
-
6
-
7
-
8
-
9
-
10
-
11
-
12
-
13
-
14
-
15
-
16
-
17
-
18
-
19
-
20
-
21
-
22
-
23
-
24
-
25
-
26
-
27
-
28
-
29
-
30
-
31
-
32
-
33
-
34
-
35
-
36
-
37
-
38
-
39
-
40
-
41
-
42
-
43
-
44
-
45
-
46
-
47
-
48
-
49
-
50
-
51
-
52
-
53
-
54
-
55
-
56
-
57
-
58
-
59
-
60
-
61
-
62
-
63
-
64
-
65
-
66
-
67
-
68
-
69
-
70
-
71
-
72
-
73
-
74
-
75
-
76
-
77
-
78
-
79
-
80
-
81
-
82
-
83
-
84
-
85
-
86
-
87
-
88
-
89
-
90
-
91
-
92
-
93
-
94
-
 95
95 -
 96
96 -
 97
97 -
 98
98 -
 99
99 -
 100
100 -
 101
101 -
 102
102 -
 103
103 -
 104
104 -
 105
105 -
106
-
107
-
108
-
109
-
110
-
111
-
112
-
113
-
114
-
115
-
116
-
117
-
118
-
119
-
120
-
121
-
122
-
123
-
124
-
125
-
126
-
127
-
128
-
129
-
130
-
131
-
132
-
133
-
134
-
135
-
136
-
137
-
138
-
139
-
140
-
141
-
142
-
143
-
144
-
145
-
146
-
147
-
148
-
149
-
150
-
151
-
152
-
153
-
154
-
155
-
156
-
157
-
158
-
159
-
160
-
161
-
162
-
163
-
164
-
165
-
166
-
167
-
168
-
169
-
170
-
171
-
172
-
173
-
174
-
175
-
176
-
177
-
178
-
179
-
180
-
181
-
182
-
183
-
184
-
185
-
186
-
187
 |
 |
