Samsung SPH-A523 User Manual (user Manual) (ver.f2) (English) - Page 53
Saving a Number from a Call, If desired, select a Speed Dial for the new Contact's Mobile, Home - ringtone
 |
View all Samsung SPH-A523 manuals
Add to My Manuals
Save this manual to your list of manuals |
Page 53 highlights
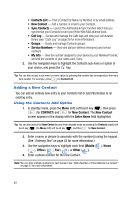
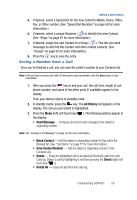
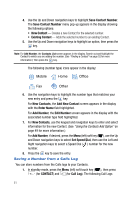
Adding a New Contact 5. If desired, select a Speed Dial for the new Contact's Mobile, Home, Office, Fax, or Other number. (See "Speed Dial Numbers" on page 58 for more information.) 6. If desired, select a unique Ringtone ( ) to identify this new Contact. (See "Rings" on page 67 for more information.) 7. If desired, assign the new Contact to a Group ( ). This lets you send messages to and find this Contact and other related contacts. (See "Groups" on page 55 for more information.) 8. Press the key to save the entry. Saving a Number from a Call Once you've finished a call, you can save the caller's number to your Contacts list. Note: If the call was incoming and Caller ID information was unavailable, then the Save option is also unavailable. 1. After you press the key to end your call, the call time, length of call, phone number, and name of the other party (if available) appear in the display. Then your device returns to standby mode. 2. In standby mode, press the key. The All History list appears in the display. The call you just ended is highlighted. 3. Press the Menu (left) soft touch key ( ). The following options appear in the display: • Send Message - Compose and send a text message to the dialed or originating number. Note: See "Sending a Text Message" on page 143 for more information. • Block Contact - Add the dialed or originating number for this call to the Blocked list. (See "Call Block" on page 77 for more information.) • Save Contact Number - Add the dialed or originating number to the Contacts List. • Delete - Erase the highlighted call or all selected (Checked) calls from your Calls log. [Select a call by highlighting it and then pressing the Check (right) soft touch key ( ).] • Delete All - Erase all calls from this calls log. Understanding CONTACT 50
-
 1
1 -
2
-
3
-
4
-
5
-
6
-
7
-
8
-
9
-
10
-
11
-
12
-
13
-
14
-
15
-
16
-
17
-
18
-
19
-
20
-
21
-
22
-
23
-
24
-
25
-
26
-
27
-
28
-
29
-
30
-
31
-
32
-
33
-
34
-
35
-
36
-
37
-
38
-
39
-
40
-
41
-
42
-
43
-
44
-
45
-
46
-
47
-
 48
48 -
 49
49 -
 50
50 -
 51
51 -
 52
52 -
 53
53 -
 54
54 -
 55
55 -
 56
56 -
 57
57 -
 58
58 -
59
-
60
-
61
-
62
-
63
-
64
-
65
-
66
-
67
-
68
-
69
-
70
-
71
-
72
-
73
-
74
-
75
-
76
-
77
-
78
-
79
-
80
-
81
-
82
-
83
-
84
-
85
-
86
-
87
-
88
-
89
-
90
-
91
-
92
-
93
-
94
-
95
-
96
-
97
-
98
-
99
-
100
-
101
-
102
-
103
-
104
-
105
-
106
-
107
-
108
-
109
-
110
-
111
-
112
-
113
-
114
-
115
-
116
-
117
-
118
-
119
-
120
-
121
-
122
-
123
-
124
-
125
-
126
-
127
-
128
-
129
-
130
-
131
-
132
-
133
-
134
-
135
-
136
-
137
-
138
-
139
-
140
-
141
-
142
-
143
-
144
-
145
-
146
-
147
-
148
-
149
-
150
-
151
-
152
-
153
-
154
-
155
-
156
-
157
-
158
-
159
-
160
-
161
-
162
-
163
-
164
-
165
-
166
-
167
-
168
-
169
-
170
-
171
-
172
-
173
-
174
-
175
-
176
-
177
-
178
-
179
-
180
-
181
-
182
-
183
-
184
-
185
-
186
-
187
 |
 |