Samsung SPH-A523 User Manual (user Manual) (ver.f2) (English) - Page 52
Adding a New Contact, Using the Contacts Add Option
 |
View all Samsung SPH-A523 manuals
Add to My Manuals
Save this manual to your list of manuals |
Page 52 highlights
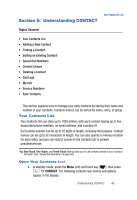
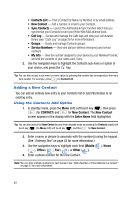
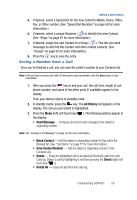
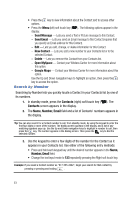
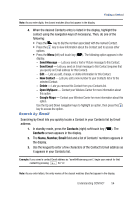
• Contacts List - Find a Contact by Name, by Number, or by email address. • New Contact - Add a number or email to your Contacts. • Sync Contacts - Launch the Addressbook Sync function which lets you synchronize your Contacts list and your Helio Web Mail address book. • Call Log - Access and manage the Calls logs and view your call duration timers (see "Calls Log" on page 26 for more information). • Groups - Create and manage Contacts groups. • Service Numbers - View and dial pre-defined emergency and service numbers. • My Info - View the number assigned to your device by your Wireless Provider, and edit the contents of your name card, if any. 2. Use the navigation keys to highlight the Contacts sub-menu or option of your choice, and press the key. Tip: You can also access a sub-menu or menu option by pressing the number key corresponds to the menu item number. For example, press for Contact List. Adding a New Contact You can add an entirely new entry to your Contacts list or add information to an existing entry. Using the Contacts Add Option 1. In standby mode, press the Menu (left) soft touch key ( ), then press (for CONTACT) and for New Contact. The New Contact screen appears in the display with the Enter Name field highlighted. Tip: You can also launch the New Contact screen from standby mode by pressing the Contacts (right) soft touch key ( ), the Menu (left) soft touch key ( ), and then for New Contact. 2. Enter a name or phrase to associate with the number(s) using the keypad. (See "Entering Text" on page 43 for more information.) 3. Use the navigation keys to highlight each field [Mobile ( ), Home ( ), Office ( ), Fax ( ), or Other ( )]. 4. Enter a phone number for the new Contact. Note: You can store multiple numbers for each Contact. See "Add a Number or Email Address to a Contact" on page 57 for more information. 49
-
 1
1 -
2
-
3
-
4
-
5
-
6
-
7
-
8
-
9
-
10
-
11
-
12
-
13
-
14
-
15
-
16
-
17
-
18
-
19
-
20
-
21
-
22
-
23
-
24
-
25
-
26
-
27
-
28
-
29
-
30
-
31
-
32
-
33
-
34
-
35
-
36
-
37
-
38
-
39
-
40
-
41
-
42
-
43
-
44
-
45
-
46
-
 47
47 -
 48
48 -
 49
49 -
 50
50 -
 51
51 -
 52
52 -
 53
53 -
 54
54 -
 55
55 -
 56
56 -
 57
57 -
58
-
59
-
60
-
61
-
62
-
63
-
64
-
65
-
66
-
67
-
68
-
69
-
70
-
71
-
72
-
73
-
74
-
75
-
76
-
77
-
78
-
79
-
80
-
81
-
82
-
83
-
84
-
85
-
86
-
87
-
88
-
89
-
90
-
91
-
92
-
93
-
94
-
95
-
96
-
97
-
98
-
99
-
100
-
101
-
102
-
103
-
104
-
105
-
106
-
107
-
108
-
109
-
110
-
111
-
112
-
113
-
114
-
115
-
116
-
117
-
118
-
119
-
120
-
121
-
122
-
123
-
124
-
125
-
126
-
127
-
128
-
129
-
130
-
131
-
132
-
133
-
134
-
135
-
136
-
137
-
138
-
139
-
140
-
141
-
142
-
143
-
144
-
145
-
146
-
147
-
148
-
149
-
150
-
151
-
152
-
153
-
154
-
155
-
156
-
157
-
158
-
159
-
160
-
161
-
162
-
163
-
164
-
165
-
166
-
167
-
168
-
169
-
170
-
171
-
172
-
173
-
174
-
175
-
176
-
177
-
178
-
179
-
180
-
181
-
182
-
183
-
184
-
185
-
186
-
187
 |
 |
