D-Link DGS-3308FG Product Manual - Page 132
DNS Relay
 |
UPC - 790069239373
View all D-Link DGS-3308FG manuals
Add to My Manuals
Save this manual to your list of manuals |
Page 132 highlights
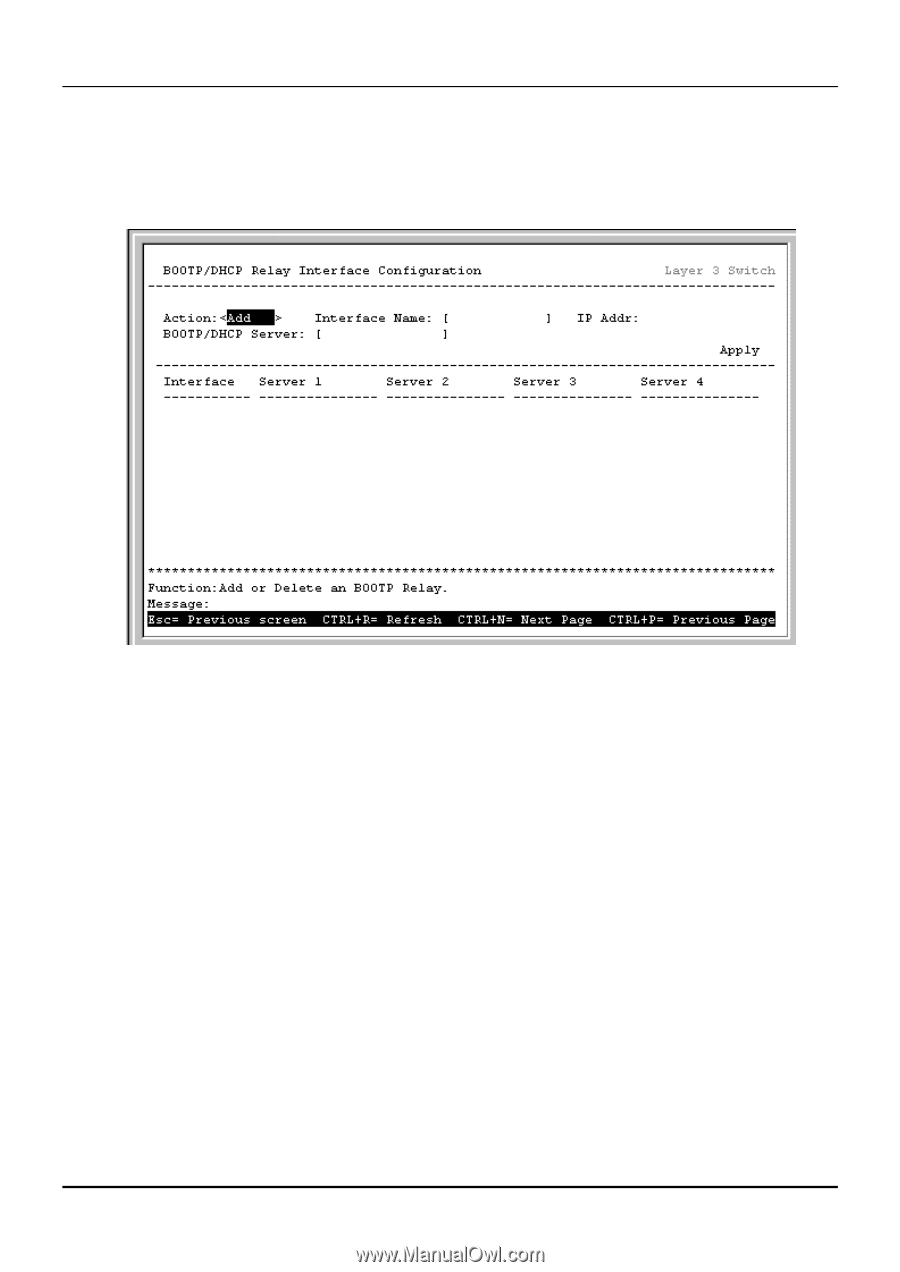
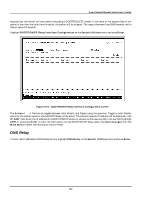
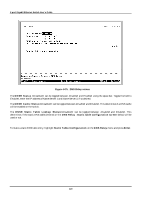
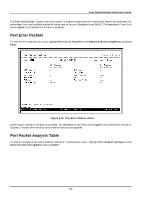
8-port Gigabit Ethernet Switch User's Guide seconds) that the Switch will wait before forwarding a BOOTREQUEST packet. If the value in the seconds field of the packet is less than the relay time threshold, the packet will be dropped. The range is between 0 and 9999 seconds, with a default value of 0 seconds. Highlight BOOTP/DHCP Relay Interface Configuration on the Switch Utilities menu and press Enter. Figure 6-74. BOOTP/DHCP Relay Interface Configuration screen The Action:< > field can be toggled between Add/Modify and Delete using the space bar. Toggle to Add/Modify and enter the subnet name for which BOOTP Relay will be active. The subnet's network IP address will be displayed in the IP Addr field. Enter the IP address of the BOOTP/DHCP server (or servers, as the case may be) in the last field, highlight APPLY and press Enter to enter the information into the BOOTP/DHCP Relay table. Use Save Changes from the Main Menu to enter the information into NV-RAM. DNS Relay To enter the IP addresses of DNS Relay servers, highlight DNS Relay on the Switch Utilities menu and press Enter. 122
-
 1
1 -
2
-
3
-
4
-
5
-
6
-
7
-
8
-
9
-
10
-
11
-
12
-
13
-
14
-
15
-
16
-
17
-
18
-
19
-
20
-
21
-
22
-
23
-
24
-
25
-
26
-
27
-
28
-
29
-
30
-
31
-
32
-
33
-
34
-
35
-
36
-
37
-
38
-
39
-
40
-
41
-
42
-
43
-
44
-
45
-
46
-
47
-
48
-
49
-
50
-
51
-
52
-
53
-
54
-
55
-
56
-
57
-
58
-
59
-
60
-
61
-
62
-
63
-
64
-
65
-
66
-
67
-
68
-
69
-
70
-
71
-
72
-
73
-
74
-
75
-
76
-
77
-
78
-
79
-
80
-
81
-
82
-
83
-
84
-
85
-
86
-
87
-
88
-
89
-
90
-
91
-
92
-
93
-
94
-
95
-
96
-
97
-
98
-
99
-
100
-
101
-
102
-
103
-
104
-
105
-
106
-
107
-
108
-
109
-
110
-
111
-
112
-
113
-
114
-
115
-
116
-
117
-
118
-
119
-
120
-
121
-
122
-
123
-
124
-
125
-
126
-
 127
127 -
 128
128 -
 129
129 -
 130
130 -
 131
131 -
 132
132 -
 133
133 -
 134
134 -
 135
135 -
 136
136 -
 137
137 -
138
-
139
-
140
-
141
-
142
-
143
-
144
-
145
-
146
-
147
-
148
-
149
-
150
-
151
-
152
-
153
-
154
-
155
-
156
-
157
-
158
-
159
-
160
-
161
-
162
-
163
-
164
-
165
-
166
-
167
-
168
-
169
-
170
-
171
-
172
-
173
-
174
-
175
-
176
-
177
-
178
-
179
-
180
-
181
-
182
-
183
-
184
-
185
-
186
-
187
-
188
-
189
-
190
-
191
-
192
-
193
-
194
-
195
-
196
-
197
-
198
-
199
-
200
-
201
-
202
-
203
-
204
-
205
-
206
-
207
-
208
-
209
-
210
-
211
-
212
-
213
-
214
-
215
-
216
-
217
-
218
-
219
-
220
-
221
-
222
-
223
-
224
-
225
-
226
-
227
-
228
-
229
-
230
-
231
-
232
-
233
-
234
-
235
-
236
-
237
 |
 |