Epson Equity LT User Manual - Page 105
APPENDIX D-PERFORMING SYSTEM DIAGNOSTICS, Starting System Diagnostics, Appendix D
 |
View all Epson Equity LT manuals
Add to My Manuals
Save this manual to your list of manuals |
Page 105 highlights
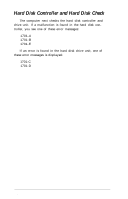
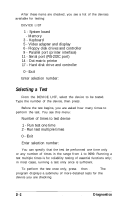
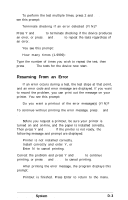
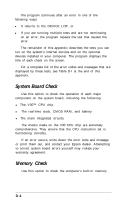
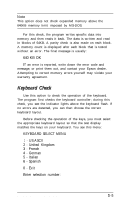
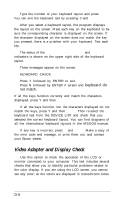
Appendix D Performing System Diagnostics This appendix describes how to check the operation of the main unit and peripheral devices of your Equity LT. You check these devices using the diagnostics program on your reference diskette. Run diagnostics if you are unsure whether a device is performing correctly. Table D-l at the end of this appendix lists the possible error messages you may see when testing these devices. Starting System Diagnostics To start the system diagnostics program, follow these steps: 1. Insert the reference diskette in drive A. 2. Turn on or reset the computer. The diagnostics program loads automatically and displays the main menu: OPERATION MENU 1 - Setup 2 - Format diskette 3 - System diagnostics 0 - Exit to DOS for more utilities Enter selection number: 3. Press 3 to select System diagnostics and press Enter. When you start the System diagnostics, the computer checks the following: l The setting of the DIP switches above the keyboard and on the back panel l The positions of the internal jumpers l The peripheral devices that are connected to the system. Performing System Diagnostics D-l
-
 1
1 -
2
-
3
-
4
-
5
-
6
-
7
-
8
-
9
-
10
-
11
-
12
-
13
-
14
-
15
-
16
-
17
-
18
-
19
-
20
-
21
-
22
-
23
-
24
-
25
-
26
-
27
-
28
-
29
-
30
-
31
-
32
-
33
-
34
-
35
-
36
-
37
-
38
-
39
-
40
-
41
-
42
-
43
-
44
-
45
-
46
-
47
-
48
-
49
-
50
-
51
-
52
-
53
-
54
-
55
-
56
-
57
-
58
-
59
-
60
-
61
-
62
-
63
-
64
-
65
-
66
-
67
-
68
-
69
-
70
-
71
-
72
-
73
-
74
-
75
-
76
-
77
-
78
-
79
-
80
-
81
-
82
-
83
-
84
-
85
-
86
-
87
-
88
-
89
-
90
-
91
-
92
-
93
-
94
-
95
-
96
-
97
-
98
-
99
-
 100
100 -
 101
101 -
 102
102 -
 103
103 -
 104
104 -
 105
105 -
 106
106 -
 107
107 -
 108
108 -
 109
109 -
 110
110 -
111
-
112
-
113
-
114
-
115
-
116
-
117
-
118
-
119
-
120
-
121
-
122
-
123
-
124
-
125
-
126
-
127
-
128
-
129
-
130
-
131
-
132
-
133
-
134
-
135
-
136
-
137
-
138
-
139
-
140
-
141
-
142
-
143
-
144
-
145
-
146
-
147
-
148
-
149
-
150
-
151
 |
 |