Epson Equity LT User Manual - Page 91
insert the outside tab first and then snap them back into
 |
View all Epson Equity LT manuals
Add to My Manuals
Save this manual to your list of manuals |
Page 91 highlights
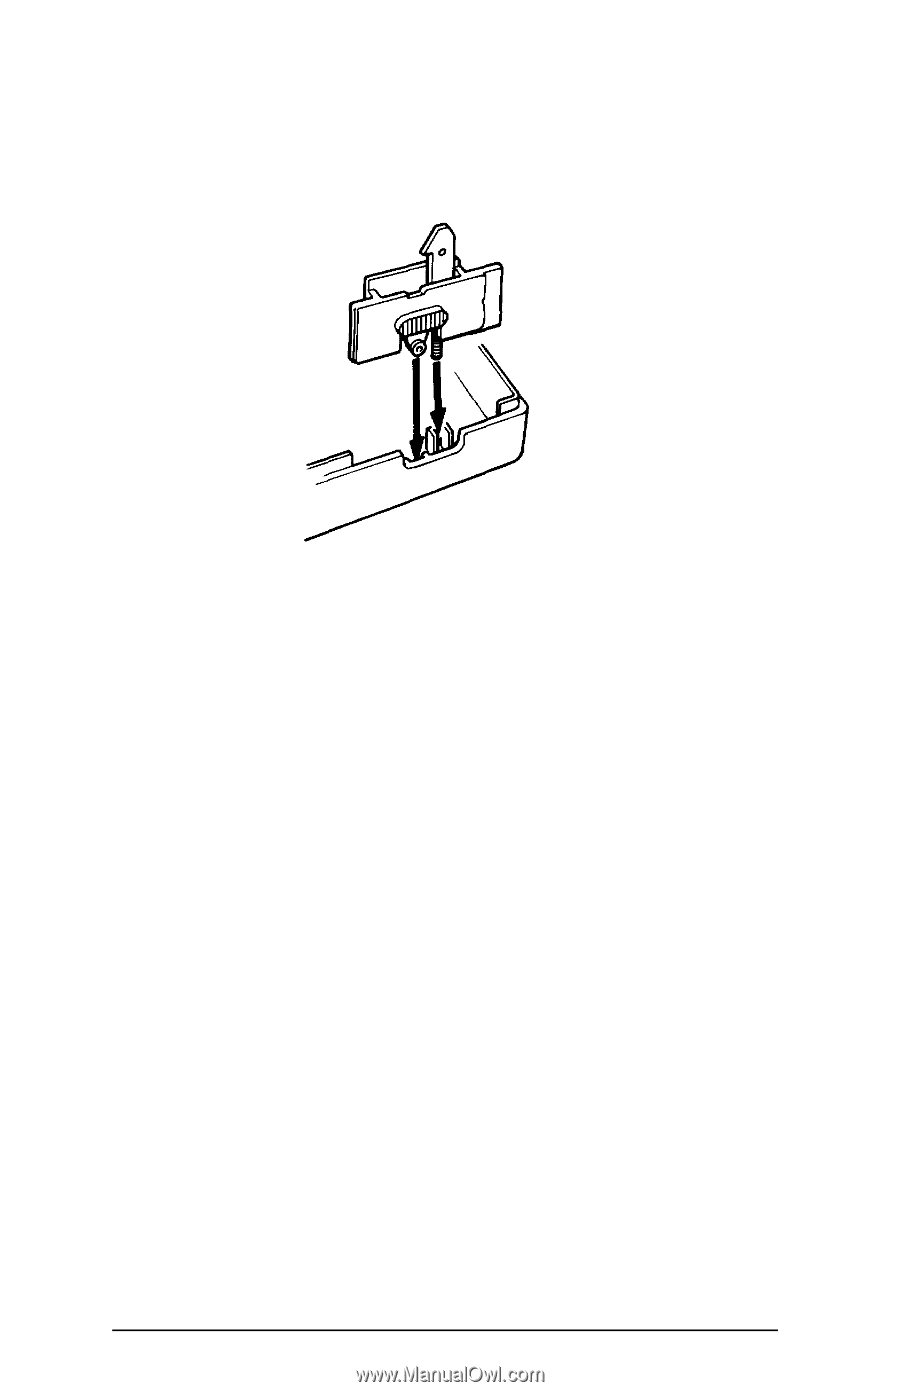
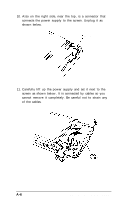
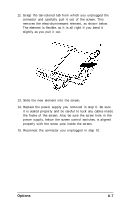
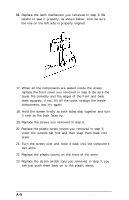
16. Replace the latch mechanism you removed in step 9. Be careful to seat it properly, as shown below. Also be sure the one on the left side is properly aligned. 17. When all the components are seated inside the screen, replace the front cover you removed in step 8. Be sure the cover fits correctly and the edges of the front and back meet squarely; if not, lift off the cover, re-align the inside components, and try again. 18. Hold the screen firmly so both sides stay together and turn it over so the back faces up. 19. Replace the screws you removed in step 6. 20. Replace the plastic screw covers you removed in step 5; insert the outside tab first and then snap them back into place. 21. Turn the screen over and slide it back into the computer's two arms. 22. Replace the plastic covers on the front of the arms. 23. Replace the screen switch tops you removed in step 2; you can just push them back on to the plastic stems. A-8 Options and Maintenance
-
 1
1 -
2
-
3
-
4
-
5
-
6
-
7
-
8
-
9
-
10
-
11
-
12
-
13
-
14
-
15
-
16
-
17
-
18
-
19
-
20
-
21
-
22
-
23
-
24
-
25
-
26
-
27
-
28
-
29
-
30
-
31
-
32
-
33
-
34
-
35
-
36
-
37
-
38
-
39
-
40
-
41
-
42
-
43
-
44
-
45
-
46
-
47
-
48
-
49
-
50
-
51
-
52
-
53
-
54
-
55
-
56
-
57
-
58
-
59
-
60
-
61
-
62
-
63
-
64
-
65
-
66
-
67
-
68
-
69
-
70
-
71
-
72
-
73
-
74
-
75
-
76
-
77
-
78
-
79
-
80
-
81
-
82
-
83
-
84
-
85
-
 86
86 -
 87
87 -
 88
88 -
 89
89 -
 90
90 -
 91
91 -
 92
92 -
 93
93 -
 94
94 -
 95
95 -
 96
96 -
97
-
98
-
99
-
100
-
101
-
102
-
103
-
104
-
105
-
106
-
107
-
108
-
109
-
110
-
111
-
112
-
113
-
114
-
115
-
116
-
117
-
118
-
119
-
120
-
121
-
122
-
123
-
124
-
125
-
126
-
127
-
128
-
129
-
130
-
131
-
132
-
133
-
134
-
135
-
136
-
137
-
138
-
139
-
140
-
141
-
142
-
143
-
144
-
145
-
146
-
147
-
148
-
149
-
150
-
151
 |
 |