Epson Equity LT User Manual - Page 90
and Maintenance, the frame of the screen. Also be sure the screw hole in
 |
View all Epson Equity LT manuals
Add to My Manuals
Save this manual to your list of manuals |
Page 90 highlights
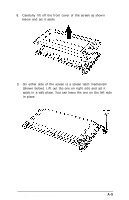
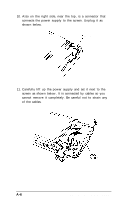
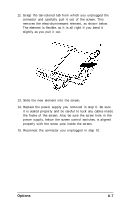
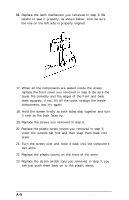
12. Grasp the tan-colored tab from which you unplugged the connector and carefully pull it out of the screen. This removes the electroluminescent element, as shown below. The element is flexible, so it is all right if you bend it slightly as you pull it out. 13. Slide the new element into the screen. 14. Replace the power supply you removed in step Il. Be sure it is seated properly and be careful to tuck any cables inside the frame of the screen. Also be sure the screw hole in the power supply, below the screen control switches, is aligned properly with the screw post inside the screen. 15. Reconnect the connector you unplugged in step 10. Options and Maintenance A-7
-
 1
1 -
2
-
3
-
4
-
5
-
6
-
7
-
8
-
9
-
10
-
11
-
12
-
13
-
14
-
15
-
16
-
17
-
18
-
19
-
20
-
21
-
22
-
23
-
24
-
25
-
26
-
27
-
28
-
29
-
30
-
31
-
32
-
33
-
34
-
35
-
36
-
37
-
38
-
39
-
40
-
41
-
42
-
43
-
44
-
45
-
46
-
47
-
48
-
49
-
50
-
51
-
52
-
53
-
54
-
55
-
56
-
57
-
58
-
59
-
60
-
61
-
62
-
63
-
64
-
65
-
66
-
67
-
68
-
69
-
70
-
71
-
72
-
73
-
74
-
75
-
76
-
77
-
78
-
79
-
80
-
81
-
82
-
83
-
84
-
 85
85 -
 86
86 -
 87
87 -
 88
88 -
 89
89 -
 90
90 -
 91
91 -
 92
92 -
 93
93 -
 94
94 -
 95
95 -
96
-
97
-
98
-
99
-
100
-
101
-
102
-
103
-
104
-
105
-
106
-
107
-
108
-
109
-
110
-
111
-
112
-
113
-
114
-
115
-
116
-
117
-
118
-
119
-
120
-
121
-
122
-
123
-
124
-
125
-
126
-
127
-
128
-
129
-
130
-
131
-
132
-
133
-
134
-
135
-
136
-
137
-
138
-
139
-
140
-
141
-
142
-
143
-
144
-
145
-
146
-
147
-
148
-
149
-
150
-
151
 |
 |
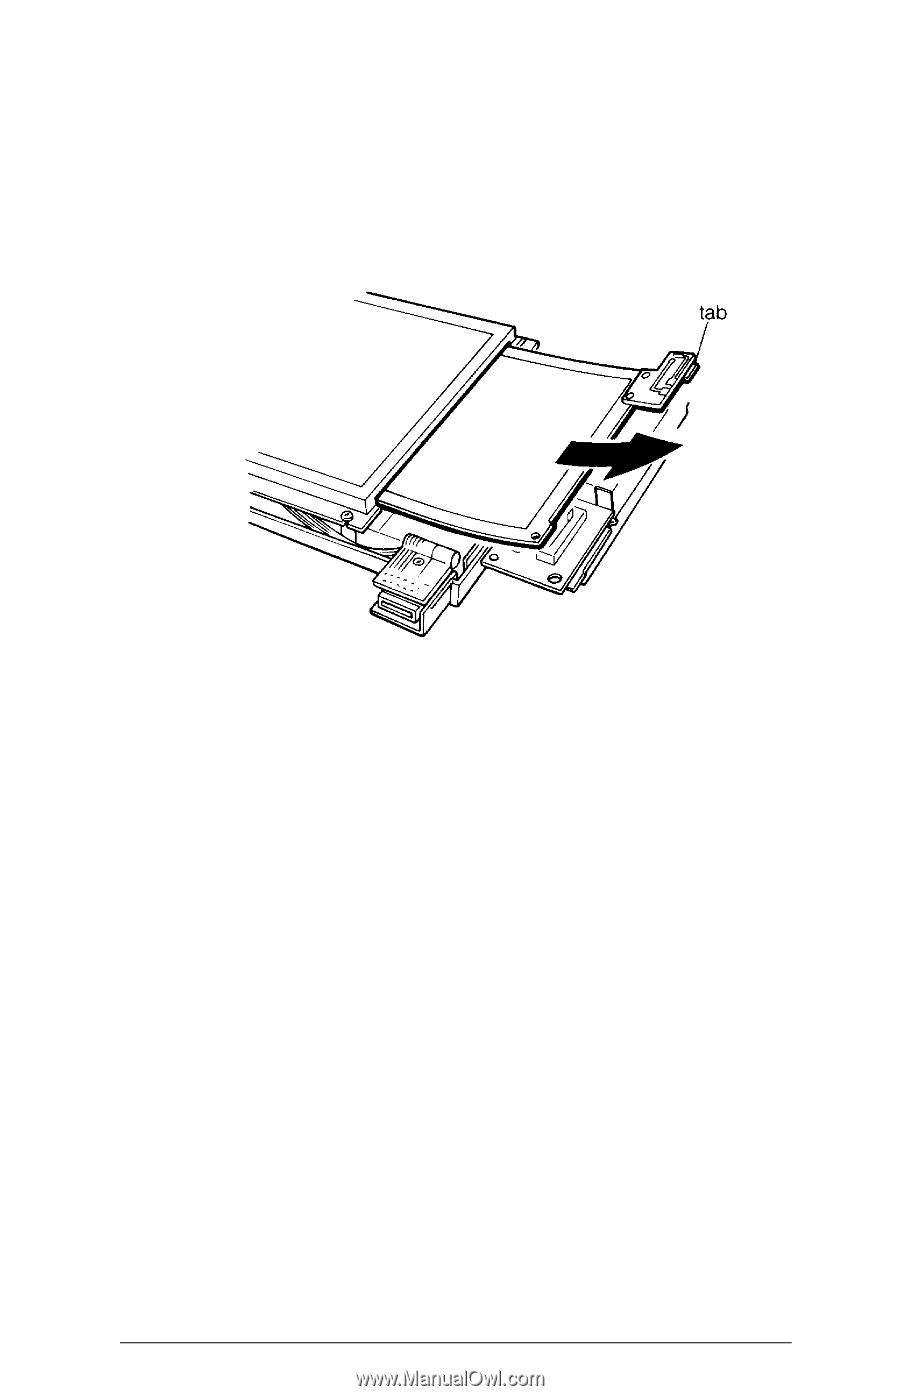
12. Grasp the tan-colored tab from which you unplugged the
connector and carefully pull it out of the screen. This
removes the electroluminescent element, as shown below.
The element is flexible, so it is all right if you bend it
slightly as you pull it out.
13. Slide the new element into the screen.
14. Replace the power supply you removed in step Il. Be sure
it is seated properly and be careful to tuck any cables inside
the frame of the screen. Also be sure the screw hole in the
power supply, below the screen control switches, is aligned
properly with the screw post inside the screen.
15. Reconnect the connector you unplugged in step 10.
Options
and Maintenance
A-7