Epson Equity LT User Manual - Page 21
Charging the Battery, Connecting a Printer
 |
View all Epson Equity LT manuals
Add to My Manuals
Save this manual to your list of manuals |
Page 21 highlights
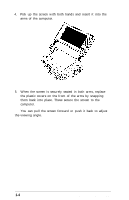
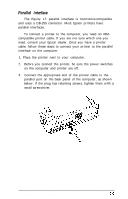
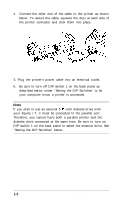
3. Plug the other end of the power cord into a 120 volt electrical wall outlet. When the adapter is connected to both the computer and an electrical outlet, the AC power indicator light turns on. This light is a convenient way to verify that the AC adapter is providing power to the computer. Be sure to read 'Using the Adapter" in Chapter 3 for information on powering the computer with the AC adapter. 4 Charging the Battery The Equity LT contains a rechargeable NiCad (nickel cadmium) battery pack that powers the computer when you are not using the AC adapter. Before you can use the computer the first time, you must charge the battery. When you plugged in the AC adapter in step 3, it started charging the battery. This happens whenever the adapter is connected to the computer and plugged into an electrical outlet. Let the battery charge for at least five minutes before you start using the computer for the first time and leave the AC adapter connected while you use the computer. Be sure to read "Using the Battery" in Chapter 3 for information on using the computer with the battery. It explains how to fully charge the battery; you should do this as soon as possible with your new computer. 5 Connecting a Printer The Equity LT has both parallel and serial interfaces. You can easily connect a printer or plotter that has either type of interface-just follow the instructions below. Of course, Epson offers a full range of printer products; consult your dealer for more information. 1-6 Setting Up Your System
-
 1
1 -
2
-
3
-
4
-
5
-
6
-
7
-
8
-
9
-
10
-
11
-
12
-
13
-
14
-
15
-
 16
16 -
 17
17 -
 18
18 -
 19
19 -
 20
20 -
 21
21 -
 22
22 -
 23
23 -
 24
24 -
 25
25 -
 26
26 -
27
-
28
-
29
-
30
-
31
-
32
-
33
-
34
-
35
-
36
-
37
-
38
-
39
-
40
-
41
-
42
-
43
-
44
-
45
-
46
-
47
-
48
-
49
-
50
-
51
-
52
-
53
-
54
-
55
-
56
-
57
-
58
-
59
-
60
-
61
-
62
-
63
-
64
-
65
-
66
-
67
-
68
-
69
-
70
-
71
-
72
-
73
-
74
-
75
-
76
-
77
-
78
-
79
-
80
-
81
-
82
-
83
-
84
-
85
-
86
-
87
-
88
-
89
-
90
-
91
-
92
-
93
-
94
-
95
-
96
-
97
-
98
-
99
-
100
-
101
-
102
-
103
-
104
-
105
-
106
-
107
-
108
-
109
-
110
-
111
-
112
-
113
-
114
-
115
-
116
-
117
-
118
-
119
-
120
-
121
-
122
-
123
-
124
-
125
-
126
-
127
-
128
-
129
-
130
-
131
-
132
-
133
-
134
-
135
-
136
-
137
-
138
-
139
-
140
-
141
-
142
-
143
-
144
-
145
-
146
-
147
-
148
-
149
-
150
-
151
 |
 |