Kyocera FS-1135MFP KM-NET ADMIN Operation Guide for Ver 2.0 - Page 52
Polling Defaults, Setting Polling Defaults, Alert Configuration, Custom Alert Sets
 |
View all Kyocera FS-1135MFP manuals
Add to My Manuals
Save this manual to your list of manuals |
Page 52 highlights
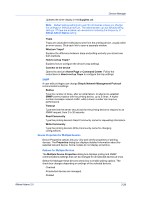
Device Manager Some selected devices are managed and some are not. Cleared None of the selected devices are being managed. Polling With the check box selected for the Manage these devices check box, select the desired polling options and set the time in seconds, minutes, or hours. SNMP Communications With any option selected for the Manage these devices check box, a user with privileges can change SNMP Communications settings. Polling Defaults The administrator can set default times for each polling option. You can apply the default settings to newly-discovered printing devices. Polling defaults can also be set in Device Manager > Preferences. Setting Polling Defaults The administrator can set default times for each polling option. The default settings are applied to newly-discovered printing devices. 1 In Device Manager, click Preferences > Polling Defaults. 2 Under Enable Default, select the polling type you want to set. Status Polling, Counter Polling, and Toner Level Polling are selected by default. 3 Under Default Interval, enter the default time within the range displayed under Allowed Range. 4 Click Submit. Alert Configuration KMnet Admin polls supported printers for status information and the collected information can be sent to users as alerts. Alerts are delivered by e-mail. Custom Alert Sets Alerts are grouped into a list of predefined alert sets. To view a default alert set, select from the list in View Default Alert Sets. You can create up to four custom Alert Sets by selecting the available alerts. Creating a Custom Alert Custom alerts can be set to notify you when status has changed. 1 In Device Manager, click Preferences > Alert Configuration. 2 In the Modify Custom Alert Sets list, select a name for the alert (Custom 1 through Custom 4). 3 You can rename the custom list by clicking Rename Alert Set icon in the toolbar and typing a new name. Do not use invisible Unicode or extended ASCII characters. 3-30 User Guide
-
 1
1 -
2
-
3
-
4
-
5
-
6
-
7
-
8
-
9
-
10
-
11
-
12
-
13
-
14
-
15
-
16
-
17
-
18
-
19
-
20
-
21
-
22
-
23
-
24
-
25
-
26
-
27
-
28
-
29
-
30
-
31
-
32
-
33
-
34
-
35
-
36
-
37
-
38
-
39
-
40
-
41
-
42
-
43
-
44
-
45
-
46
-
 47
47 -
 48
48 -
 49
49 -
 50
50 -
 51
51 -
 52
52 -
 53
53 -
 54
54 -
 55
55 -
 56
56 -
 57
57 -
58
-
59
-
60
-
61
-
62
-
63
-
64
-
65
-
66
-
67
-
68
-
69
-
70
-
71
-
72
-
73
-
74
-
75
-
76
-
77
-
78
-
79
-
80
-
81
-
82
-
83
-
84
-
85
-
86
-
87
-
88
-
89
-
90
-
91
-
92
-
93
-
94
-
95
-
96
-
97
-
98
-
99
-
100
-
101
-
102
-
103
-
104
-
105
-
106
-
107
 |
 |
