Kyocera FS-1135MFP KM-NET ADMIN Operation Guide for Ver 2.0 - Page 76
Print Job Manager Console, Navigation Area, admin, User name, Password, Log
 |
View all Kyocera FS-1135MFP manuals
Add to My Manuals
Save this manual to your list of manuals |
Page 76 highlights
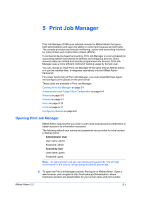
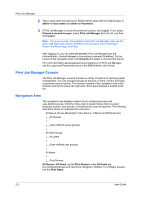
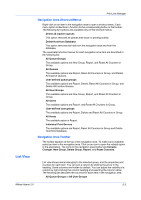
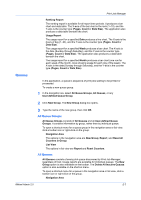
Print Job Manager 2 Type a user name and password. KMnet Admin ships with the default logon of admin for User name and admin for Password. 3 If Print Job Manager is set as the preferred console, click Log In. If not, select Choose a console to open, select Print Job Manager from the list, and then click Log In. Note: If pop-up blockers are enabled, these Print Job Manager tasks will not open: Add Alert Subscription, Add Report Subscription, Device Manager Report, the About page, and Help. After logging on, you can alternate between Print Job Manager and the Administration, Device Manager or Accounting consoles (if installed). On the toolbar of the navigation area, click Console and select a console from the list. For more information about passwords and logging on to Print Job Manager, see the Logon and Passwords topics in the KMnet Admin User Guide. Print Job Manager Console The Print Job Manager console provides a variety of options for printing system management. You can construct groups by devices or users, monitor print jobs, or generate various reports. The console consists of the navigation area in the left pane and the list viewin the right pane. Each pane displays a toolbar at the top. Navigation Area The navigation area displays a layout of pre-configured groups and user-defined groups. Click the minus sign to expand these items to select particular queues, user groups, or hosts that you want to examine. The following illustration shows an example of the structure. All Queue Groups (Examples: Color Device, or Black and White Device) |__ All Queues | |__ (User-defined queue groups) | All User Groups |__ All Users | |__ (User-defined user groups) | All Hosts | |__ Print Servers All Queues, All Users, and all Print Servers under All Hosts are pre-configured groups and cannot be changed or deleted. To configure queues, use the Host Agent. 5-2 User Guide
-
 1
1 -
2
-
3
-
4
-
5
-
6
-
7
-
8
-
9
-
10
-
11
-
12
-
13
-
14
-
15
-
16
-
17
-
18
-
19
-
20
-
21
-
22
-
23
-
24
-
25
-
26
-
27
-
28
-
29
-
30
-
31
-
32
-
33
-
34
-
35
-
36
-
37
-
38
-
39
-
40
-
41
-
42
-
43
-
44
-
45
-
46
-
47
-
48
-
49
-
50
-
51
-
52
-
53
-
54
-
55
-
56
-
57
-
58
-
59
-
60
-
61
-
62
-
63
-
64
-
65
-
66
-
67
-
68
-
69
-
70
-
 71
71 -
 72
72 -
 73
73 -
 74
74 -
 75
75 -
 76
76 -
 77
77 -
 78
78 -
 79
79 -
 80
80 -
 81
81 -
82
-
83
-
84
-
85
-
86
-
87
-
88
-
89
-
90
-
91
-
92
-
93
-
94
-
95
-
96
-
97
-
98
-
99
-
100
-
101
-
102
-
103
-
104
-
105
-
106
-
107
 |
 |