Kyocera KM-8530 KM-8530 Operation Guide
Kyocera KM-8530 Manual
 |
View all Kyocera KM-8530 manuals
Add to My Manuals
Save this manual to your list of manuals |
Kyocera KM-8530 manual content summary:
- Kyocera KM-8530 | KM-8530 Operation Guide - Page 1
KM-8530 OPERATION GUIDE Please read the Operation Guide before using the copier. Keep it in the designated location for easy reference. - Kyocera KM-8530 | KM-8530 Operation Guide - Page 2
when 15 minutes have elapsed after completion of the last copy, with the copier remaining in the ready to copy state during that time. The time period for 90 minutes have elapsed after completion of the last copy, with the copier remaining in the ready to copy state during that time. The time - Kyocera KM-8530 | KM-8530 Operation Guide - Page 3
Features of the KM-8530 Basic 1 Safety (Auto Shut-Off 2-20 Shutting Off / Reducing the Power Manually 2-21 Entering an ECM Password (ECM 2-22 Loading Paper 2-23 Loading Paper in Tray 4 Job Memory &Help Mode 5 Troubleshooting 6 Machine Specifications 7 Advanced Information 8 Special Original 9 - Kyocera KM-8530 | KM-8530 Operation Guide - Page 4
Contents (continued) 3 Copying Operations Section 3: Copying Operations Positioning Originals 3-2 Positioning Originals in RADF 3-2 Positioning Original on Platen Glass 3-6 Setting Print Quantity 3-7 To Set Print Quantity 3-7 To Change Print Quantity 3-7 Setting Job During Warm-up 3-8 To - Kyocera KM-8530 | KM-8530 Operation Guide - Page 5
Screen for Operation Guide (Help Mode 4-6 To Display Help Screen from Basic Screen 4-6 To Display Help Screen from Other Screens 4-8 5 Troubleshooting Section 5: Troubleshooting When "Call for Service" Message Is Displayed 5-2 Limited Use of the Copier in Trouble 5-3 Preventive Maintenance - Kyocera KM-8530 | KM-8530 Operation Guide - Page 6
(Folding / Stapling&Folding 7-8 Punching File Holes in Copies (Punch 7-11 Output Z-Folded Copies (Z-Folding 7-14 Making Trimmed Booklet (Trimming 7-17 Cover Sheet Feeding 7-20 Using Finisher Manually 7-23 Using Two Copiers in Tandem 7-26 To Stop Scanning/Printing 7-30 Troubleshooting ...7-31 - Kyocera KM-8530 | KM-8530 Operation Guide - Page 7
10-37 Transmitting/Editing Machine Setting File (Environment Setup 10-41 v 1 Safety Information 2 Machine Information 3 Copying Operations 4 Job Memory &Help Mode 5 Troubleshooting 6 Machine Specifications 7 Advanced Information 8 Special Original 9 Applications 10 Network Function 11 Paper - Kyocera KM-8530 | KM-8530 Operation Guide - Page 8
& Supplies Adding Toner ...12-2 Inserting a New Staple Cartridge into DF- Glass 12-15 Cleaning the RADF Platen Guide Cover 12-16 Checking Copy Count Copier Initial Setting 13-10 [3] User Setting Mode 13-12 [1] User Density Level 1 Setting 13-12 [2] User Density Level 2 Setting 13-13 [3] User - Kyocera KM-8530 | KM-8530 Operation Guide - Page 9
Action On/Off Setting 13-32 [4] Lunch Hour Off Setting 13-34 [5] Timer Interrupt Password Setting 13-35 [10] Control Panel Adjustment 13-36 [11] Tray Auto Select Operations 4 Job Memory &Help Mode 5 Troubleshooting 6 Machine Specifications 7 Advanced Information 8 Special Original 9 Applications - Kyocera KM-8530 | KM-8530 Operation Guide - Page 10
of the KM-8530 • All-Image an appropriate magnification ratio when Copy Size is selected manually. Automatically selected when the AMS key is touched. specified period of copier inactivity. • Auto Reset Automatically resets to auto mode defaults after a specified period of copier inactivity. • Auto - Kyocera KM-8530 | KM-8530 Operation Guide - Page 11
the KM-8530 ( multi-page report at the same time as saving paper. • Copy Density Manually selects up to 9 density levels. • Copy Mode Selects the desired simplex screen and prints the following data: total counter of the machine, copier counter, print counter and the date when the counter started. • - Kyocera KM-8530 | KM-8530 Operation Guide - Page 12
, four enlargement, and three user-set ratios. Zoom ratios can on LCD for confirmation. • Manual Shut-off Shuts off the KM-8530 cannot detect, in order to select the optimal paper size for copying or printing. • Output Mode for Machine with DF-630/635 Finisher Installed: Non-Sort, Sort, Staple - Kyocera KM-8530 | KM-8530 Operation Guide - Page 13
the KM-8530 ( Finisher with PI-108 Cover Sheet Feeder Installed: Cover Sheet mode Manual Finishing mode For details, see Section 7: Advanced Information. • Overlay off all but nominal power supply after a specified period of copier inactivity, for optimal efficiency. Power is returned after a brief - Kyocera KM-8530 | KM-8530 Operation Guide - Page 14
width setting (10 ~ 150mm) permits in manual or auto. • Reserve Scans in subsequent copy jobs while the KM-8530 is busy printing or copying. • Reverse Image presentation and usefulness of the copies. • Staple Selects the stapling position and number of staples. • STD Size (Special) Detects the - Kyocera KM-8530 | KM-8530 Operation Guide - Page 15
KM-8530 (continued) • Tab Paper Copies onto tabbed sheets from tabbed originals, allowing the image on the tab part of the original to be printed on the same part of the tabbed copy paper. • Tandem Mode for Two Copiers : Trim the end of folded or stapled&folded booklets. • Userset Density (USERSET - Kyocera KM-8530 | KM-8530 Operation Guide - Page 16
- Kyocera KM-8530 | KM-8530 Operation Guide - Page 17
Basic 1 Safety Information 2 Machine Information 3 Copying Operations 4 Job Memory &Help Mode 5 Troubleshooting 6 Machine Specifications - Kyocera KM-8530 | KM-8530 Operation Guide - Page 18
- Kyocera KM-8530 | KM-8530 Operation Guide - Page 19
1 Safety Information 1 Safety Information Precautions for Installation and Use Caution Labels and Indicators 1-2 Regulations 1-5 Requirements for Safe Use 1-6 - Kyocera KM-8530 | KM-8530 Operation Guide - Page 20
Caution Labels and Indicators The caution labels and indicators are attached to the machine areas, as shown below, where you are advised to pay special attention to avoid any dangerous situations or serious injury. This internal area is very hot. To avoid getting burned, DO NOT TOUCH. Cette zone - Kyocera KM-8530 | KM-8530 Operation Guide - Page 21
Caution Labels and Indicators (continued) 1 Safety Information Tray 1 Tray 2 Tray 3 DF-635 Finisher (DF-635 only) CAUTION DO NOT put your hand between the main body and tray; otherwise you may be injured. (DF-630/635) CAUTION Inside the lower paper exit outlet is the roller drive unit. DO NOT - Kyocera KM-8530 | KM-8530 Operation Guide - Page 22
contact your service representative for replacement labels. The following indicators are used on the caution labels or in this manual to categorize injury, machine trouble or physical damage. If you find any of these indicators when removing jammed paper, adding toner, or reading the manual, be - Kyocera KM-8530 | KM-8530 Operation Guide - Page 23
The KM-8530 generates, uses, and can radiate radio frequency energy. If it is not installed and used in accordance with the instruction manual, interference FDA Regulations This Copier is certified as a "Class 1" laser product under the U.S.Department of Health and Human Service (DHHS) Radiation - Kyocera KM-8530 | KM-8530 Operation Guide - Page 24
-outlet shall be installed near the equipment and shall be easily accessible. • Do not bend or crush the power cord. If your copier power cord is bent or damaged in any way, contact your service representative immediately. Do not attempt to repair it yourself, and do not continue to operate the - Kyocera KM-8530 | KM-8530 Operation Guide - Page 25
Prevention of Short Circuit Do not install the copier where it could be splashed with rain water room, many copies are made, or more than one copier is used at the same time, an odor may be CAUTION: Transportation Be sure to contact your service representative when moving or transporting the machine. - Kyocera KM-8530 | KM-8530 Operation Guide - Page 26
sufficient space for facilitating copy operation, changing parts, and periodic inspection. Leave an adequate space (120) 45.7 (1160) 3.9 (100) 12.7 (322) 21.5 (546) 1 2 3 69.4 (1762) 61.4 (1560) KM-8530 34.9 (887) 15.2 (386) 3.9 15.7 (100) (400) 72.6 (1845) 37.4 (950) Unit: inches (mm) 30 - Kyocera KM-8530 | KM-8530 Operation Guide - Page 27
(626) 3.9 (100) 15.7 (400) 37.4 (950) 61.4 (1560) 45.7 (1160) Unit: inches (mm) 30.5 4.7 (775) (120) 111.35 (2828) 141.8 (3601) 30.45 (773) KM-8530 + DF-635 + PU-108/PZ-108 + TU-108 + LT-412 72.6 (1845) Reminder! Finisher primary (main) tray of DF-630/635 Finisher gradually goes down - Kyocera KM-8530 | KM-8530 Operation Guide - Page 28
Routine Handling WARNING: High Voltage DO NOT TOUCH the high voltage parts indicated with WARNING label or described in the manual. CAUTION: Actions in Response to Troubles • If the Service Call screen is displayed and copier operations cannot be continued anymore, stop the operation to prevent any - Kyocera KM-8530 | KM-8530 Operation Guide - Page 29
Check paper to be sure it conforms to the specifications outlined in Section 11. • Do not use paper with staples or paper that conducts electricity (silver, carbon, etc.), otherwise an accident may occur as a result of fire. • To avoid machine trouble, do not use heat-sensitive paper, paper that - Kyocera KM-8530 | KM-8530 Operation Guide - Page 30
Be careful when withdrawing the fixing unit. WARNING: Drum Unit The internal drum unit generates a high voltage. To avoid an electrical shock, DO NOT TOUCH. CAUTION: Disposal of Copier Do not dispose of this copier yourself. Contact your service representative, who can arrange for its safe disposal - Kyocera KM-8530 | KM-8530 Operation Guide - Page 31
Requirements for Safe Use (continued) 1 Safety Information CAUTION: DF-630/635 Finisher Primary (Main) Tray When printed materials are removed from the primary (main) tray of the Finisher, the tray goes up automatically. To avoid injury, DO NOT put your hand on top of the printed sheets. Be sure - Kyocera KM-8530 | KM-8530 Operation Guide - Page 32
- Kyocera KM-8530 | KM-8530 Operation Guide - Page 33
2 Machine Information 2 Machine Information Machine Configuration Turn On/Off the Power Loading Paper Machine Configuration, Turning On the Power and Loading Paper Machine Configuration 2-2 Turning On the Power Switch 2-17 Loading Paper 2-23 - Kyocera KM-8530 | KM-8530 Operation Guide - Page 34
Machine Configuration External Machine Items 17 Control panel 16 LCD touch screen 1 RADF 2 Work table 3 Multi-sheet bypass tray 15 Power switch 12 DF-630/DF-635 Finisher (option) 10 Front door 9 Left door 14 Cover sheet feeder PI-108 (option) 8 Tray 1 7 Tray 2 6 Tray 3 5 Right side door (not - Kyocera KM-8530 | KM-8530 Operation Guide - Page 35
sets. DF-635 also folds or staples & folds copies into booklet-styled sets. 13 TU-108 Trimmer unit (option) trims the end of booklet. 14 PI-108 Cover sheet feeder (option) loads cover sheet paper and feeds the sheet as cover. 15 Power switch turns copier power On/Off when pressed. 16 - Kyocera KM-8530 | KM-8530 Operation Guide - Page 36
of mishandled paper. 4 Lever A can be moved to withdraw the conveyance fixing unit for removal of mishandled paper. 5 Drum unit forms the copy image. 6 Fixing unit fuses the toner onto the copy paper. 7 Reset switch used only by service representative turns machine power on/off when pressed. 2-4 - Kyocera KM-8530 | KM-8530 Operation Guide - Page 37
Memory unit 2 Machine Information Machine Configuration Turn On/Off the Power Loading Paper DF-630 Finisher KM-8530 main body LT-402 Large capacity tray DF-635 Finisher Printing System (2) Printer controller UG-1 Postscript kit IB-1 Network Board LT-412 Large capacity tray TU-108 Trimmer unit - Kyocera KM-8530 | KM-8530 Operation Guide - Page 38
mode outlet (DF-635 Finisher only) outputs finished copied sets when selecting Folding mode or Stapling & Folding mode. 3 Booklet tray (DF-635 Finisher only) holds sets output in Folding mode or Stapling & Folding mode. 4 Primary (Main) tray holds sets output in Non-sort mode, Sort mode (offset - Kyocera KM-8530 | KM-8530 Operation Guide - Page 39
opens to remove mishandled paper. 4 Left lever opens to remove mishandled paper. 5 Stacker unit holds stapler, and also holds the device to provide Folding and Stapling&Folding mode in DF-635. 6 Stacker unit handle withdraws unit to allow removal of mishandled paper and replacement of - Kyocera KM-8530 | KM-8530 Operation Guide - Page 40
Machine Configuration (continued) PI-108 Cover Sheet Feeder 2 Cover sheet feeder 3 Cover sheet feeder guide plate 1 Manual finishing operation panel 1 Manual finishing operation panel controls cover sheet feeder operations. 2 Cover sheet feeder holds cover sheets for use in cover sheet output - Kyocera KM-8530 | KM-8530 Operation Guide - Page 41
2 LCT left side door opens to allow removal of mishandled paper. 3 LCT lever can be moved downward to ease removal of mishandled paper. 4 LCT paper guides hold copy paper to fix the position. 5 Paper loading button is pressed to lower the bottom plate to allow loading paper. 6 LCT bottom plate goes - Kyocera KM-8530 | KM-8530 Operation Guide - Page 42
TU-108 Trimmer Unit Machine Configuration (continued) DF-635 Finisher 5 Trimmer stacker cover 4 Trimmer unit tray 1 Front-right cover 2 Front door 3 Trimmer stacker 1 Front-right cover opens to allow removal of mishandled paper. 2 Front door opens to allow removal of mishandled paper or waste - Kyocera KM-8530 | KM-8530 Operation Guide - Page 43
Machine Configuration (continued) 1 Trimmer unit knob 2 Machine Information Machine Configuration Turn On/Off the Power Loading Paper 3 Trimmer pressure release lever 2 Trash basket 1 Trimmer unit knob can be turned to ease removal of mishandled paper. 2 Trash basket holds waste paper cut off - Kyocera KM-8530 | KM-8530 Operation Guide - Page 44
PU-108 Punching Unit Machine Configuration (continued) 1 Punching unit front door 4 Knob 5 Left lever 6 Trash basket 3 Upper lever 2 Right lever 1 Punching unit front door opens to allow removal of mishandled paper or waste paper. 2 Right lever opens to allow removal of mishandled paper. 3 - Kyocera KM-8530 | KM-8530 Operation Guide - Page 45
Machine Configuration (continued) PZ-108 Punching / Z-Folding Unit 4 Handle 3 Knob 2 Machine Information Machine Configuration Turn On/Off the Power Loading Paper 5 Left lever 1 Punching / Z-Folding unit front door 6 Trash basket 2 Right lever 1 Punching / Z-Folding unit front door opens to - Kyocera KM-8530 | KM-8530 Operation Guide - Page 46
reserve jobs can be set. The arrow keys at the right side of folder keys are used to scroll. 2 Notice icons : ADD TONER icon is displayed when toner supply becomes low. : PM CALL icon is displayed when preventive maintenance is due. 3 Message area displays the machine status and procedure required - Kyocera KM-8530 | KM-8530 Operation Guide - Page 47
Machine Configuration (continued) : Sub icon is displayed when the copier operates in tandem with the primary (master) copier. : HDD icon is displayed when using Image Store & Output mode of Server function. : Original direction icon indicates the original direction specified on the Special Original - Kyocera KM-8530 | KM-8530 Operation Guide - Page 48
deletes the stored memory. 8 TIMER lights when the timer function is set. 9 POWER SAVER ON/OFF activates power-saving mode for times when the copier is inactive, or activates Timer Interrupt mode when Weekly Timer function is active. 10 START activates copying or scanning. 11 [C] (CLEAR QTY.) allows - Kyocera KM-8530 | KM-8530 Operation Guide - Page 49
Machine Information Machine Configuration Turn On/Off the Power Loading Paper HINT If the copier will not be turned on by the power switch, open the left door of the main body, then check that the internal reset switch of the copier is ON. (See p. 2-4.) Be sure not to use the reset switch in - Kyocera KM-8530 | KM-8530 Operation Guide - Page 50
now available. DETAILS • When the initial settings are changed by the Key Operator, the modified conditions will be displayed on the Basic Screen. • When "Enter E.C.M. password" is displayed, enter your password to use the machine. 2-18 - Kyocera KM-8530 | KM-8530 Operation Guide - Page 51
Turning On the Power Switch (continued) To Turn Off the Power 1. Turn OFF the power switch. The power switch is located on the left side of the main body. The touch screen and all the LEDs on the control panel will go out. 2 Machine Information Machine Configuration Turn On/Off the Power Loading - Kyocera KM-8530 | KM-8530 Operation Guide - Page 52
lowers the power after a specified period (initially 15 minutes) of copier inactivity. The LCD screen becomes dark with the message "Low Power Key Operator setting, see p. 13-38. • When "Timer interrupt mode / Enter password" is displayed after pressing [POWER SAVER ON/OFF], see p. 7-2 and follow - Kyocera KM-8530 | KM-8530 Operation Guide - Page 53
Information Machine Configuration Turn On/Off the Power Loading Paper INTERRUPT PROOF COPY TIMER POWER SAVER ON / OFF STOP TY. START DETAILS If Manual Low Power is selected in the Key Operator setting, the machine automatically activates the Low Power mode before releasing [POWER SAVER ON/OFF - Kyocera KM-8530 | KM-8530 Operation Guide - Page 54
all copying activities by controlling ECM password accounts. Copy quantity limits for specific accounts can be set. The ECM is not factory-set. An ECM password is required only when the ECM is activated, a User Password is assigned, and "Enter E.C.M. password" is displayed on the touch screen - Kyocera KM-8530 | KM-8530 Operation Guide - Page 55
Loading Paper A paper indicator is shown on each tray key of the Basic Screen to indicate the paper level of the tray. (Six levels are provided: ) When paper in a tray becomes empty, the indicator " " appears on the tray key. 2 Machine Information Machine Configuration Turn On/Off the Power - Kyocera KM-8530 | KM-8530 Operation Guide - Page 56
and the left side) to the edge of the paper. Release the release knob to lock the side guide plate. Reminder! • Be sure that the rear guide plate is securely aligned to the paper; otherwise machine trouble may occur. • Be sure that the green levers are securely aligned to the paper; otherwise the - Kyocera KM-8530 | KM-8530 Operation Guide - Page 57
LT-412 Reminder! Be sure to load only the paper size set for the LCT. To change the paper size of the LCT, contact your service representative. 2-25 - Kyocera KM-8530 | KM-8530 Operation Guide - Page 58
3 until the bottom plate will not go down any more. LT-402 LT-412 Reminder! • Do not load above the red line on the side guide plates. • Be sure that the rear stopper is correctly positioned according to the paper size to be loaded; otherwise machine - Kyocera KM-8530 | KM-8530 Operation Guide - Page 59
1. Open the Multi-sheet bypass tray located on the right side of the copier. When loading large paper, withdraw the right edge of the Multi-sheet bypass /Off the Power Loading Paper 2. Load copy paper, and adjust the paper guides to the paper size. The loaded paper size will be indicated on the - Kyocera KM-8530 | KM-8530 Operation Guide - Page 60
Loading Paper (continued) Loading Tabbed Sheets in Tray 1, 2, or 3 When TAB is displayed on the tray key of the Basic Screen, follow the procedure below to supply the tray with tabbed sheets. HINT The tray paper type can be specified in the Key Operator setting. For details, see p. 13-23 to p. 13-24 - Kyocera KM-8530 | KM-8530 Operation Guide - Page 61
/Off the Power Loading Paper Reminder! • The tab extension width should be 12.5mm or less. • To load the tabbed sheets into LCT, contact your service representative to position the rear stopper for the paper size to be loaded. 1. Open the LCT top door. 2. Press the paper loading button to lower - Kyocera KM-8530 | KM-8530 Operation Guide - Page 62
extension width should be 12.5mm or less. 1. Open the Multi-sheet bypass tray located on the right side of the copier. 2. Load tabbed sheets as illustrated above. 3. Adjust the paper guides to the paper size. 4. Specify the paper type as TAB for the Multi-sheet bypass tray. HINT See p. 3-30 to - Kyocera KM-8530 | KM-8530 Operation Guide - Page 63
3 Copying Operations How to Make a Basic Copy Positioning Originals 3-2 Setting Print Quantity 3-7 Setting Job During Warm-up 3-8 To Stop Scanning/Printing 3-10 Selecting Copy Size 3-11 Selecting Magnification Ratio (Lens Mode 3-15 Selecting Density Level 3-19 Making Double-Sided Copies ( - Kyocera KM-8530 | KM-8530 Operation Guide - Page 64
to 100 originals can be set at a time. Reminder! • Do not set more than 100 originals or over the red line indicated on the paper guides; otherwise a paper misfeed will occur. • If the number of originals exceeds 100, divide them into blocks not exceeding 100 sheets, then load them from the - Kyocera KM-8530 | KM-8530 Operation Guide - Page 65
two-sided originals with page one FACE UP. Output without Finisher Up to 100 originals can be set at a time. DF-630/635 3. Adjust paper guides. Output Modes Binding Mode Recalling Previous Job Check Mode & Proof Copy Interrupt Mode 3-3 - Kyocera KM-8530 | KM-8530 Operation Guide - Page 66
document feeder, otherwise the selected copy conditions may be altered automatically. • Be sure not to use unsuitable RADF originals. See p. 11-8 for details. 3. Adjust paper guides. 3-4 - Kyocera KM-8530 | KM-8530 Operation Guide - Page 67
the RADF original tray. HINT • To use the SDF mode, see procedure on p. 8-10 to p. 8-11. • For the SDF original specifications, see p. 11-10. 1. Adjust paper guides to the SDF original size. 3 Copying Operations Positioning Originals Setting Print Quantity Set Job During Warmup Stop Scan/Print Copy - Kyocera KM-8530 | KM-8530 Operation Guide - Page 68
feeder, e.g., when size is incompatible, or when originals are folded, stapled, torn, or in generally poor condition. 1. Raise the document feeder. in the right rear corner, aligning the edge with the right measuring guide. 2. Gently close the document feeder to prevent the original from shifting - Kyocera KM-8530 | KM-8530 Operation Guide - Page 69
Setting Print Quantity This section describes how to set or change print quantity. To Set Print Quantity The copier is initially set to copy the original set in amounts determined by the print quantity setting, then outputs sorted sets. 1. Enter the desired print quantity - Kyocera KM-8530 | KM-8530 Operation Guide - Page 70
is warming up after power is turned on, select copy conditions and start scanning so that the copier may start printing immediately the copier engine is ready. 1. Turn on the power switch of the machine. A few seconds after the Wake-up Screen appears in the LCD touch panel, seven - Kyocera KM-8530 | KM-8530 Operation Guide - Page 71
Setting Job During Warm-up (continued) 5. Press [START]. The original for the job will be scanned. When scanning is completed, the highlighted FREE JOB folder key will change to RESERVE JOB, and the next FREE JOB becomes active. 3 Copying Operations Positioning Originals Setting Print Quantity - Kyocera KM-8530 | KM-8530 Operation Guide - Page 72
To Stop Scanning/Printing Follow the procedure below to stop scanning or printing. 1. Touch to highlight SCAN JOB or PRINT JOB to be suspended. 2. Press [STOP]. INTERRUPT PROOF COPY TIMER POWER SAVER ON / OFF STOP START The current machine operation of the selected job will be suspended, and - Kyocera KM-8530 | KM-8530 Operation Guide - Page 73
Selecting Copy Size To select an appropriate copy size for getting your desired copy result, use APS (Automatic Paper Selection), or select copy size manually on the touch screen, as required. To Select Copy Size Automatically (APS) APS detects the size of originals placed on the RADF or platen - Kyocera KM-8530 | KM-8530 Operation Guide - Page 74
to load the appropriate paper. • Copy result may not be satisfactory due to the Rotation function. In this case, turn the function OFF manually. See. p. 7-4. See the table below for the relation of original size, magnification ratio and copy paper size. Magnification ratio Magnification ratio Copy - Kyocera KM-8530 | KM-8530 Operation Guide - Page 75
Selecting Copy Size (continued) To Specify Desired Copy Size (AMS) When a copy size is specified on the touch screen, an appropriate reduction or enlargement ratio will be selected automatically according to the original size detected from the RADF or the platen glass. HINTS • See the table on the - Kyocera KM-8530 | KM-8530 Operation Guide - Page 76
Copy Size (continued) DETAILS Copy result may not be satisfactory due to the Rotation function. In this case, turn the function OFF manually. See. p. 7-4. See the table below for the relation of original size, copy paper size, and magnification ratio automatically selected. ORIGINAL SIZE AMS - Kyocera KM-8530 | KM-8530 Operation Guide - Page 77
Selecting Magnification Ratio (Lens Mode) When the copier is turned ON, the magnification ratio is set to 1.00 (100%) automatically on the Basic Screen. Follow each procedure described in this section to select - Kyocera KM-8530 | KM-8530 Operation Guide - Page 78
Mode (RE) Use the 8 preset ratios (0.50, 0.65, 0.77, 0.93, 1.21, 1.29, 1.55, 2.00) and 3 user preset ratios to increase or decrease magnification in fixed amounts. >>> Specification for Fixed Magnification Mode - Kyocera KM-8530 | KM-8530 Operation Guide - Page 79
Ratio (Lens Mode) (continued) To Copy in Zoom Mode Use the Zoom mode to reduce or enlarge the copied original image in 1% increments. >>> Specification for Zoom Mode - Kyocera KM-8530 | KM-8530 Operation Guide - Page 80
Selecting Magnification Ratio (Lens Mode) (continued) 6. Position original(s). HINT See p. 3-2 to p. 3-6 for details on positioning originals. 7. Press [START]. 3-18 - Kyocera KM-8530 | KM-8530 Operation Guide - Page 81
) operates with the default settings. It detects Select Copy Density Select manual copy density to adjust exposure (density) when originals are too light or too dark. Manual adjustments can be made middle density level. • To select the user-set density (USER1 or USER2), touch the desired indicator. • - Kyocera KM-8530 | KM-8530 Operation Guide - Page 82
Selecting Density Level (continued) 2. Select additional copy conditions, as desired. HINT See p. 13-12 to p. 13-13 to set the user-set density. 3. Enter the desired print quantity from the control panel keypad. HINT See p. 3-7 for details on setting print quantity. 4. Position original(s). HINT See - Kyocera KM-8530 | KM-8530 Operation Guide - Page 83
Selecting Density Level (continued) Density Shift Use this function to shift each of nine density levels to three levels lighter or three levels darker. This function can be set to use in combination with AUTO (Text/Photo), Text, Photo and Increase Contrast modes and the general mode. Density shift - Kyocera KM-8530 | KM-8530 Operation Guide - Page 84
Making Double-Sided Copies (1a2, 2a2) The Basic Screen is initially set to 1a1 copy mode to make single-sided copies from single-sided originals. Follow the procedure below to make double-sided copies from the originals scanned from the document feeder or from the platen glass. Using RADF Select - Kyocera KM-8530 | KM-8530 Operation Guide - Page 85
Making Double-Sided Copies (1a2, 2a2) (continued) 2. Select the original set direction. Touch SPECIAL ORIGINAL on the Basic Screen to display the Special Original popup menu, then touch the desired original direction key to highlight it. 3 Copying Operations Positioning Originals Setting Print - Kyocera KM-8530 | KM-8530 Operation Guide - Page 86
Making Double-Sided Copies (1a2, 2a2) (continued) 4. Select additional copy conditions, as desired. DETAILS Some incompatible conditions may automatically release the selected copy mode. In this case, arrange the settings so that they are compatible with the selected copy mode. 5. Enter the desired - Kyocera KM-8530 | KM-8530 Operation Guide - Page 87
Making Double-Sided Copies (1a2, 2a2) (continued) Using Platen Glass Use the platen glass to scan originals unsuitable for the document feeder. >>>Specification for Double-Sided Copying Using Platen Glass - Kyocera KM-8530 | KM-8530 Operation Guide - Page 88
be automatically highlighted on the screen. Reminder! DO NOT press [AUTO RESET] at this point, otherwise the platen mode will be released to disable the copier from scanning the original placed on the platen glass. 3-26 - Kyocera KM-8530 | KM-8530 Operation Guide - Page 89
Making Double-Sided Copies (1a2, 2a2) (continued) 5. Select additional copy conditions, as desired. DETAILS Some incompatible conditions may automatically release the selected copy mode. In this case, arrange the settings so that they are compatible with the selected copy mode. 6. Enter the desired - Kyocera KM-8530 | KM-8530 Operation Guide - Page 90
Making Single-Sided Copies from Double-Sided Originals (2a1) Use RADF and select 2a1 copy mode to make single-sided copies from double-sided originals. Front Front 2-1 Copying Front Front Double-sided oriFginarl ont Back Back Back Front Front Front Front Front Back Back Back Back Back Simplex - Kyocera KM-8530 | KM-8530 Operation Guide - Page 91
Making Single-Sided Copies from Double-Sided Originals (2a1) 3. Select additional copy conditions, as desired. DETAILS Some incompatible conditions may automatically release the selected copy mode. In this case, arrange the settings so that they are compatible with the selected copy mode. 4. Enter - Kyocera KM-8530 | KM-8530 Operation Guide - Page 92
TYPE/SIZE. The Paper Type/Size popup menu will be displayed. 4. Touch the desired paper type key. When Thick, Thin, Tab paper, OHP, Trace, or User is highlighted, a print job will conform to the selected paper type. If no paper type indication is needed, touch the highlighted key to clear the - Kyocera KM-8530 | KM-8530 Operation Guide - Page 93
Copying Using Special Paper (Multi-Sheet Bypass Tray) (continued) DETAILS When selecting Tab paper, AMS is automatically selected. The STD size (special) and Non STD size cannot be selected, and the loaded copy paper cannot be fed in 1a2 or 2a2 copying. 5. Specify the paper size. 3 Copying - Kyocera KM-8530 | KM-8530 Operation Guide - Page 94
Copying Using Special Paper (Multi-Sheet Bypass Tray) (continued) When Wide paper is highlighted, the popup menu will appear. Use arrow keys to scroll to the desired wide size, then specify the precise dimensions of paper to be used, following the procedure below. (1) Touch Input size. The Input - Kyocera KM-8530 | KM-8530 Operation Guide - Page 95
Copying Using Special Paper (Multi-Sheet Bypass Tray) (continued) 8. Enter the desired print quantity from the control panel keypad. HINT See p. 3-7 for details on setting print quantity. 9. Position original(s) FACE UP in the document feeder or FACE DOWN on the platen glass. 3 Copying Operations - Kyocera KM-8530 | KM-8530 Operation Guide - Page 96
or condition. DETAILS RADF tray capacity is 100; however, more than 100 originals can be scanned into memory using RADF store mode. >>>Specification for Store Mode - Kyocera KM-8530 | KM-8530 Operation Guide - Page 97
on the confirmation screen to be sure the data is deleted. HINT Should memory overflow occur frequently, it is recommended that you contact your service representative to extend the memory capacity in your machine. 6. Touch STORE to exit the Store mode. STORE will return to the normal display. Lens - Kyocera KM-8530 | KM-8530 Operation Guide - Page 98
is finished, the Reserve job starts printing immediately. >>>Specifications for Reserve - Kyocera KM-8530 | KM-8530 Operation Guide - Page 99
During Warmup Stop Scan/Print Copy Size DETAILS When setting more than one reserve job, the next reserve job setting will be available after the copier starts to scan for the previous reserve job. When setting the fourth copying job, touch the active FREE JOB key at the far right to - Kyocera KM-8530 | KM-8530 Operation Guide - Page 100
will be restored. To scroll to the next/previous screen, touch the arrow keys displayed at the right side of the folder keys. HINT When trouble occurs on a reserve job which is not currently displayed on the screen, the arrow key to scroll to that job will blink. See p. 5-8 to p. 510 - Kyocera KM-8530 | KM-8530 Operation Guide - Page 101
then touch JOB CLEAR. Touch YES to clear the highlighted reserve job, or NO to cancel. To check user name (not copier information): Touch USER NAME CHECK to display the User Name Check Screen. Check the user name indicated on the right side of the job number and operatio mode. 3-39 2-1 Multi-Sheet - Kyocera KM-8530 | KM-8530 Operation Guide - Page 102
. (01-99) for each job assigned to the machine. MODE: Displays the machine's current mode of operation. Three modes are listed below. COPIER PRINTER SCANNER STATUS: Displays the current status of the machine for each job. READY : Ready to use in each mode INTERRUPT : Interrupting the previous - Kyocera KM-8530 | KM-8530 Operation Guide - Page 103
Copying Using Memory (continued) MINUTE(s) TO GO: Displays the time (in minutes) required for completing the job. Exceeding 999 minutes: 999^ Shorter than 1 minute: - Kyocera KM-8530 | KM-8530 Operation Guide - Page 104
without Finisher This section describes the output modes for a copier without the Finisher. The Non-sort mode is initially on the exit tray. 12 3 Originals Example: 3-set copies Face down non-sort (default) Face down rotation sort Face down group Face down rotation group Face up non-sort - Kyocera KM-8530 | KM-8530 Operation Guide - Page 105
Output Mode for Machine without Finisher (continued) 1. When using Rotation sort or Rotation group mode, load the same paper size into two trays in different orientation. HINT Non-sort mode is initially selected. Key Operator can change the initial output mode. See p. 13-10. 2. Select the desired - Kyocera KM-8530 | KM-8530 Operation Guide - Page 106
Output Mode for Machine without Finisher (continued) (2) Touch to highlight the desired mode key. To use Face Up mode in combination, simply touch to highlight FACE UP instead of FACE DOWN. (3) Touch OK. The Basic Screen will be restored, with OUTPUT APPLI. highlighted. 3. Select additional copy - Kyocera KM-8530 | KM-8530 Operation Guide - Page 107
outputs multiple copies of the original set, having each sorted set offset by 30mm upon exit. 3 Staple-sort mode offsets and staples each sorted set. Up to 50 sheets (or within 5mm thick) can be stapled. 4 Group mode groups together multiple copies of each original and offsets the sets by 30mm upon - Kyocera KM-8530 | KM-8530 Operation Guide - Page 108
group Face up non-sort Face up group The copier is initially set to output to Primary (main) the output modes using Finisher options. >>>Specification for Output Modes with Finisher - Kyocera KM-8530 | KM-8530 Operation Guide - Page 109
p. 13-10. 2. Select the desired output mode. To set Non-sort or Sort mode using Primary (main) tray: proceed to the next step. To set Staple-sort mode using Primary (main) tray: proceed to step 4. To set Group mode using Primary (main) tray or output to Secondary (sub) tray: proceed to - Kyocera KM-8530 | KM-8530 Operation Guide - Page 110
displayed. DETAILS When making double-sided copies, select the desired binding mode on the Output Mode popup menu. See p. 3-51 for detail. Staple position Binding mode 13 2 31 2 123 1 1 1 2 22 33 3 (4) Touch SPECIAL ORIGINAL on the Basic Screen to display the Special Original popup menu - Kyocera KM-8530 | KM-8530 Operation Guide - Page 111
Output Mode for Machine with Finisher (continued) 5. To set Group mode or output to Secondary (sub) tray: Touch OUTPUT APPLI. on the Basic Screen to display the Output Mode popup menu. Select the desired output mode. To set the Group mode, touch GROUP to highlight it. 3 Copying Operations - Kyocera KM-8530 | KM-8530 Operation Guide - Page 112
Output Mode for Machine with Finisher (continued) 9. Press [START]. Press [STOP] to suspend the scanning or printing job. CAUTION When the finisher exit tray capacity is exceeded due to the print quantity selected, remove the copied sets as they exit; otherwise, mishandled paper will occur. 3-50 - Kyocera KM-8530 | KM-8530 Operation Guide - Page 113
Selecting Binding Mode When copying in 1a2 or 2a2 mode, specify the binding mode on the Output Mode popup menu to obtain the desired copy result. Right & Left binding: Normal duplex copies Up binding: Duplex copies arranged upside down on the reverse side Binding mode Copies 3 Copying Operations - Kyocera KM-8530 | KM-8530 Operation Guide - Page 114
Recalling Previous Job Settings Follow the procedure below to copy with a previous job's settings. DETAILS • Only the last-completed output job settings can be recalled as the previous job settings. Non-complete job or reserve job settings cannot be recalled, even if the setting operations have been - Kyocera KM-8530 | KM-8530 Operation Guide - Page 115
copying selections. • Copying conditions using Store mode • Sheet/Cover insertion • Chapter • Combination • Booklet • Image insert • Book Copy • Program job >>>Specifications for Check Mode and Proof Copy - Kyocera KM-8530 | KM-8530 Operation Guide - Page 116
Checking Feature Selections and Proof Copying (continued) Verify the settings made for the current job. • If settings are OK, proceed to step 8. • If a sample copy is needed, proceed to step 6. • If making any setting change from the Check Screen, proceed to the next step. • If releasing any setting - Kyocera KM-8530 | KM-8530 Operation Guide - Page 117
Checking Feature Selections and Proof Copying (continued) 5. To release the settings: Touch the desired copying condition key on the Check Screen to highlight it, then touch RELEASE SETTING. 3 Copying Operations Positioning Originals Setting Print Quantity Set Job During Warmup The confirmation - Kyocera KM-8530 | KM-8530 Operation Guide - Page 118
Check Screen does not change.) If required, change the print quantity on the Basic Screen. 8. Press [START]. If the print quantity is not changed, the copier will output the rest, except the sample sets. CAUTION When the finisher / trimmer unit / paper exit tray capacity is exceeded due to the print - Kyocera KM-8530 | KM-8530 Operation Guide - Page 119
timing selected. See p. 13-39 to p. 13-44. >>>Specification for Interrupt Mode - Kyocera KM-8530 | KM-8530 Operation Guide - Page 120
Interrupt Copying (continued) 2. Set copy conditions, as desired. The initial settings in Interrupt mode are as follows. Copy Mode : 1a1 RADF : ON AES : ON Lens Mode : 1.00 (100%) APS : ON Print Quantity : 1 Finisher : Main Tray in Sort mode DETAILS Remove any document from the platen - Kyocera KM-8530 | KM-8530 Operation Guide - Page 121
steady for the temporary job performed in Interrupt mode. • Scanning originals into memory while printing in Reserve mode The LED blinks until the copier completes the current printing job, scans all originals placed on the document feeder, and prints one set of the Reserved job. The LED remains - Kyocera KM-8530 | KM-8530 Operation Guide - Page 122
- Kyocera KM-8530 | KM-8530 Operation Guide - Page 123
4 4 Job Memory & Help Mode Job Memory &Help Mode How to Use Helpful Functions Job Memory Storing Job Conditions (Job Memory: Job Store 4-2 Recalling Stored Job Settings (Job Memory: Job Recall 4-5 Displaying Screen for Operation Guide (Help Mode 4-6 Help Mode - Kyocera KM-8530 | KM-8530 Operation Guide - Page 124
to store up to 30 frequently used copy job settings, which can be recalled at any time. The stored jobs can be given alphabetical names. >>>Specifications for Job Memory - Kyocera KM-8530 | KM-8530 Operation Guide - Page 125
Storing Job Conditions (Job Memory: Job Store) (continued) 4. Review the settings on the Job Store Check Screen. Check that the selections made in step 1 are correctly entered. DETAILS If any correction is required, touch - Kyocera KM-8530 | KM-8530 Operation Guide - Page 126
Storing Job Conditions (Job Memory: Job Store) (continued) DETAILS If you wish to cancel the job number selection, touch CANCEL to restore the Basic Screen, which displays the settings made in step 1. If you wish to cancel the settings, press [AUTO RESET]. 7. Touch OK. The Job Name Registration - Kyocera KM-8530 | KM-8530 Operation Guide - Page 127
key to reach the desired job number key (16~30). 3. If desired, touch JOB CHECK. The Job Recall Check Screen displays to enable you to review the settings. 4. Touch OK. The settings of the selected job will be recalled on the restored Basic Screen. To cancel the recall mode, touch CANCEL - Kyocera KM-8530 | KM-8530 Operation Guide - Page 128
provides information on adding toner. • PAPER SUPPLY provides information on loading paper in each tray. • HELP MENU displays the Help Menu Screen which provides a list of all of the copier functions. When a function item is touched, the Help Screen displays information specific to that topic. 4-6 - Kyocera KM-8530 | KM-8530 Operation Guide - Page 129
Displaying Screen for Operation Guide (Help Mode) • PANEL CONTRAST displays the screen to displays the extension number of the Key Operator. • TELEPHONE/FAX displays the phone/fax number of your service centre. DETAILS • Touch Touch on the Help Screen, if provided, to scroll to the next page. - Kyocera KM-8530 | KM-8530 Operation Guide - Page 130
Displaying Screen for Operation Guide (Help Mode) To Display Help Screen from Other Screens 1. While in any screen other than the Basic Screen, press [HELP]. SCAN / SERVER PRINT CHECK HELP - Kyocera KM-8530 | KM-8530 Operation Guide - Page 131
5 Troubleshooting How to Handle Machine Troubles When "Call for Service" Message Is Displayed 5-2 Preventive Maintenance 5-4 Clearing Mishandled Paper 5-6 When "JAM" Appears on Folder Key (Or Arrow Key Flashes 5-8 When "ADD PAPER" Appears on Folder Key ( - Kyocera KM-8530 | KM-8530 Operation Guide - Page 132
following the procedure below. 1. Make note of the Report code No. indicated in the second line of the message area. Reminder! After calling for service using the Key Operator setting, be sure to turn OFF the power switch immediately, then unplug the machine as described here. 2. Turn OFF the power - Kyocera KM-8530 | KM-8530 Operation Guide - Page 133
are not affected by the trouble. To obtain this limited functionality of the copier, consult your service representative. Be sure to can continue without using the troubled portion of the machine (ex. Tray 2). 5 Troubleshooting Call for Service Preventive Maintenance Clearing Mishandled Paper - Kyocera KM-8530 | KM-8530 Operation Guide - Page 134
a set number of copies have been made on your copier, Preventive Maintenance (PM) will be required for maintaining optimal performance. When preventive maintenance is due, a message and an icon ( prompt you to contact your service representative for maintenance. ) will To Check the PM Counter - Kyocera KM-8530 | KM-8530 Operation Guide - Page 135
(continued) The PM counter will appear under the Printer counter on the screen. HINT To print the Counter list including the PM counter, see p. 12-18. 3. Touch EXIT. The Basic Screen will be restored. 5 Troubleshooting Call for Service Preventive Maintenance Clearing Mishandled Paper JAM Key ADD - Kyocera KM-8530 | KM-8530 Operation Guide - Page 136
Clearing Mishandled Paper When a paper misfeed occurs, the copier stops making copies and mishandled paper codes display on the screen to indicate misfeed area(s). Copying operation cannot be continued until all the misfeed locations - Kyocera KM-8530 | KM-8530 Operation Guide - Page 137
until all the locations are cleared. WARNING The drum unit generates high voltage. To avoid bodily staples stuck inside the machine so as not to get injured. CAUTION DO NOT INSERT your finger into the two RADF hinge portions, otherwise you may be injured. 5 Troubleshooting Call for Service - Kyocera KM-8530 | KM-8530 Operation Guide - Page 138
Screen will change to flashing JAM JOB. When more than four jobs have been specified and the folder key of the print/scan job in trouble is not currently displayed on the screen, the arrow key to scroll to that job will flash. Follow the procedure below to remove mishandled paper - Kyocera KM-8530 | KM-8530 Operation Guide - Page 139
job will resume. 5. Touch FREE JOB to continue the reserve job setting. WARNING The drum unit generates high voltage. To avoid electrical shock, NEVER TOUCH the area. 5 Troubleshooting Call for Service Preventive Maintenance Clearing Mishandled Paper JAM Key ADD PAPER Key Memory Overflow Power OFF - Kyocera KM-8530 | KM-8530 Operation Guide - Page 140
Basic Screen will change to flashing ADD PAPER. When more than four jobs have been specified and the folder key of the print job in trouble is not currently displayed on the screen, the arrow key to scroll to that job will flash. Follow the procedure below to continue the copying - Kyocera KM-8530 | KM-8530 Operation Guide - Page 141
Is Displayed (Memory Overflow) In certain modes, this printer/copier uses memory to make operations convenient and smooth flowing STOP and SCAN STOP as the only two available options. 5 Troubleshooting Call for Service Preventive Maintenance Clearing Mishandled Paper JAM Key ADD PAPER Key Memory - Kyocera KM-8530 | KM-8530 Operation Guide - Page 142
When "Memory Full" Message Is Displayed (Memory Overflow) Memory Overflow in Reserve Job When memory overflow occurs during the reserve operation, CONTINUE also appears on the active screen. In this case, the machine will not stop until all the jobs on standby for printing are completed. DETAILS If - Kyocera KM-8530 | KM-8530 Operation Guide - Page 143
any trouble affects the electrical signal of the copier, the Power OFF/ON Screen will be displayed. Follow the procedure below to turn the machine power off then on. 1. Turn OFF the power switch. 2. Wait about 10 seconds. 3. Turn ON the power switch. 5 Troubleshooting Call for Service Preventive - Kyocera KM-8530 | KM-8530 Operation Guide - Page 144
Troubleshooting Tips COPIER Manually adjust copy density to darker density. Check toner indicator and add toner, if required. Check paper for dampness. Do not leave paper in copier inner surface of document cover clean. Call for service if "Call for service" is displayed in the message area. Check - Kyocera KM-8530 | KM-8530 Operation Guide - Page 145
supply is needed. Follow instructions for adding toner. ADD PAPER Key Memory Overflow Power OFF/ON Screen Copying Hints CALL FOR PM IS DISPLAYED IN MESSAGE AREA Contact your service representative for Preventive Maintenance. APS SELECTS THE WRONG COPY SIZE Paper guides must be adjusted exactly - Kyocera KM-8530 | KM-8530 Operation Guide - Page 146
Troubleshooting Tips (continued) THE BASIC SCREEN DOES NOT DISPLAY SETTINGS AS DESCRIBED IN INSTRUCTION MANUAL Check with the Key Operator, as Initial Settings may have been changed. "PLEASE CHECK ORIGINAL" This message displays when the copier service representative to enable the machine to default - Kyocera KM-8530 | KM-8530 Operation Guide - Page 147
6 Machine Specifications Main Body & Option Specifications Main Body Specifications 6-2 Option Specifications 6-5 6 Machine Specifications - Kyocera KM-8530 | KM-8530 Operation Guide - Page 148
Specifications Product Name Configuration Photoreceptor Method Toner in Document Feeder KM-8530 Console with stationary platen OPC drum Laser Electrostatic manual density); APS detects 11"x17", 8.5"x14", 8.5"x11"R, 8.5"x11", 5.5"x8.5" Presets; 0.50, 0.65, 0.77, 0.93, 1.21, 1.29, 1.55, 2.00 3 User - Kyocera KM-8530 | KM-8530 Operation Guide - Page 149
, & Intermediate papers unavailable) Main body trays 1/2/3; 500/500/1,000 sheets LCT tray 4; 4,000 sheets Multi-sheet bypass tray; 150 sheets Tray 1/2/3 user adjustable Tray 4 adjusted by service 150 sheets (20 lb) 20 lb~24 lb bond recommended (Max. range: 16 lb~53 lb (200g/m2 thick paper) OHP sheet - Kyocera KM-8530 | KM-8530 Operation Guide - Page 150
Main Body Specifications (continued) Machine Dimensions Main Body (with RADF) Width: 34.9 in. (887 mm) Depth: 30.5 in. (775 mm) Height: ", 5.5"x8.5" Paper weight: 16~45 lb Paper curl limit: 20 mm or less Non-stack type Modes: 1>2; 2>2 These specifications are subject to change without notice. 6-4 - Kyocera KM-8530 | KM-8530 Operation Guide - Page 151
6 Machine Specifications Cover Sheet Feeder (PI-108) Power source: Finisher Paper size: 11"x17", 8.5"x14", 8.5"x11", 8.5"x11"R, 5.5"x11", 5.5"x11"R, A4, A4R (8.27" x11.69", 210 mm x 297 mm) Paper weight in cover sheet mode: 13 ~ 110 lb (200 g/m2 thick paper) Paper weight in manual staple: 16 - Kyocera KM-8530 | KM-8530 Operation Guide - Page 152
Option Specifications (continued) Punching Unit (PU-108) Paper size: 11"x17", 8.5"x11" Paper weight: 16~45 lb Number of hole: 3 holes Hole diameter mm) Height 27.4 in (695 mm) Weight: 92.4 lb (42 kg) Power source: supply from main body These specifications are subject to change without notice. 6-6 - Kyocera KM-8530 | KM-8530 Operation Guide - Page 153
Advanced 7 Advanced Information 8 Special Original 9 Applications 10 Server Function 11 Paper & Original Info 12 Maintenance & Supplies 13 Key Operator Mode - Kyocera KM-8530 | KM-8530 Operation Guide - Page 154
- Kyocera KM-8530 | KM-8530 Operation Guide - Page 155
(Punch 7-11 Output Z-Folded Copies (Z-Folding 7-14 Making Trimmed Booklet (Trimming 7-17 Cover Sheet Feeding 7-20 Using Finisher Manually 7-23 Using Two Copiers in Tandem 7-26 Vertical/Horizontal Zoom Folding / Stapling&Folding Punch Z-Folding Trimming Cover Sheet Feeding Using Finisher - Kyocera KM-8530 | KM-8530 Operation Guide - Page 156
OFF STOP TY. START Reminder! IMPORTANT: WHEN THE TIMER INDICATOR IS LIT, THE COPIER WILL TURN OFF AUTOMATICALLY. DO NOT TURN IT OFF BY PRESSING POWER SWITCH. When . Timer interrupt mode Enter password DETAILS The machine power will be turned off automatically after 5 minutes from this state - Kyocera KM-8530 | KM-8530 Operation Guide - Page 157
In the event the Timer Interrupt password has not been entered by the Zoom Folding / Stapling&Folding Punch Z-Folding Trimming Cover Sheet Feeding Using Finisher Manually Tandem Mode 7 of the copier is finished, press [POWER SAVER ON/OFF] for one second or longer, then release it. The copier returns - Kyocera KM-8530 | KM-8530 Operation Guide - Page 158
8.5"x11" or 5.5"x8.5", irrespective of the copy paper feeding direction. DETAILS By default, Rotation requires APS or AMS to function. The Key Operator can set this 5.5"x8.5"R 8.5"x11" 5.5"x8.5" 5.5"x8.5"R ABCDE The copier is initially set to activate the Rotation function automatically. Follow - Kyocera KM-8530 | KM-8530 Operation Guide - Page 159
Horizontal Zoom Mode Specifications - Kyocera KM-8530 | KM-8530 Operation Guide - Page 160
Vertical/Horizontal Zoom Mode (continued) 2. Touch Verti. on the popup menu to highlight it, then set the vertical zoom ratio. Use the keypad on the popup menu to enter a 3-digit vertical zoom ratio, or use arrow keys (c/d) to scroll to the desired ratio. Similarly, touch Horiz. to highlight it, - Kyocera KM-8530 | KM-8530 Operation Guide - Page 161
image using the Vertical/Horizontal zoom with an original placed slantwise on the platen glass. Weekly Timer Rotation Vertical/Horizontal Zoom Folding / Stapling&Folding Punch 30° Length: 0.50, Width: 2.00 Length: 2.00, Width: 0.50 30° Length: 0.50, Width: 2.00 Length: 2.00, Width: 0.50 - Kyocera KM-8530 | KM-8530 Operation Guide - Page 162
output to the Booklet tray of the Finisher. In the Stapling & Folding mode, each copied set is stapled at two positions (saddle stitched), then folded and output to the Booklet tray of the Finisher. >>>Specifications for Folding / Stapling & Folding Mode - Kyocera KM-8530 | KM-8530 Operation Guide - Page 163
Touch MAIN TRAY, if not highlighted. Weekly Timer Rotation Vertical/Horizontal Zoom Folding / Stapling&Folding Punch Z-Folding Trimming Cover Sheet Feeding Using Finisher Manually Tandem Mode 7 Advanced Information 3. Touch STAPLING & FOLDING or FOLDING, as desired. DETAILS Selecting FOLDING or - Kyocera KM-8530 | KM-8530 Operation Guide - Page 164
/ Stapling&Folding) (continued) When selecting STAPLING & for simplex copying 6 pages or less for duplex copying Stapling & Folding mode: 80 pages or less for simplex copying for duplex copying Exceeding the above capacity limits may cause trouble in the Finisher. 8. Press [START]. CAUTION When - Kyocera KM-8530 | KM-8530 Operation Guide - Page 165
trouble may occur in Punching unit. • Be sure that the side guide plates of the paper tray are securely aligned to the paper; otherwise the copies may not be punched in position. >>>Specifications / Stapling&Folding Punch Z-Folding Trimming Cover Sheet Feeding Using Finisher Manually Tandem Mode - Kyocera KM-8530 | KM-8530 Operation Guide - Page 166
Punching File Holes in Copies (Punch) (continued) 1. Touch OUTPUT APPLI. on the Basic Screen The Output Mode popup menu will be displayed. 2. Touch MAIN TRAY, if not highlighted. 3. Touch PUNCH. The Punch Position popup menu will be displayed. 4. Touch the desired punch position key on the screen to - Kyocera KM-8530 | KM-8530 Operation Guide - Page 167
set direction. Weekly Timer Rotation Vertical/Horizontal Zoom Folding / Stapling&Folding Punch Touch SPECIAL ORIGINAL on the Basic Screen to display control panel keypad. Z-Folding Trimming Cover Sheet Feeding Using Finisher Manually Tandem Mode HINT See p. 3-7 for details on setting print - Kyocera KM-8530 | KM-8530 Operation Guide - Page 168
to the selected output mode. >>>Specifications for Z-Folding Mode - Kyocera KM-8530 | KM-8530 Operation Guide - Page 169
be displayed. 2. Touch MAIN TRAY, if not highlighted. Weekly Timer Rotation Vertical/Horizontal Zoom Folding / Stapling&Folding Punch Z-Folding Trimming Cover Sheet Feeding Using Finisher Manually Tandem Mode 7 Advanced Information 3. Touch Z-FOLDING to highlight it. 4. Touch OK on the Output - Kyocera KM-8530 | KM-8530 Operation Guide - Page 170
Output Z-Folded Copies (Z-Folding) (continued) 5. Select additional copying features, as required. 6. Enter the desired print quantity from the control panel keypad. HINT See p. 3-7 for details on setting print quantity. 7. Position originals. HINT See p. 3-2 to p. 3-6 for details on positioning - Kyocera KM-8530 | KM-8530 Operation Guide - Page 171
unit tray. >>>Specifications for Trimming Mode - Kyocera KM-8530 | KM-8530 Operation Guide - Page 172
the automatically selected Booklet mode on the Application Selection Screen. • When copying dark originals or using Reverse Image mode together with Folding or Stapling & Folding mode, the folded line of the output copies may be slightly shifted. 4. Touch OK on the Output Mode popup menu. The Basic - Kyocera KM-8530 | KM-8530 Operation Guide - Page 173
12 pages or less for simplex copying 6 pages or less for duplex copying Stapling & Folding mode: 80 pages or less for simplex copying 40 pages or less limits may cause trouble in the Finisher. 8. Press [START]. Z-Folding Trimming Cover Sheet Feeding Using Finisher Manually Tandem Mode 7 Advanced - Kyocera KM-8530 | KM-8530 Operation Guide - Page 174
sets output to the Booklet tray or Trimmer unit tray in the Folding, Stapling & Folding, or Trimming mode. DETAILS • Paper loaded into the cover WITH BLANK SHEET) in Booklet and cover mode in Sheet/Cover Insertion. >>>Specifications for Cover Sheet Feeding - Kyocera KM-8530 | KM-8530 Operation Guide - Page 175
not highlighted. Weekly Timer Rotation Vertical/Horizontal Zoom Folding / Stapling&Folding Punch 3. Touch COVER SHEET. The Cover Sheet Mode BACK to highlight it. Z-Folding Trimming Cover Sheet Feeding Using Finisher Manually Tandem Mode 7 Advanced Information 5. Touch OK to restore the Output - Kyocera KM-8530 | KM-8530 Operation Guide - Page 176
Cover Sheet Feeding (continued) 8. Load the cover sheet paper into the optional cover sheet feeder of the DF-630/635 Finisher. If the paper size loaded in the cover sheet feeder is not suitable for the selected copy conditions, the following messages will be displayed and copying will be unavailable - Kyocera KM-8530 | KM-8530 Operation Guide - Page 177
Cover Sheet Feeder+ TU-108 Trimmer Unit • 1 oblique staple • 2 parallel staples • Stapling & Folding and Trimming (2 staples in the center + Folding + Trimming) >>>Specifications for Manual Staple 1 oblique staple and 2 parallel staples - Kyocera KM-8530 | KM-8530 Operation Guide - Page 178
Align the guide plate. The indicator light of Start/Stop button will turn green. HINT Refer to the specifications for available paper size and capacity in each mode. 2. Press Staple Mode Selection button to select the desired mode. MANUAL OPERATION DETAILS When selecting Stapling & Folding mode - Kyocera KM-8530 | KM-8530 Operation Guide - Page 179
to the appropriate tray according to the selected mode. DETAILS If you want to stop the Manual Finishing operation, press the Start/Stop button again. The Finisher will cease operating. When using Stapling & Folding mode, the unfinished set will be left in the stacker unit inside the Finisher - Kyocera KM-8530 | KM-8530 Operation Guide - Page 180
the tandem mode. ❒ The 8530 is provided with an Allocation recovery mode, which functions when trouble occurs in either the primary or secondary copier to allow the trouble-free copier to complete the job. ❒ When the two copiers in tandem mode have the same ECM password registered, copying will be - Kyocera KM-8530 | KM-8530 Operation Guide - Page 181
Rotation Vertical/Horizontal Zoom Folding / Stapling&Folding Punch Z-Folding Trimming Cover Sheet Feeding Using Finisher Manually Tandem Mode The copier with TANDEM highlighted will become the primary copier; the other copier will function as the secondary copier. The Master icon displays on the - Kyocera KM-8530 | KM-8530 Operation Guide - Page 182
, such as a paper misfeed or lack of paper, the secondary copier will be unavailable for printing; however, the problem will not cause tandem mode to be released. Take the appropriate troubleshooting measures to be ready for copying. • Tandem printing job cannot be started if 10 reserve jobs (not - Kyocera KM-8530 | KM-8530 Operation Guide - Page 183
Stapling&Folding Punch Z-Folding Interrupt mode during Tandem mode copying Interrupt copying is available only on the copier with [INTERRUPT] pressed. The tandem mode copying on the copier copier to handle the remaining print quantity. Trimming Cover Sheet Feeding Using Finisher Manually Tandem - Kyocera KM-8530 | KM-8530 Operation Guide - Page 184
the remaining print quantity. 2. Touch CONTINUE to go on, or EXIT to delete all the data transmitted to the secondary copier and to release the tandem mode. The primary copier will take over the remaining print quantity and complete the job. DETAILS Once the Allocation recovery mode is activated and - Kyocera KM-8530 | KM-8530 Operation Guide - Page 185
primary or secondary copier: The copier that is trouble free handles the remaining print quantity and completes the job. When the job is completed, take the appropriate troubleshooting measures to correct the problem. Weekly Timer Rotation Vertical/Horizontal Zoom Folding / Stapling&Folding Punch - Kyocera KM-8530 | KM-8530 Operation Guide - Page 186
- Kyocera KM-8530 | KM-8530 Operation Guide - Page 187
8 Special Original How to Make a Copy of Special Original Specifying Original Direction 8-2 Making Copy Quality Closer to Originals (Text/Photo Enhance 8-4 Copying Mixed Size Originals (Mixed Original 8-6 Copying Z-Folded Originals (Z-Folded Original 8-8 Feeding Single Original from RADF (SDF - Kyocera KM-8530 | KM-8530 Operation Guide - Page 188
is required to obtain copy results as expected when making double-sided copies with binding position specified or when staple position is specified. Originals on RADF: A A Z Z Originals on platen glass: A Z A Z Z Z A A A Z A Z 1. Touch SPECIAL ORIGINAL on the Basic Screen. The Special - Kyocera KM-8530 | KM-8530 Operation Guide - Page 189
Specifying Original Direction (continued) 3. Touch OK to complete the setting and return to the Basic Screen. The SPECIAL ORIGINAL key on the Basic Screen is highlighted, and the icon in the message area indicates the selected original direction. 4. Make other compatible selections. 5. Enter the - Kyocera KM-8530 | KM-8530 Operation Guide - Page 190
level can be shifted three levels darker or three levels lighter (Density Shift). See p. 3-21 if this setting is desired. >>>Specifications for Text/Photo Enhance - Kyocera KM-8530 | KM-8530 Operation Guide - Page 191
Making Copy Quality Closer to Originals (Text/Photo Enhance) 2. Touch Text, Photo, or Increase Contrast, as required. 3. Touch OK to return to the Basic Screen. 4. Select additional copying features, as desired. 5. Enter the desired print quantity from the control panel keypad. HINT See p. 3-7 for - Kyocera KM-8530 | KM-8530 Operation Guide - Page 192
ratio automatically selected (AMS mode). >>>Specifications for Mixed Original - Kyocera KM-8530 | KM-8530 Operation Guide - Page 193
Copying Mixed Size Originals (Mixed Original) (continued) 2. Touch Mixed Original. 3. Touch OK to return to the Basic Screen. 4. Select additional copying features, as desired. DETAILS APS is automatically selected on the Basic Screen. To select AMS, touch the tray key on the Basic Screen to select - Kyocera KM-8530 | KM-8530 Operation Guide - Page 194
may function incorrectly. This mode requires more scanning time to detect the original size. >>>Specifications for Z-Folded Original - Kyocera KM-8530 | KM-8530 Operation Guide - Page 195
Copying Z-Folded Originals (Z-Folded Original) (continued) 5. Enter the desired print quantity from the control panel keypad. HINT See p. 3-7 for details on setting print quantity. 6. Position mixed original(s) FACE UP in the document feeder. HINTS • See p. 3-4 for details on positioning originals. - Kyocera KM-8530 | KM-8530 Operation Guide - Page 196
With the SDF mode selected, original paper specification will be different in simplex and duplex copying modes. Simplex original paper weight:13 ~ 110 lb Duplex original paper weight: 13 ~ 45 lb ❒ Incompatible Conditions: Using platen glass, Folding, Staple-sort, Group, Rotation sort, Rotation group - Kyocera KM-8530 | KM-8530 Operation Guide - Page 197
of the original in the document feeder. Never set more than one thick original or paste up, otherwise machine trouble may be caused. Auto Start mode with RADF store mode: Adjust the paper guides according to the original size to be set, then position a sheet of original in the document feeder. The - Kyocera KM-8530 | KM-8530 Operation Guide - Page 198
mode). Use Non STD size mode to specify the scanning area manually for copying or printing special size originals. Use Tab paper mode to copy a tabbed original, including the image of the tab part, onto tabbed copy paper. >>>Specifications for Original Form - Kyocera KM-8530 | KM-8530 Operation Guide - Page 199
-Standard Size Originals (Original Form) (continued) 3. Touch the desired size key. DETAILS When selecting WHOLE AREA on the Non STD size mode menu, the copier scans the whole area of the platen glass and copies with the paper size or magnification ratio currently selected. 4. Touch OK on the popup - Kyocera KM-8530 | KM-8530 Operation Guide - Page 200
- Kyocera KM-8530 | KM-8530 Operation Guide - Page 201
9 Applications How to Use Application Functions Application Selection Screen Sheet/Cover Insertion Chapter Combination To Display Application Selection Screen 9-2 Inserting Sheets and Covers (Sheet/Cover Insertion 9-3 Locating Title Pages on the Right Side (Chapter 9-7 Lay Out Several Pages - Kyocera KM-8530 | KM-8530 Operation Guide - Page 202
To Display Application Selection Screen Follow the procedure below to display the Application Selection Screen and select the desired copying features. 1. Touch APPLI. on the Basic Screen. The Application Selection Screen will be displayed on the touch panel. DETAILS • When a function key is touched - Kyocera KM-8530 | KM-8530 Operation Guide - Page 203
sheets into the finished set, as well as front and back covers. >>>Specifications for Sheet/Cover Insertion - Kyocera KM-8530 | KM-8530 Operation Guide - Page 204
Inserting Sheets and Covers (Sheet/Cover Insertion) (continued) 1. Load regular sheets into any tray, and insertion sheets and covers into each tray source to be designated on the Sheet/Cover Insertion Screen. DETAILS • When using thick paper or tabbed paper for covers or insertions, load them in - Kyocera KM-8530 | KM-8530 Operation Guide - Page 205
Inserting Sheets and Covers (Sheet/Cover Insertion) (continued) 5. Touch CHANGE OF THE COVERS TRAY to select the cover sheet tray source. The tray source for covers currently selected is displayed on the Sheet/Cover Insertion Screen. Every touch of the key shifts the selection in the display that - Kyocera KM-8530 | KM-8530 Operation Guide - Page 206
Inserting Sheets and Covers (Sheet/Cover Insertion) (continued) 10. Position originals FACE UP in the document feeder. HINTS • For details on positioning originals, see p. 3-2. • Use RADF store mode (p. 3-34 to p. 3-35) when the original count exceeds 100. 11. Press [START]. CAUTION When the - Kyocera KM-8530 | KM-8530 Operation Guide - Page 207
. To effectively locate the title page on the right, a blank sheet will be automatically created on the reverse side of a sheet, if required. >>>Specifications for Chapter - Kyocera KM-8530 | KM-8530 Operation Guide - Page 208
Locating Title Pages on the Right Side (Chapter) (continued) 3. Use the control panel keypad to enter the page number of each title page. Touch SET after each entry to move to the next key. When setting more than 15 locations, touch the arrow key to move to the next page. To clear an incorrect entry - Kyocera KM-8530 | KM-8530 Operation Guide - Page 209
Locating Title Pages on the Right Side (Chapter) (continued) 6. Enter the desired print quantity from the control panel keypad. HINT See p. 3-7 for details on setting print quantity. 7. Position originals FACE UP in the document feeder. Application Selection Screen HINTS • For details on - Kyocera KM-8530 | KM-8530 Operation Guide - Page 210
pages onto one sheet of copy paper (2 in 1, 4 in 1, or 8 in 1). >>>Specifications for Combination - Kyocera KM-8530 | KM-8530 Operation Guide - Page 211
Lay Out Several Pages onto One Sheet (Combination) (continued) 3. Select the desired Combination mode. Application Selection Screen Sheet/Cover Insertion Chapter Touch 2 in 1, 4 in 1 or 8 in 1 in the desired order area, referring to the illustration on Combination the following page. 4. Touch OK - Kyocera KM-8530 | KM-8530 Operation Guide - Page 212
Lay Out Several Pages onto One Sheet (Combination) (continued) 7. Enter the desired print quantity from the control panel keypad. HINT See p. 3-7 for details on setting print quantity. 8. Position originals FACE UP in the document feeder. HINTS • For details on positioning originals, see p. 3-2 to - Kyocera KM-8530 | KM-8530 Operation Guide - Page 213
paper type in the Key Operator mode. Original images are scanned into memory and automatically arranged in booklet format in correct order. >>>Specifications for Booklet - Kyocera KM-8530 | KM-8530 Operation Guide - Page 214
Making a Multiple Page Signature Booklet (Booklet) (continued) 3. Touch Booklet on the Application Selection Screen. 4. Touch to highlight the desired Booklet mode key. When a cover sheet is required, touch CHANGE OF THE COVERS TRAY to select the cover sheet tray source. Touch CHANGE OF THE BINDING - Kyocera KM-8530 | KM-8530 Operation Guide - Page 215
1a2 or 2a2 copy mode. DETAILS If the copier is equipped with DF-635 Finisher, Folding or Stapling & Folding output mode is available. Follow the trimmer unit will cease operating. To avoid such trouble, select an appropriate print quantity from the specifications on p. 11-3. The roller drive unit is - Kyocera KM-8530 | KM-8530 Operation Guide - Page 216
the Basic Screen to display the Output Mode popup menu, then touch MAIN TRAY to highlight it. 2 Touch STAPLING & FOLDING or FOLDING, as desired. NOTE: Selecting FOLDING or STAPLING & FOLDING will automatically switch the output tray to Booklet tray. Notice that the arrow shown beside the Main tray - Kyocera KM-8530 | KM-8530 Operation Guide - Page 217
into a binder. Application Selection Screen Sheet/Cover Insertion >>>Specifications for Transparency Interleave - Kyocera KM-8530 | KM-8530 Operation Guide - Page 218
Copying onto Transparent Films (Transparency Interleave) (continued) 4. Touch Transparency Interleave on the Application Selection Screen. 5. Select the desired Transparency Interleave mode, then touch OK. 6. Touch OK on the Application Selection Screen. The Basic Screen will be restored. DETAILS • - Kyocera KM-8530 | KM-8530 Operation Guide - Page 219
images as a finished set. The selected copy paper size is determined by the size of originals loaded in the document feeder. >>>Specifications for Image Insert - Kyocera KM-8530 | KM-8530 Operation Guide - Page 220
Inserting Images into Printed Sets (Image Insert) (continued) 3. Use the control panel keypad to enter the page number. Touch SET after each entry to move to the next key. When setting more than 15 locations, touch the arrow key to move to the next page. To clear an incorrect entry, touch DELETE. - Kyocera KM-8530 | KM-8530 Operation Guide - Page 221
12. • Should memory overflow occur frequently, it is recommended that you contact your service representative to extend the memory capacity in your machine. 12. Touch STORE to exit the Store mode. 13. Press [START]. The copier will start printing when ready for output. Application Selection Screen - Kyocera KM-8530 | KM-8530 Operation Guide - Page 222
from the third scan, after the first and second scan copy normally. >>>Specifications for Book Copy - Kyocera KM-8530 | KM-8530 Operation Guide - Page 223
Dividing an Image into Right and Left Pages (Book Copy) (continued) 2. Touch Book Copy on the Application Selection Screen. Application Selection Screen Sheet/Cover Insertion Chapter The Book Copy Screen will be displayed. 3. Select the desired Book Copy mode. Combination Booklet Transparency - Kyocera KM-8530 | KM-8530 Operation Guide - Page 224
released and 1.00 magnification is selected automat- ically. Change the magnification manually, if desired. 8. Enter the desired print quantity from the control Touch STORE to exit the Store mode. 13. Press [START]. The copier will start printing when ready for output. CAUTION When the finisher / - Kyocera KM-8530 | KM-8530 Operation Guide - Page 225
Dividing an Image into Right and Left Pages (Book Copy) (continued) Scanning Original for Cover Use platen glass for scanning original for cover. 1 Open the document feeder. 2 Position original for front cover FACE DOWN on the platen glass. 3 Press [START] to start scanning. 4 When Front/Back Cover - Kyocera KM-8530 | KM-8530 Operation Guide - Page 226
each set (referred to as JOB), then output them all as a complete set. >>>Specifications for Program Job - Kyocera KM-8530 | KM-8530 Operation Guide - Page 227
Programming Different Settings for an Output Job (Program Job) (continued) 2. Touch Program Job on the Application Selection Screen. Application Selection Screen Sheet/Cover Insertion Chapter The incompatible function keys will be dimmed to show inactivity. Combination 3. Touch OK on the - Kyocera KM-8530 | KM-8530 Operation Guide - Page 228
Memory overflow may occur during scanning. See p. 5-11 to p. 5-12. • Should memory overflow occur frequently, it is recommended that you contact your service representative to extend the memory capacity in your machine. 9. Select the desired output mode and enter the print quantity from the control - Kyocera KM-8530 | KM-8530 Operation Guide - Page 229
glass area outside the borders of the original will not be copied. >>>Specifications for Non-Image Area Erase - Kyocera KM-8530 | KM-8530 Operation Guide - Page 230
copier manually so that the Non-Image Area Erase functions without fail. See p. 13-53. Oblique erase mode Rectangle erase mode Having Any Problem ? This function may perform incorrectly if the lighting in the work place is directly over the platen glass. In this case, consult your service - Kyocera KM-8530 | KM-8530 Operation Guide - Page 231
and vice versa. This is very good for copying white-on-black originals and reversing them to fax. >>>Specifications for Reverse Image - Kyocera KM-8530 | KM-8530 Operation Guide - Page 232
Reversing Color in Black and White Image (Reverse Image) (continued) 4. Enter the desired print quantity from the control panel keypad. HINT See p. 3-7 for details on setting print quantity. 5. Position original(s) FACE UP in the document feeder or FACE DOWN on the platen glass. HINT For details on - Kyocera KM-8530 | KM-8530 Operation Guide - Page 233
rear left corner of the A3 original area indicated on the left edge of the platen glass. >>>Vertical/Horizontal Width Setting Mode Specifications - Kyocera KM-8530 | KM-8530 Operation Guide - Page 234
Repeating Selected Image Area (Repeat: Vert./Horiz. Mode) (continued) 3. Touch Vertical/Horizontal, then specify the vertical and horizontal widths of the scanning area. Use up/down arrow key to enter the width from 10 to 150mm in 1mm increments. Keep touching the key to increase/decrease the value - Kyocera KM-8530 | KM-8530 Operation Guide - Page 235
Repeating Selected Image Area (Repeat: Vert./Horiz. Mode) (continued) 7. Enter the desired print quantity from the control panel keypad. HINT See p. 3-7 for details on setting print quantity. 8. Position original FACE DOWN on the platen glass. HINT See the illustration on p. 9-33 for details. 9. - Kyocera KM-8530 | KM-8530 Operation Guide - Page 236
and mode (2 Repeat, 4 Repeat, or 8 Repeat), then arrange the image by specified times in one copy sheet. >>>Auto Detection/ Repeat Mode Specifications - Kyocera KM-8530 | KM-8530 Operation Guide - Page 237
Repeating Automatically or Selecting Repeating Times (Repeat: AUTO/ Repeat Mode) (continued) 1. Touch APPLI. on the Basic Screen. Reminder! When starting a new copying job, be sure to close the RADF securely, then press [AUTO RESET]. Application 2. Touch Repeat on the Application Selection - Kyocera KM-8530 | KM-8530 Operation Guide - Page 238
The AUTO mode may not operate properly if the lighting in the work place is directly over the platen glass. In this case, consult your service representative about an appropriate place for installation. 9-38 - Kyocera KM-8530 | KM-8530 Operation Guide - Page 239
Use Frame/Fold Erasure to eliminate black copy marks along borders to clean up and improve the presentation of the copy. >>>Specifications for Frame/Fold Erasure - Kyocera KM-8530 | KM-8530 Operation Guide - Page 240
Eliminating Black Copy Marks Along Borders (Frame/Fold Erasure) (continued) 3. Touch to highlight the desired mode key. Touch Frame Erasure (All sides), Frame Erasure (Each side), or Fold Erasure to highlight it. Either Frame erasure mode and Fold erasure can be selected in combination. 4. Specify - Kyocera KM-8530 | KM-8530 Operation Guide - Page 241
Eliminating Black Copy Marks Along Borders (Frame/Fold Erasure) (continued) Use the touch screen keypad or up/down arrow key to enter the desired erasure amount, from 1 to 300mm in 1mm increments. To specify Fold Erasure amount: Application Selection Screen Sheet/Cover Insertion Chapter - Kyocera KM-8530 | KM-8530 Operation Guide - Page 242
center the whole image on the copy paper making it easy to copy small pieces of paper. >>>Specifications for AUTO Layout - Kyocera KM-8530 | KM-8530 Operation Guide - Page 243
, remove the copied sets as they exit; otherwise, mishandled paper will occur. Frame/Fold Erasure AUTO Layout All-Image Area Image Shift Having Any Problem? The AUTO layout function may not operate properly if the lighting in the work place is directly over the platen glass. In this case, consult - Kyocera KM-8530 | KM-8530 Operation Guide - Page 244
Printing Images Fully to the Edges (All-Image Area) Use this function to make copies printed completely to the edges. >>>Specifications for All-Image Area - Kyocera KM-8530 | KM-8530 Operation Guide - Page 245
Printing Images Fully to the Edges (All-Image Area) (continued) 5. Enter the desired print quantity from the control panel keypad. HINT See p. 3-7 for details on setting print quantity. 6. Position original(s) FACE UP in the document feeder or FACE DOWN on the platen glass. Application - Kyocera KM-8530 | KM-8530 Operation Guide - Page 246
the illustration on p. 9-48 for details. If image loss is likely, select the Reduce & Shift mode instead of regular Image shift. See p. 9-49. >>>Specifications for Image Shift - Kyocera KM-8530 | KM-8530 Operation Guide - Page 247
Adjusting Position of Copy Image (Image Shift) (continued) 3. Touch Image Shift on the Application Selection Screen. Application Selection Screen Sheet/Cover Insertion Chapter 4. Touch Image Shift on the Image Shift Setting Screen, then specify Combination the shift direction and amount. Booklet - Kyocera KM-8530 | KM-8530 Operation Guide - Page 248
Adjusting Position of Copy Image (Image Shift) (continued) 5. Touch OK. The Application Selection Screen will be restored. 6. Touch OK on the Application Selection Screen. The Basic Screen will be restored. 7. Enter the desired print quantity from the control panel keypad. HINT See p. 3-7 for - Kyocera KM-8530 | KM-8530 Operation Guide - Page 249
Create Binding Margin (Reduce&Shift) Use Reduce & Shift instead of regular Image Shift to prevent image loss when creating a binding margin. >>>Specifications for Reduce & Shift - Kyocera KM-8530 | KM-8530 Operation Guide - Page 250
Reducing Images to Create Binding Margin (Reduce&Shift) (continued) 1. Select the copy mode and paper size, as required. 2. Touch APPLI. on the Basic Screen. Reminder! When starting a new copying job, be sure to close the RADF securely, then press [AUTO RESET]. 3. Touch Image Shift on the - Kyocera KM-8530 | KM-8530 Operation Guide - Page 251
Reducing Images to Create Binding Margin (Reduce&Shift) (continued) 5. Touch OK. The Application Selection Screen will be restored. 6. Touch OK on the Application Selection Screen. The Basic Screen will be restored. 7. Enter the desired print quantity from the control panel keypad. Application - Kyocera KM-8530 | KM-8530 Operation Guide - Page 252
described in the next subsection) provided on the Stamp/Overlay Selection Screen can be used individually or in multiple combinations. >>>Specification for STAMP, SET NUMBERING, PAGE NUMBERING, DATE/TIME - Kyocera KM-8530 | KM-8530 Operation Guide - Page 253
Printing Stamp, Page, Date/Time onto Copies (Stamp) (continued) 2. Touch Stamp/Overlay on the Application Selection Screen. The Stamp/Overlay Selection Screen will be displayed. 3. Touch to select the desired key in the STAMP area. Application Selection Screen Sheet/Cover Insertion Chapter - Kyocera KM-8530 | KM-8530 Operation Guide - Page 254
Printing Stamp, Page, Date/Time onto Copies (Stamp) (continued) When selecting SET NUMBERING: Specify the numbering type, printing position, character size, printed page and starting No. Touch to highlight the desired numbering type key and printing position key on the screen. If fine adjustment is - Kyocera KM-8530 | KM-8530 Operation Guide - Page 255
Printing Stamp, Page, Date/Time onto Copies (Stamp) (continued) When selecting DATE/TIME: Specify the date/time type, printing position, character size and printed page. Application Selection Screen Sheet/Cover Insertion Chapter Touch to highlight the desired date, time, and printing position keys - Kyocera KM-8530 | KM-8530 Operation Guide - Page 256
Printing Stamp, Page, Date/Time onto Copies (Stamp) (continued) CAUTION When the finisher / trimmer unit / paper exit tray capacity is exceeded due to the print quantity selected, remove the copied sets as they exit; otherwise, mishandled paper will occur. DETAILS: Fine Adjustment Setting Screen - Kyocera KM-8530 | KM-8530 Operation Guide - Page 257
Printing Stamp, Page, Date/Time onto Copies (Stamp) (continued) Use +5- to enter a minus number to print from halfway through, e.g. -2 to print "1" from page 4. Touch OK to return to the previous screen. Originals When "(+)2" is entered: Copies 2 3 4 5 6 When "-2" is entered: Application - Kyocera KM-8530 | KM-8530 Operation Guide - Page 258
center of the page (WATERMARK), or the numbers in the specified form repeatedly over the scanned image (WATERMARK NUMBERING). >>>Specification for WATERMARK and WATERMARK NUMBERING - Kyocera KM-8530 | KM-8530 Operation Guide - Page 259
Printing Watermark onto Copies (Stamp) (continued) 3. Touch WATERMARK or WATERMARK NUMBERING, as desired. Application Selection Screen Sheet/Cover Insertion Chapter The subsequent screen will be displayed to allow you to specify the selected Combination watermark type. 4. Booklet When selecting - Kyocera KM-8530 | KM-8530 Operation Guide - Page 260
Printing Watermark onto Copies (Stamp) (continued) 5. Touch OK. The Stamp/Overlay Selection Screen will be restored. Touch to select another stamp function key to use in combination, if desired. 6. Touch OK on the Stamp/Overlay Selection Screen. The Application Selection Screen will be restored. 7. - Kyocera KM-8530 | KM-8530 Operation Guide - Page 261
Job (Overlay) Use this function to scan an image, then overlay the image onto each page copied in the job. >>>Specification for Overlay - Kyocera KM-8530 | KM-8530 Operation Guide - Page 262
Overlaying an Image onto Each Page Copied in the Job (Overlay) (continued) 3. Touch OVERLAY. 4. Touch OK on the Stamp/Overlay Selection Screen. The Application Selection Screen will be restored. 5. Touch OK on the Application Selection Screen. The Basic Screen will be restored. The Store mode is - Kyocera KM-8530 | KM-8530 Operation Guide - Page 263
Overlaying an Image onto Each Page Copied in the Job (Overlay) (continued) 12. Repeat steps 10 and 11 for all originals. 13. Touch STORE to exit the Store mode, then press [START] to print. CAUTION When the finisher / trimmer unit / paper exit tray capacity is exceeded due to the print quantity - Kyocera KM-8530 | KM-8530 Operation Guide - Page 264
and store several images in HDD, then recall the desired image from the HDD to overlay onto each page copied in the job. >>>Specification for Overlay Memory - Kyocera KM-8530 | KM-8530 Operation Guide - Page 265
Storing an Overlay Image in HDD / Overlaying Image Stored in HDD (Overlay Memory) (continued) 2. Touch Stamp/Overlay on the Application Selection Screen. Application Selection Screen Sheet/Cover Insertion Chapter The Stamp/Overlay Selection Screen will be displayed. 3. Touch OVERLAY MEMORY. - Kyocera KM-8530 | KM-8530 Operation Guide - Page 266
Storing an Overlay Image in HDD / Overlaying Image Stored in HDD (Overlay Memory) (continued) 5. Enter the desired image name. Use the touch screen keypad to enter the desired name up to 8 characters. The date when you made this entry will be stored automatically. To correct an entry, touch 1- - Kyocera KM-8530 | KM-8530 Operation Guide - Page 267
Storing an Overlay Image in HDD / Overlaying Image Stored in HDD (Overlay Memory) (continued) The machine automatically starts to store the overlaying image data in the HDD. The Overlaying Image Selection Screen will resume when the storing function is completed. To continue to store the overlaying - Kyocera KM-8530 | KM-8530 Operation Guide - Page 268
Storing an Overlay Image in HDD / Overlaying Image Stored in HDD (Overlay Memory) (continued) CAUTION When the finisher / paper exit tray capacity is exceeded due to the print quantity selected, remove the copied sets as they exit; otherwise, mishandled paper will occur. DETAILS: Popup Menu for Name - Kyocera KM-8530 | KM-8530 Operation Guide - Page 269
)........10-22 Setting E-Mail Transmission Function (Environment Setup 10-27 Setting E.C.M. Function (Environment Setup 10-29 Setting Scan Transmission Function (Environment Setup 10-37 Transmitting/Editing Machine Setting File (Environment Setup) .....10-41 Server Functions Image Store/Delete - Kyocera KM-8530 | KM-8530 Operation Guide - Page 270
To Use Server Functions Use Server function with HDD to accumulate scanned images into built-in DIMM (memory), then store the image data in HDD so that the data can be recalled to DIMM and output as needed. This function also allows you to store the image data for normal copying procedures. Scan - Kyocera KM-8530 | KM-8530 Operation Guide - Page 271
DIMM for printing. Server Functions Image Store/Delete Image Store&Output Image Recall To Use Web Utilities Machine Information Job Status HDD Job Information Environment Setup 10 Network Function 10-3 - Kyocera KM-8530 | KM-8530 Operation Guide - Page 272
this function to delete it from HDD. To Store Image Data in HDD Specify your password when storing the data in HDD for protection. Image data can be given an alphabetical job name. >>>Specifications for Storing Image Data in HDD - Kyocera KM-8530 | KM-8530 Operation Guide - Page 273
Store/Delete Site Selection Screen will be displayed. 3. Enter the desired image data password in up to 8 characters from the touch screen keypad. Server Functions Image Store character, then enter the correct password. To Use Web Utilities Machine Information Job Status HDD Job Information - Kyocera KM-8530 | KM-8530 Operation Guide - Page 274
in HDD (Image Store/Delete) (continued) 4. If the password is correct, touch OK. The Job Name Entry Screen will be then enter the correct job name. 6. If the job name is correct, touch OK. The Scanner Setting Screen will be displayed. DETAILS If an entered job name has already been used, the popup - Kyocera KM-8530 | KM-8530 Operation Guide - Page 275
storing data in the HDD. If Store mode is used, touch to deselect STORE on the Scanner Setting Screen after all originals are scanned, then press [START]. When storing job is almost Web Utilities Machine Information Job Status HDD Job Information Environment Setup 10 Network Function 10-7 - Kyocera KM-8530 | KM-8530 Operation Guide - Page 276
Storing/Deleting Image Data in HDD (Image Store/Delete) (continued) To Delete Image Data from HDD The password specified when storing the data in HDD is required. The image data is to be specified by the given job name. Delete HDD 1. Press [MODE] - Kyocera KM-8530 | KM-8530 Operation Guide - Page 277
Deleting Image Data in HDD (Image Store/Delete) (continued) 3. Enter your image data password from the touch screen keypad. To correct an entry, touch 1-CHARACTER DELETE repeatedly to Use Web Utilities Machine Information Job Status HDD Job Information Environment Setup 10 Network Function 10-9 - Kyocera KM-8530 | KM-8530 Operation Guide - Page 278
menu will disappear. 6. Touch OK to restore the Scan/Server Setting Menu Screen. DETAILS To delete the data stored with different password, touch PREVIOUS SCREEN to return to the Image Data Password Entry Screen. 7. Press [MODE] to light up the [COPY] LED. The Basic Screen will be restored. 10-10 - Kyocera KM-8530 | KM-8530 Operation Guide - Page 279
popup menu. 2. Touch HDD STORE. Image Store/Delete Image Store&Output Image Recall To Use Web Utilities Machine Information Job Status HDD Job Information Environment Setup 10 Network Function The Image Data Password Entry Screen will be displayed. 10-11 - Kyocera KM-8530 | KM-8530 Operation Guide - Page 280
characters from the touch screen keypad. To correct an entry, touch 1-CHARACTER DELETE repeatedly to delete each character, then enter the correct password. 4. If the password is correct, touch OK. The Job Name Entry Screen will be displayed. 5. Enter the desired job name in up to 8 characters from - Kyocera KM-8530 | KM-8530 Operation Guide - Page 281
popup menu to delete the data, or touch NO to continue. Image Recall To Use Web Utilities Machine Information Job Status HDD Job Information Environment Setup 10 Network Function 10-13 - Kyocera KM-8530 | KM-8530 Operation Guide - Page 282
function to recall the image data from the HDD to the built-in DIMM for printing. To recall data stored in the HDD, enter the password specified at the time data was stored, then designate it by the job name. Output DIMM Recall HDD 1. Press [MODE] to light up the [SCAN - Kyocera KM-8530 | KM-8530 Operation Guide - Page 283
Recalling Image Data from HDD (Image Recall) (continued) 3. Enter your image data password from the touch screen keypad. To correct an entry, touch 1-CHARACTER DELETE repeatedly to to complete the image recall and output operation. HDD Job Information Environment Setup 10 Network Function 10-15 - Kyocera KM-8530 | KM-8530 Operation Guide - Page 284
Recalling Image Data from HDD (Image Recall) (continued) Selecting WAIT OUTPUT: (1) Touch OK. When the data transmission is completed, the Basic Screen will be displayed reflecting the settings made for that job. (2) Enter the desired print quantity, then press [START] to print. Selecting PROOF - Kyocera KM-8530 | KM-8530 Operation Guide - Page 285
provides the following functions. 1 Main Page Displays the job in progress, service call, and machine information. 2 Job Status Displays the current and previous name of the image data is also available. 4 Environment Setup Performs the Key Operator setting concerning network environment and E.C.M. - Kyocera KM-8530 | KM-8530 Operation Guide - Page 286
. The Main Page informs you of the current job status of the machine and the maintenance item, if required. • Service call • JAM • Paper supply • Toner supply • Staple cartridge supply • Dispose of Trimmer trash basket • Dispose ot Punch trash basket • PM call DETAILS • Click on [REFRESH] in - Kyocera KM-8530 | KM-8530 Operation Guide - Page 287
17 for detailed procedure to access the Web Utilities. 2. Click on the 8530 image. Server Functions Image Store/Delete The window now provides the paper Information Job Status HDD Job Information Environment Setup 10 Network Function DETAILS Click on [REFRESH] in the window to update - Kyocera KM-8530 | KM-8530 Operation Guide - Page 288
[Job Status]. The current job status, number of jobs in waiting, and remaining time to elapse before completing the print job. DETAILS Clicking on the 8530 image will display the machine information. See p. 10-19. DETAILS Click on [REFRESH] to update the information. 10-20 - Kyocera KM-8530 | KM-8530 Operation Guide - Page 289
" area. Server Functions Image Store/Delete Image Store&Output Image Recall To Use Web Utilities Machine Information Job Status HDD Job Information Environment Setup 10 Network Function DETAILS If no print job has been made after the machine is powered on, no indication will appear in the first - Kyocera KM-8530 | KM-8530 Operation Guide - Page 290
-17 for detailed procedure to access the Web Utilities. 2. Click on [HDD Job Information]. 3. Enter the Image Recall Password, then click on [Apply]. HINT The Image Recall Password is the image data password entered in up to 8 characters when the image data was stored in HDD. See p. 10-5, 10-9 or 10 - Kyocera KM-8530 | KM-8530 Operation Guide - Page 291
those having the same image data password will be listed. • The printer data stored in HDD will also be listed. 4. Search the desired image data. To search a specific image data, enter the job name will resume the searched job list. HDD Job Information Environment Setup 10 Network Function 10-23 - Kyocera KM-8530 | KM-8530 Operation Guide - Page 292
, the print job cannot be completed successfully and the message displayed in the "Result of job print" dialogue box will inform you that the wrong password was entered. HINT See p. 13-15 for details of the ECM setting. Selecting Auto output: Enter the desired print quantity, then click on [Apply - Kyocera KM-8530 | KM-8530 Operation Guide - Page 293
. Server Functions Image Store/Delete Image Store&Output Image Recall To Use Web Utilities Machine Information Job Status HDD Job Information Environment Setup 10 Network Function Click on [Yes] to delete the data. Choosing [Back] will resume the Job list dialogue box. DETAILS • Once deleted - Kyocera KM-8530 | KM-8530 Operation Guide - Page 294
Operating Image Data Stored in HDD (HDD Job Information) (continued) 8. Change the job name of the image data. Click on [Rename] on the right side of the desired job name to change the job name of the image data. The Change Job name dialogue box will be displayed. Enter the new job name using - Kyocera KM-8530 | KM-8530 Operation Guide - Page 295
See p. 10-17 for detailed procedure to access the Web Utilities. 2. Click on [Environment Setup]. 3. Display the E-Mail Transmission Setting window. Enter the 4-digit Key Operator password, then click on [Apply]. Click on [E-Mail transmission setting]. Server Functions Image Store/Delete Image - Kyocera KM-8530 | KM-8530 Operation Guide - Page 296
Setting E-Mail Transmission Function (Environment Setup) (continued) 4. Perform the setting. Enter the IP address of the mail server, IP address of the DNS server send a test mail to the manager. DETAILS The Extension for maintenance option will be exclusively used by a service representative. 10-28 - Kyocera KM-8530 | KM-8530 Operation Guide - Page 297
settings can also be performed on the machine except for the Wrong E.C.M. password (from printer) setting, or may require the operation on the machine. Refer to p. 2. Click on [Environment Setup]. 3. Display the E.C.M. Function Setting window. Enter the 4-digit Key Operator password, then click on [ - Kyocera KM-8530 | KM-8530 Operation Guide - Page 298
Setting E.C.M. Function (Environment Setup) (continued) Click on [E.K.C. function setting]. The Enter Network Password dialog box will be displayed. Enter "ekc" in the User Name text box, and an 8-digit master key code in the Password text box, then click on [OK]. The E.C.M. Function Setting menu - Kyocera KM-8530 | KM-8530 Operation Guide - Page 299
Setup) (continued) The E.C.M. Data Setting window will be displayed. Enter the following items to register a new E.C.M. data, then click on [Apply]. Number: Automatically assigned Password the machine immediately to be valid for the user operations. Server Functions Image Store/Delete Image Store - Kyocera KM-8530 | KM-8530 Operation Guide - Page 300
. The E.C.M. Data List window will be displayed. HINT The "Another user count" in the list indicates the count accumulated for the jobs performed by non-registered users. This data cannot be edited other than resetting the counter. To change Password, Name, or Limit: (1) Click on the number of the - Kyocera KM-8530 | KM-8530 Operation Guide - Page 301
Setting E.C.M. Function (Environment Setup) (continued) The E.C.M. Edit Setting window will be displayed. (2) Change the password, name, or limit, as be transmitted to the machine immediately to be valid for the user operations. Server Functions Image Store/Delete Image Store&Output Image Recall - Kyocera KM-8530 | KM-8530 Operation Guide - Page 302
Setting E.C.M. Function (Environment Setup) (continued) To reset E.C.M. count: (1) Click on the check box(es) to select the E.C.M. data of the counter to be cleared, then click on the radio - Kyocera KM-8530 | KM-8530 Operation Guide - Page 303
Setting E.C.M. Function (Environment Setup) (continued) To delete E.C.M. data: (1) Click on the check box(es) to select the E.C.M. data to be deleted, then click on the radio button (a white circle) heading the "Delete selected item(s) (Except for Another user count)." (2) Click on [Apply]. The - Kyocera KM-8530 | KM-8530 Operation Guide - Page 304
Setting E.C.M. Function (Environment Setup) (continued) 6. Set the E.C.M. function. Click on [E.K.C. function Click on [Apply]. The change made in the settings will be transmitted immediately for the user operations. DETAILS To restore the previous setting, click on [Reset]. To cancel the E.C.M. - Kyocera KM-8530 | KM-8530 Operation Guide - Page 305
web browser. For details of the Scan Transmission Setting, contact your service representative. >>>Specifications for Scan Transmission Setting - Kyocera KM-8530 | KM-8530 Operation Guide - Page 306
Setup) (continued) DETAILS The [Scan transmission setting] key appears in the window only when the Printing System (2) Printer Controller is installed in the machine. 4. Register the E-Mail, HDD, and FTP, as required. HINT For details of this setting, refer to the instruction manual of the printer - Kyocera KM-8530 | KM-8530 Operation Guide - Page 307
on [Change]. The window for changing the selected item will be displayed. To Use Web Utilities Machine Information Job Status HDD Job Information Environment Setup 10 Network Function Change the contents as desired, then click on [Registration]. The registered content will be displayed. 10-39 - Kyocera KM-8530 | KM-8530 Operation Guide - Page 308
Setting Scan Transmission Function (Environment Setup) (continued) Click on [Back] to return to the Scan Transmission Setting window. 7. Delete the registered contents. Display the Entry List of the desired item as - Kyocera KM-8530 | KM-8530 Operation Guide - Page 309
Web Utilities HINT Machine Information See p. 10-17 for detailed procedure to access the Web Utilities. Job Status 2. Click on [Environment Setup]. 3. Display the Setting File Import/Export window. Enter the 4-digit Key Operator password, then click on [Apply]. HDD Job Information Environment - Kyocera KM-8530 | KM-8530 Operation Guide - Page 310
Transmitting/Editing Machine Setting File (Environment Setup) Click on [Setting data Import/Export]. The Enter Network Password dialog box will be displayed. Enter "ekc" in the User Name text box, and an 8-digit master key code in the Password text box, then click on [OK]. The Setting File Import/ - Kyocera KM-8530 | KM-8530 Operation Guide - Page 311
Transmitting/Editing Machine Setting File (Environment Setup) DETAILS The data type cannot be specified other than "TAB separated." Confirm that the radio button heading "Save this file to disk" is marked in the File Download dialog box, then click on [OK]. In the dialog box, designate the folder - Kyocera KM-8530 | KM-8530 Operation Guide - Page 312
File (Environment Setup) 5. Edit the machine setting file. The machine setting file transmitted to a PC is a TAB separated text data which can be edited using an application software such as Text Editor or Table Editor. A new setting file can also be created according to the specifications for each - Kyocera KM-8530 | KM-8530 Operation Guide - Page 313
Transmitting/Editing Machine Setting File (Environment Setup) DETAILS: To Edit the Machine Setting File • Save the file as Specifications for Each Machine Setting File Type E.C.M. data setting file:. • Begin the file with #EKC_TAB. • Max. 1,000 files can be edited. • A line should include PASSWORD, - Kyocera KM-8530 | KM-8530 Operation Guide - Page 314
Transmitting/Editing Machine Setting File (Environment Setup) FTP data setting file:. • Begin the file name with #IP_FTP. • Max. 12 files can be edited. • A line should include PROFILE NAME, HOST ADDRESS, FILE PASS, LOGIN, and PASSWORD, being separated by a tab. • PROFILE NAME should be 18 byte or - Kyocera KM-8530 | KM-8530 Operation Guide - Page 315
11 Paper and Original Information Paper Information 11-2 Original Information 11-8 Paper Information Original Information 11 Paper & Original Info - Kyocera KM-8530 | KM-8530 Operation Guide - Page 316
as Thin 25 ~ 45 lb when specified as Tab paper Weight 16 ~ 110 lb (200 g/m2) 13 ~ 110 lb (200 g/m2) 16 ~ 24 lb for Stapling&Folding / Folding mode 13 ~ 110 lb (200 g/m2) 13 ~ 45* lb 16 ~ 24 lb for Z-Folding mode 16 ~ 24 lb 13 ~ 110 lb (200 g/m2 - Kyocera KM-8530 | KM-8530 Operation Guide - Page 317
be specified as Thick3, irrespective of paper weight, for paper that has difficulty with toner fixation. See p. 13-23 ~p. 13-24. HINTS • See p. 13-23 Maximum number of folded sheet is 3 for Folding mode, and 20 for Stapling&Folding mode. 200 sheets (200g/m2) for each Unlimited Punching: Unlimited - Kyocera KM-8530 | KM-8530 Operation Guide - Page 318
20 20 51~60* - 15 15 61~100* - 10 10 *51 ~ 100 copies can be stapled by DF-630 Finisher only. Capacity for Mixed Size Originals using Z-Folding and Staple-Sort Capacity for one stapled set Primary Tray Capacity Number of Z-folded sheets Number of regular sheets 1 sheet 1 ~ 40 sheets - Kyocera KM-8530 | KM-8530 Operation Guide - Page 319
trays (Tray 1, 2, and 3), see p. 1323 to p. 13-24. • LT-402 is initially fixed to 8.5"x11", and LT-412 is fixed to 11"x17". Contact your service representative to change the tray size, if desired. Paper Information Original Information 11 Paper & Original Info 11-5 - Kyocera KM-8530 | KM-8530 Operation Guide - Page 320
5.5"x8.5"W* *Portrait orientation only. Max. 12.36" x 18.07" (314mm x 459mm) ~ Min. 3.94" x 5.83" (100mm x 148mm) 11"x17" / 8.5"x11"R only in Stapling&Folding / Folding mode Max. 12.36" x 18.07" (314mm x 459mm) ~ Min. 5.5" x 8.5" 11"x17", 8.5"x11" Punching mode: 11"x17", 8.5"x11" Z-Folding mode: 11 - Kyocera KM-8530 | KM-8530 Operation Guide - Page 321
cannot be loaded in the main body trays. Transparent film, labels, hole punch DETAILS When using special paper type other than the above mentioned, select "User" as the paper type in Paper type/size setting for the Multi-sheet bypass tray. To Store Copy Paper • Store paper in a cool, dry area - Kyocera KM-8530 | KM-8530 Operation Guide - Page 322
originals are folded, stapled, torn, or in generally poor condition. HINT See each description in this manual for copy conditions which film, art paper, cellophane Doubled, punched or stapled originals Thin or thick originals Platen Glass Original Specifications ❒ Max. original size: 11"x17" ( - Kyocera KM-8530 | KM-8530 Operation Guide - Page 323
mode • Mixed Original mode • Z-Folded Original mode • SDF mode Specifications for each mode are described as follows. HINT Detectable paper size can be ❒ Original size: Three types of size combination are determined by the RADF guide width. 11"x17", 8.5"x14", 8.5"x11", and 5.5"x8.5"* mixed 8.5"x14", - Kyocera KM-8530 | KM-8530 Operation Guide - Page 324
Original Information (continued) DETAILS See below for the guide width of each combination. Guide 8.5"x11" 11"x17" width Guide 5.5"x 8.5"x width 8.5" 11" 8.5"x14" Z-Folded Original mode Use Z-Folded Original mode to scan folded originals without using the size detection sensor of the RADF. See p. - Kyocera KM-8530 | KM-8530 Operation Guide - Page 325
12 Maintenance & Supplies How to Maintain the Copier Adding Toner 12-2 Inserting a New Staple Cartridge into DF-630/635 Finisher 12-6 -15 Checking Copy Count 12-17 Adding Toner Inserting New Staple Cartridge Empty Trash Basket Cleaning Scanning Section Checking Copy Count 12 Maintenance & - Kyocera KM-8530 | KM-8530 Operation Guide - Page 326
as described on the label on the front of the toner box. Otherwise, machine trouble may occur. Add toner according to the procedure as follows. 1. Open the copier front door, then pull out the toner box 90 degrees to the right. 2. Pull the toner cartridge lock lever forward until it stops. 12-2 - Kyocera KM-8530 | KM-8530 Operation Guide - Page 327
3. Remove the empty toner cartridge. Adding Toner (continued) 4. Shake the new toner cartridge several times to loosen toner, then remove the toner cartridge cap. 5. Set the new toner cartridge into the toner box. Adding Toner Inserting New Staple Cartridge Empty Trash Basket Cleaning Scanning - Kyocera KM-8530 | KM-8530 Operation Guide - Page 328
the d mark on the toner box. DETAILS Be sure to set the hollow part of the toner cartridge upward, otherwise the machine trouble may occur. 7. Push the toner cartridge lock lever backward until it stops. 8. Return the toner box to its original position, then close the copier front door securely. 12 - Kyocera KM-8530 | KM-8530 Operation Guide - Page 329
water and seek medical advice. CAUTION Do not throw the empty toner cartridge into a fire. If it is thrown into a fire, the toner may ignite and cause a dangerous situation. Adding Toner Inserting New Staple Cartridge Empty Trash Basket Cleaning Scanning Section Checking Copy Count 12 Maintenance - Kyocera KM-8530 | KM-8530 Operation Guide - Page 330
message area. Follow the procedure below according to your finisher type to replace the staple cartridge. Reminder! Use only the staples supplied by Kyoceramita. To purchase, please contact your service representative. 1. Open the Finisher door. 2. Pull out the stacker unit slowly by holding the - Kyocera KM-8530 | KM-8530 Operation Guide - Page 331
bottom of the cartridge housing, then remove the empty cartridge. Open the bottom of the cartridge housing while pressing two locks on both sides. Adding Toner Reminder! Do not remove the staples remaining inside the housing; otherwise, the first sheet output after the replenishment will not be - Kyocera KM-8530 | KM-8530 Operation Guide - Page 332
-635: Remove the empty cartridge from the cartridge housing. Reminder! Do not remove the staples remaining inside the housing; otherwise, the first sheet output after the replenishment will not be stapled. 5. Insert the new cartridge into the housing. Firmly insert the cartridge into the housing - Kyocera KM-8530 | KM-8530 Operation Guide - Page 333
Inserting a New Staple Cartridge into DF-630/635 Finisher (continued) DF-635: Remove the lock 8. Return the stacker unit to its original position. DF-630 DF-635 Adding Toner Inserting New Staple Cartridge Empty Trash Basket Cleaning Scanning Section Checking Copy Count 12 Maintenance & Supplies 12-9 - Kyocera KM-8530 | KM-8530 Operation Guide - Page 334
Inserting a New Staple Cartridge into DF-630/635 Finisher (continued) 9. Close the Finisher door. 12-10 - Kyocera KM-8530 | KM-8530 Operation Guide - Page 335
punched even if Punch mode is selected. Follow the procedure below to empty the trash basket. 1. Open the Finisher door. 2. Withdraw the trash basket. Adding Toner Inserting New Staple Cartridge Empty Trash Basket Cleaning Scanning Section Checking Copy Count 12 Maintenance & Supplies 12-11 - Kyocera KM-8530 | KM-8530 Operation Guide - Page 336
Empty Trash Basket of PU-108/PZ-108 Punching (Z-Folding) 3. Empty the trash basket. 4. Return the trash basket to its original position, then close the Finisher door securely. 12-12 - Kyocera KM-8530 | KM-8530 Operation Guide - Page 337
even if Trimming mode is selected. Follow the procedure below to empty the trash basket. 1. Open the trimmer front door. 2. Withdraw the trash basket. Adding Toner Inserting New Staple Cartridge Empty Trash Basket Cleaning Scanning Section Checking Copy Count 12 Maintenance & Supplies 12-13 - Kyocera KM-8530 | KM-8530 Operation Guide - Page 338
Empty Trash Basket of TU-108 Trimmer Unit (continued) 3. Empty the trash basket. 4. Return the trash basket to its original position, then close the trimmer front door securely. 12-14 - Kyocera KM-8530 | KM-8530 Operation Guide - Page 339
may be copied, resulting in dark lines on the copies. Raise the document cover, and clean the left partition glass with a clean soft cloth. Adding Toner Inserting New Staple Cartridge Empty Trash Basket Cleaning Scanning Section Checking Copy Count 12 Maintenance & Supplies 12-15 - Kyocera KM-8530 | KM-8530 Operation Guide - Page 340
Scanning Section (continued) Cleaning the RADF Platen Guide Cover The RADF platen guide cover should be kept clean; otherwise soil marks may be copied or the original size cannot be detected correctly. Raise the document cover, and clean the RADF platen guide cover with a clean soft cloth. Reminder - Kyocera KM-8530 | KM-8530 Operation Guide - Page 341
the following items as a list on the touch panel: Total counter, Copier counter, Printer counter, Counter start date. Check the list, then print it from to return to the Basic Screen. Adding Toner Inserting New Staple Cartridge Empty Trash Basket Cleaning Scanning Section Checking Copy Count 12 - Kyocera KM-8530 | KM-8530 Operation Guide - Page 342
Checking Copy Count (continued) To Print the Counter List 1. Press [P (COUNTER)] on the control panel. R INT PRO P Y COUNTER CLEAR QTY. S The Counter List Screen will be displayed. 2. Touch COUNTER MENU. The Basic Screen will be displayed. 3. Touch the desired tray key to select the copy size. - Kyocera KM-8530 | KM-8530 Operation Guide - Page 343
Setting Mode E.C.M. How to Access the Key Operator Mode 13-2 [1] System Initial Setting 13-4 [2] Copier Initial Setting 13-10 [3] User Setting Mode 13-12 [4] E.C.M. (Electronic Copy Monitor) Function Setting 13-15 [5] Lock / Delete Job Memory 13-22 [6] Paper Type / Special Size Set 13-23 - Kyocera KM-8530 | KM-8530 Operation Guide - Page 344
, modifying machine settings, and controlling user activity, for billing purposes. A unique 4-digit Key Operator password is normally set by service at installation. If the unique code is not set by service, the copier will not display Key Operator Password Entry Screen when the Key Operator - Kyocera KM-8530 | KM-8530 Operation Guide - Page 345
. If the Key Operator password is not valid, check with your service representative. Key Operator Mode 4. Make setting changes from the Key Operator Mode Screen, as described on the following pages. System Initial Setting Copier Initial Setting User Setting Mode E.C.M. DETAILS • To scroll - Kyocera KM-8530 | KM-8530 Operation Guide - Page 346
trouble or request for supplies. [1] Date & Time Setting Set the current date and time, the summer time, and also the time difference. ❒ Default the Date & Time Setting Screen. 3 Adjust the time. The time that the copier currently has is displayed in the upper line, in the order of date, month, - Kyocera KM-8530 | KM-8530 Operation Guide - Page 347
required, touch PREVIOUS SCREEN to restore the Basic Screen to perform copying operations. 13-5 Key Operator Mode System Initial Setting Copier Initial Setting User Setting Mode E.C.M. Lock/Delete Job Memory Paper Type/ Special Size Panel Contrast/ Key Sound Key Operator Data Setting Weekly Timer - Kyocera KM-8530 | KM-8530 Operation Guide - Page 348
[1] System Initial Setting (continued) [2] Language Select Setting Select the language used in the LCD. ❒ Default setting: English System Initial Setting Menu Screen Language Selection Screen Procedure 1 Touch [1] System initial setting on the Key Operator Mode Screen to display the System - Kyocera KM-8530 | KM-8530 Operation Guide - Page 349
your network manager to perform this setting. Incorrect setting may cause a trouble in other network systems. ❒ Setting options: IP address, Subnetmask, Address Setting Screen Key Operator Mode System Initial Setting Copier Initial Setting User Setting Mode E.C.M. IP Address Setting Screen (next - Kyocera KM-8530 | KM-8530 Operation Guide - Page 350
are provided. • Service call • JAM • Paper supply • Toner supply • PM call • Finisher tray full • Complete job • Dispose of trash basket • Non complete job • Staple cartridge supply NOTE: Ask your network manager to perform this setting. Incorrect setting may cause a trouble in other network - Kyocera KM-8530 | KM-8530 Operation Guide - Page 351
Screen. 8 Touch PREVIOUS SCREEN to return to the Basic Screen and perform copying operations. Key Operator Mode System Initial Setting Copier Initial Setting User Setting Mode E.C.M. Lock/Delete Job Memory Paper Type/ Special Size Panel Contrast/ Key Sound Key Operator Data Setting Weekly Timer - Kyocera KM-8530 | KM-8530 Operation Guide - Page 352
are changed by the Key Operator, the new initial settings display when the copier is powered on, when Auto/Reset timer is reached, or when [AUTO RESET manual] Lens mode : [AMS; ratio 0.25~4.00] Paper tray : [APS; trays 1, 2, 3, or LCT] Output mode : [Non-sort; Sort, Group; Staple-sort; Stapling - Kyocera KM-8530 | KM-8530 Operation Guide - Page 353
required, touch PREVIOUS SCREEN to restore the Basic Screen to perform copying operations. 13-11 Key Operator Mode System Initial Setting Copier Initial Setting User Setting Mode E.C.M. Lock/Delete Job Memory Paper Type/ Special Size Panel Contrast/ Key Sound Key Operator Data Setting Weekly Timer - Kyocera KM-8530 | KM-8530 Operation Guide - Page 354
the sample sheet(s), then enter the density level No. by using the touch screen keypad. 7 Touch OK to complete the setting and return to the User Setting Mode Menu Screen. 8 Touch PREVIOUS SCREEN to restore the Key Operator Mode Screen. 9 If no further changes are required, touch PREVIOUS SCREEN to - Kyocera KM-8530 | KM-8530 Operation Guide - Page 355
can be recalled by selecting USER2 on the Basic Screen. User Setting Mode Menu Screen User Density Level 2 Setting Screen Key Operator Mode System Initial Setting Copier Initial Setting User Setting Mode E.C.M. Procedure 1 Touch [3] User setting mode on the Key Operator Mode Screen to display - Kyocera KM-8530 | KM-8530 Operation Guide - Page 356
, changing them is not recommended. ❒ Setting options:Userset or Preset ratio ❒ Default setting: USERSET1: 4.00 USERSET2: 2.00 USERSET3: 0.50 User Setting Mode Menu Screen User Lens Mode Ratio Setting Screen Procedure 1 Touch [3] User setting mode on the Key Operator Mode Screen to display the - Kyocera KM-8530 | KM-8530 Operation Guide - Page 357
allows you to monitor all copying activity by controlling ECM password accounts. This feature can track copier usage for individual users and/or accounts as well as limit access to the copier to authorized users. Copy quantity limits for specific accounts can also be set. Use the ECM Key Operator - Kyocera KM-8530 | KM-8530 Operation Guide - Page 358
[4] E.C.M. (Electronic Copy Monitor) Function Setting How to Access the ECM Setting Mode Key Operator Mode Screen ECM Master Key Code Screen ECM Setting Menu Screen Procedure 1 Touch [4] E.C.M. function setting on the Key Operator Mode Screen. The ECM Master Key Code Screen displays, if a code - Kyocera KM-8530 | KM-8530 Operation Guide - Page 359
Setting Menu Screen ECM Data Edit Screen Key Operator Mode System Initial Setting Copier Initial Setting User Setting Mode E.C.M. ECM Data Change Screen ECM Data Add Screen Password Duplication Screen Name Duplication Screen Procedure 1 Touch [4] E.C.M. function setting on the Key Operator - Kyocera KM-8530 | KM-8530 Operation Guide - Page 360
note 1.) Name: 8 characters max. (See note 2.) Limit: 999,999 copies max. NOTES: 1 We recommend that you make a list of all ECM passwords and account numbers. 2 If an invalid user name is entered, continue by the valid name. (3) Touch OK to complete the setting and to verify whether the same - Kyocera KM-8530 | KM-8530 Operation Guide - Page 361
of copies will be counted only for the ECM password with the smallest No. We recommend you do not use duplicate ECM password. When a name is duplicated: The Name Duplication 13-19 Key Operator Mode System Initial Setting Copier Initial Setting User Setting Mode E.C.M. Lock/Delete Job Memory Paper - Kyocera KM-8530 | KM-8530 Operation Guide - Page 362
[4] E.C.M. (Electronic Copy Monitor) Function Setting [2] E.C.M. All Count Reset Reset the count for all ECM accounts. ECM Setting Menu Screen ECM All Count Reset Screen Procedure 1 Touch [4] E.C.M. function setting on the Key Operator Mode Screen. Enter an 8-digit ECM master key code, then - Kyocera KM-8530 | KM-8530 Operation Guide - Page 363
machine will stop when the count limit is reached, or if the copier will complete the copy job before stopping when reaching maximum copy count. will be cleared. To continue the job using the same user password, change the copy limit of the password or clear the copy count. Touch After job to stop - Kyocera KM-8530 | KM-8530 Operation Guide - Page 364
[5] Lock/Delete Job Memory Use this function to lock/unlock or delete a Job that has been programmed. A locked Job is indicated by a lock icon ( ) on the Lock/Delete Job Memory Screen. The settings of a locked job cannot be changed. ❒ Setting options: Lock Job memory, Unlock Job memory, Delete Job - Kyocera KM-8530 | KM-8530 Operation Guide - Page 365
special paper is used on a regular basis and is always placed in a specific paper tray. Key Operator Mode Screen Paper Type Setting Screen Key Operator Mode System Initial Setting Copier Initial Setting User Setting Mode Special Size Setting Screen (STD size) Special Size Setting Screen (STD - Kyocera KM-8530 | KM-8530 Operation Guide - Page 366
[6] Paper Type / Special Size Set (continued) To specify special size; (1) Touch Special size setting on the Paper Type Setting Screen to display the Special Size Setting Screen. (2) Touch the desired paper tray to highlight it. (3) Touch a paper size key to specify a paper size for the selected - Kyocera KM-8530 | KM-8530 Operation Guide - Page 367
volume of the touch key. Key Operator Mode Screen Panel Contrast/ Key Sound Adjustment Screen Key Operator Mode System Initial Setting Copier Initial Setting User Setting Mode Procedure 1 Touch [7] Panel contrast/Key sound adj. on the Key Operator Mode Screen to display the Panel Contrast/ Key - Kyocera KM-8530 | KM-8530 Operation Guide - Page 368
[8] Key Operator Data Setting Use this screen to enter the name and extension number of the Key Operator indicated on the Help Screen selected from the Basic Screen. ❒ Setting options: 5-digit Key Operator telephone extension; Max. 8-character Key Operator name Key Operator Mode Screen Key - Kyocera KM-8530 | KM-8530 Operation Guide - Page 369
specifically for lunch breaks, weekends and holidays, or any time the copier is not required. In Addition, Timer Interrupt can be enabled (with or without a password your machine, contact your service representative. The following Weekly Initial Setting Copier Initial Setting User Setting Mode - Kyocera KM-8530 | KM-8530 Operation Guide - Page 370
on the Key Operator Mode Screen. The Weekly Timer Master Key Code Screen displays when the 4-digit Weekly Timer master key code is set by service. Otherwise, the Weekly Timer Setting Menu Screen displays without the code requirement. 2 If the Weekly Timer Master Key Code Screen is displayed, use the - Kyocera KM-8530 | KM-8530 Operation Guide - Page 371
Weekly Timer, or touch Weekly timer Off to deactivate Weekly Timer. The default setting is Weekly timer Off. The selected key will be highlighted. 4 Touch operations. 13-29 Key Operator Mode System Initial Setting Copier Initial Setting User Setting Mode E.C.M. Lock/Delete Job Memory Paper Type - Kyocera KM-8530 | KM-8530 Operation Guide - Page 372
the same, power will not go on. • If the setting is 00:00~00:00, you will not be able to set the copiers off/on condition for specific days. When setting Sunday OFF-time, Monday ON-time is highlighted again. Proceed to step 5. 4 To set the ON/OFF time collectively for - Kyocera KM-8530 | KM-8530 Operation Guide - Page 373
are required, touch PREVIOUS SCREEN to restore the Basic Screen to perform copying operations. Key Operator Mode System Initial Setting Copier Initial Setting User Setting Mode E.C.M. 13-31 Lock/Delete Job Memory Paper Type/ Special Size Panel Contrast/ Key Sound Key Operator Data Setting - Kyocera KM-8530 | KM-8530 Operation Guide - Page 374
/Off Setting Use this function to set the On/Off condition of the copier for a given month. Set the On-Off condition for specific days; or set it collectively, for all Mondays through Sundays of the given month. The default setting is collective: On for Mondays through Saturdays, and Off for Sundays - Kyocera KM-8530 | KM-8530 Operation Guide - Page 375
are required, touch PREVIOUS SCREEN to restore the Basic Screen to perform copying operations. Key Operator Mode System Initial Setting Copier Initial Setting User Setting Mode E.C.M. 13-33 Lock/Delete Job Memory Paper Type/ Special Size Panel Contrast/ Key Sound Key Operator Data Setting - Kyocera KM-8530 | KM-8530 Operation Guide - Page 376
to shut down power for lunch break then turn on again while the copier is turned on due to the Weekly Timer function. The only one off appear grayed out and cannot be selected. The Function Invalid setting is the factory default setting. 5 Touch OK to complete the setting and return to the Weekly - Kyocera KM-8530 | KM-8530 Operation Guide - Page 377
Timer Interrupt function. The default password of 0000 allows the timer function to be interrupted without the requirement for password entry. Weekly Timer Setting Menu Screen Timer Interrupt Password Setting Screen Key Operator Mode System Initial Setting Copier Initial Setting User Setting Mode - Kyocera KM-8530 | KM-8530 Operation Guide - Page 378
[10] Control Panel Adjustment Use this feature to check the malfunction of the LCD touch screen due to the shift in position of the touch sensor. Key Operator Mode Screen Control Panel Adjustment Screen Procedure 1 Touch [10] Control panel adjustment on the Key Operator Mode Screen to display - Kyocera KM-8530 | KM-8530 Operation Guide - Page 379
for each tray when ATS/APS functions. Key Operator Mode Screen 1 Key Operator Mode Screen 2 Key Operator Mode System Initial Setting Copier Initial Setting User Setting Mode Tray Auto Select Setting Screen Procedure 1 Touch [11] Tray auto select setting on the Key Operator Mode Screen to - Kyocera KM-8530 | KM-8530 Operation Guide - Page 380
on the Timer Setting Screen below the Auto Low Power and Auto Shut Off indicators. Touch the arrow keys (c) and (d) in each area to select a specific waiting period before activating the Auto Low Power or Auto Shut Off. NOTES: 1 The period of time selected for Auto Low Power cannot exceed the - Kyocera KM-8530 | KM-8530 Operation Guide - Page 381
detect (SMALL) No. 18: Rotation No. 19: Staple mode reset-function No. 20: Job offset operating No. No. 26: START key latch function No. 27: STOP key function Setting (default is underlined) OFF / 30 sec. / 60 sec. / 90 sec. System Initial Setting Copier Initial Setting User Setting Mode E.C.M. - Kyocera KM-8530 | KM-8530 Operation Guide - Page 382
An interruption suspended way Division of a number of copies / During of a number of copies No. 33: E.C.M. password input timing Auto reset timer / complete job No. 34: Key click sound (No paper, toner/ JAM) OFF / 3 seconds / 5 seconds / 10 seconds No. 35: Reserve copy function Reserve copy by - Kyocera KM-8530 | KM-8530 Operation Guide - Page 383
enlargement mode, an appropriate paper size is selected according to the ratio selected.) 13-41 Key Operator Mode System Initial Setting Copier Initial Setting User Setting Mode E.C.M. Lock/Delete Job Memory Paper Type/ Special Size Panel Contrast/ Key Sound Key Operator Data Setting Weekly Timer - Kyocera KM-8530 | KM-8530 Operation Guide - Page 384
the RADF the copier automatically selects an appropriate ratio for the copy when copy size is selected manually. [14] Staple mode reset-function Staple mode is automatically canceled after a job is completed with Staple sort mode ON. (Sort mode is selected.) [20] Job offset operating Set the copier - Kyocera KM-8530 | KM-8530 Operation Guide - Page 385
the latch function. Key Operator Mode System Initial Setting Copier Initial Setting User Setting Mode [27] STOP key function Select to display the copier with DF-635 mounted to automatically select the Booklet mode when Stapling&Folding or Folding output mode is selected. [29] E.C.M. password - Kyocera KM-8530 | KM-8530 Operation Guide - Page 386
[38] Trimmer (STD/ Non STD size) (Function invalid) Set the machine to allow trimming the folded or stapled & folded sheets in nonstandard size (or wide size). [39] Timer which prohibits Printer Set the timer to allow the printing job after operating the copying job. [40] Bookmark function Select to - Kyocera KM-8530 | KM-8530 Operation Guide - Page 387
patterns used in the machine Key Operator Mode Screen Management List Print Menu Screen Key Operator Mode System Initial Setting Copier Initial Setting User Setting Mode E.C.M. Procedure 1 Touch [14] Machine management list print on the Key Operator Mode Screen to display the Management List - Kyocera KM-8530 | KM-8530 Operation Guide - Page 388
[15] Side 2 Lens Adjustment Use this function to set the adjustment data of the magnification ratio for each tray as Side 2. Key Operator Mode Screen Side 2 Lens Adjustment Screen Procedure 1 Touch [16] Side 2 lens adjustment on the Key Operator Mode Screen to display the Side 2 Lens Adjustment - Kyocera KM-8530 | KM-8530 Operation Guide - Page 389
. Key Operator Mode Screen Finisher Adjustment Menu Screen Stapling&Folding Stopper Position Adjustment Screen Folding Stopper Position Adjustment Screen Key Operator Mode System Initial Setting Copier Initial Setting User Setting Mode E.C.M. Trimming Stopper Adjustment Screen Punch Vertical - Kyocera KM-8530 | KM-8530 Operation Guide - Page 390
[16] Finisher Adjustment (continued) 2nd Folding Position Adjustment Screen Procedure 1 Touch [17] Finisher adjustment on the Key Operator Mode Screen to display the Finisher Adjustment Menu Screen. 2 Touch the desired menu key to display the adjustment screen for each function. 3 Make fine - Kyocera KM-8530 | KM-8530 Operation Guide - Page 391
. Key Operator Mode Screen HDD Management Password Entry Screen Key Operator Mode System Initial Setting Copier Initial Setting User Setting Mode E.C.M. HDD Management Setting Menu Screen Password List/Delete Screen State of HDD Capacity Screen Password List/Delete Screen JOB Auto Delete - Kyocera KM-8530 | KM-8530 Operation Guide - Page 392
Entry Screen will be displayed when the 4-digit HDD management password is set by service representative. Otherwise, the HDD Management Setting Menu Screen displays without the password requirement. If the HDD Management Password Entry Screen is displayed, use the keypad on the touch screen to - Kyocera KM-8530 | KM-8530 Operation Guide - Page 393
Setting key will function only when Printing System (2) Printer Controller is installed on the machine. Key Operator Mode Screen Scan Transmission Setting Screen Key Operator Mode System Initial Setting Copier Initial Setting User Setting Mode E.C.M. Change E-Mail Address Screen Change Box - Kyocera KM-8530 | KM-8530 Operation Guide - Page 394
[18] Scan Transmission Setting (continued) @ ? 3 Select the name key to be changed or deleted. Touch the Lower arrow key to scroll, or Upper arrow key to return. To delete the address: Touch to highlight the desired name key, then touch DELETE. The selected key will be deleted from the screen. To - Kyocera KM-8530 | KM-8530 Operation Guide - Page 395
Area Erase Setting Screen Key Operator Mode System Initial Setting Copier Initial Setting User Setting Mode Procedure 1 Touch [20] Non-image area erase erase mode and density level automatically. To specify the erase mode manually, touch Oblique erase or Rectangle erase, as desired, then select - Kyocera KM-8530 | KM-8530 Operation Guide - Page 396
function. Key Operator Mode Screen Timing Adjustment Menu Screen Printer Restart Timing Adjustment Screen Printer Resist Loop Adjustment Screen Printer Pre-resist Adjustment Screen Printer Lead Edge Timing Adjustment Screen Scanner (Platen) Restart Timing Adjustment Screen RADF Restart Timing - Kyocera KM-8530 | KM-8530 Operation Guide - Page 397
are required, touch PREVIOUS SCREEN to restore the Basic Screen to perform copying operations. Key Operator Mode System Initial Setting Copier Initial Setting User Setting Mode E.C.M. 13-55 Lock/Delete Job Memory Paper Type/ Special Size Panel Contrast/ Key Sound Key Operator Data Setting - Kyocera KM-8530 | KM-8530 Operation Guide - Page 398
to make fine adjustments of the image centering function. Key Operator Mode Screen Centering Adjustment Menu Screen Printer Centering Adjustment Screen Scanner (Platen) Centering Adjustment Screen RADF Centering Adjustment Screen Procedure 1 Touch [22] Centering adjustment on the Key Operator - Kyocera KM-8530 | KM-8530 Operation Guide - Page 399
Index - Kyocera KM-8530 | KM-8530 Operation Guide - Page 400
- Kyocera KM-8530 | KM-8530 Operation Guide - Page 401
3-22 2a1 3-28 A ADD PAPER key 5-10 ADD TONER icon 12-2 Adding Toner 12-2 AES key 3-19 All-Image Area 9-44 AMS key 3-7 "Call for Service" message 5-2 Call for Service Screen 5-2 Cartridge housing Adjustment 13-36 Conveyance fixing unit 2-4 Copier Initial Setting 13-10 Copy Limit 13- Drum unit 2-4 i - Kyocera KM-8530 | KM-8530 Operation Guide - Page 402
password 2-22, 13-15, 13-17 E-Mail Transmission Function 10-27 E-Mail Transmission Setting 13-8 Empty trash basket 12-11, 12-13 Environment 1-7 Environment Setup 13-51 G Gateway address 13-7 Guide width for mixed originals 11-10 H Setting 13-10 Inserting new staple cartridge 12-6 Installation Space - Kyocera KM-8530 | KM-8530 Operation Guide - Page 403
2-16 Left partition glass 12-15 Lens Mode 3-15 Limited use of the copier 5-3 Line speed setting 13-7 Loading Paper 2-23 Loading Tabbed Sheets 2-28, Print 13-45 Machine Setting File 10-41 Manual finishing operation panel 2-8 Manual staple 7-23 Manual stapling & folding mode 7-23 "Memory Full" message - Kyocera KM-8530 | KM-8530 Operation Guide - Page 404
originals 11-9 RADF platen guide cover 12-16 RADF Staple cartridge 12-7 Staple mode reset-function 13-42 Stapling password 7-3 Timer Interrupt Password Setting 13-35 Timer Setting 13-30 Timer which prohibits Printer 13-44 Timing Adjustment 13-54 To Store Copy Paper 11-7 Toner cartridge 2-4, 12-3 Toner - Kyocera KM-8530 | KM-8530 Operation Guide - Page 405
Index U Unsuitable RADF originals 11-8 Up Binding 3-51 User Density Level 1 Setting 13-12 User Density Level 2 Setting 13-13 User Lens Mode Ratio Setting 13-14 User management list 13-45 User Setting Mode 13-12 USER1, USER2 (Density) 3-19, 13-12~13-13 USERSET (Lens Mode) 13-14 V Vertical/Horizontal - Kyocera KM-8530 | KM-8530 Operation Guide - Page 406
- Kyocera KM-8530 | KM-8530 Operation Guide - Page 407
- Kyocera KM-8530 | KM-8530 Operation Guide - Page 408
75038-5299 TEL : (972) 550-8987 FAX : (972) 570-4704 Dallas Parts Distribution Center & National Training Center: 2825 West Story Road, Irving, Texas 75038-5299 TEL : (972) 659-0055 FAX : (972) 570-5816 KYOCERA MITA CANADA, LTD. 6120 Kestrel Road, Mississauga, Ontario L5T 1S8, Canada TEL : (905
-
 1
1 -
 2
2 -
 3
3 -
 4
4 -
 5
5 -
 6
6 -
 7
7 -
8
-
9
-
10
-
11
-
12
-
13
-
14
-
15
-
16
-
17
-
18
-
19
-
20
-
21
-
22
-
23
-
24
-
25
-
26
-
27
-
28
-
29
-
30
-
31
-
32
-
33
-
34
-
35
-
36
-
37
-
38
-
39
-
40
-
41
-
42
-
43
-
44
-
45
-
46
-
47
-
48
-
49
-
50
-
51
-
52
-
53
-
54
-
55
-
56
-
57
-
58
-
59
-
60
-
61
-
62
-
63
-
64
-
65
-
66
-
67
-
68
-
69
-
70
-
71
-
72
-
73
-
74
-
75
-
76
-
77
-
78
-
79
-
80
-
81
-
82
-
83
-
84
-
85
-
86
-
87
-
88
-
89
-
90
-
91
-
92
-
93
-
94
-
95
-
96
-
97
-
98
-
99
-
100
-
101
-
102
-
103
-
104
-
105
-
106
-
107
-
108
-
109
-
110
-
111
-
112
-
113
-
114
-
115
-
116
-
117
-
118
-
119
-
120
-
121
-
122
-
123
-
124
-
125
-
126
-
127
-
128
-
129
-
130
-
131
-
132
-
133
-
134
-
135
-
136
-
137
-
138
-
139
-
140
-
141
-
142
-
143
-
144
-
145
-
146
-
147
-
148
-
149
-
150
-
151
-
152
-
153
-
154
-
155
-
156
-
157
-
158
-
159
-
160
-
161
-
162
-
163
-
164
-
165
-
166
-
167
-
168
-
169
-
170
-
171
-
172
-
173
-
174
-
175
-
176
-
177
-
178
-
179
-
180
-
181
-
182
-
183
-
184
-
185
-
186
-
187
-
188
-
189
-
190
-
191
-
192
-
193
-
194
-
195
-
196
-
197
-
198
-
199
-
200
-
201
-
202
-
203
-
204
-
205
-
206
-
207
-
208
-
209
-
210
-
211
-
212
-
213
-
214
-
215
-
216
-
217
-
218
-
219
-
220
-
221
-
222
-
223
-
224
-
225
-
226
-
227
-
228
-
229
-
230
-
231
-
232
-
233
-
234
-
235
-
236
-
237
-
238
-
239
-
240
-
241
-
242
-
243
-
244
-
245
-
246
-
247
-
248
-
249
-
250
-
251
-
252
-
253
-
254
-
255
-
256
-
257
-
258
-
259
-
260
-
261
-
262
-
263
-
264
-
265
-
266
-
267
-
268
-
269
-
270
-
271
-
272
-
273
-
274
-
275
-
276
-
277
-
278
-
279
-
280
-
281
-
282
-
283
-
284
-
285
-
286
-
287
-
288
-
289
-
290
-
291
-
292
-
293
-
294
-
295
-
296
-
297
-
298
-
299
-
300
-
301
-
302
-
303
-
304
-
305
-
306
-
307
-
308
-
309
-
310
-
311
-
312
-
313
-
314
-
315
-
316
-
317
-
318
-
319
-
320
-
321
-
322
-
323
-
324
-
325
-
326
-
327
-
328
-
329
-
330
-
331
-
332
-
333
-
334
-
335
-
336
-
337
-
338
-
339
-
340
-
341
-
342
-
343
-
344
-
345
-
346
-
347
-
348
-
349
-
350
-
351
-
352
-
353
-
354
-
355
-
356
-
357
-
358
-
359
-
360
-
361
-
362
-
363
-
364
-
365
-
366
-
367
-
368
-
369
-
370
-
371
-
372
-
373
-
374
-
375
-
376
-
377
-
378
-
379
-
380
-
381
-
382
-
383
-
384
-
385
-
386
-
387
-
388
-
389
-
390
-
391
-
392
-
393
-
394
-
395
-
396
-
397
-
398
-
399
-
400
-
401
-
402
-
403
-
404
-
405
-
406
-
407
-
408
 |
 |
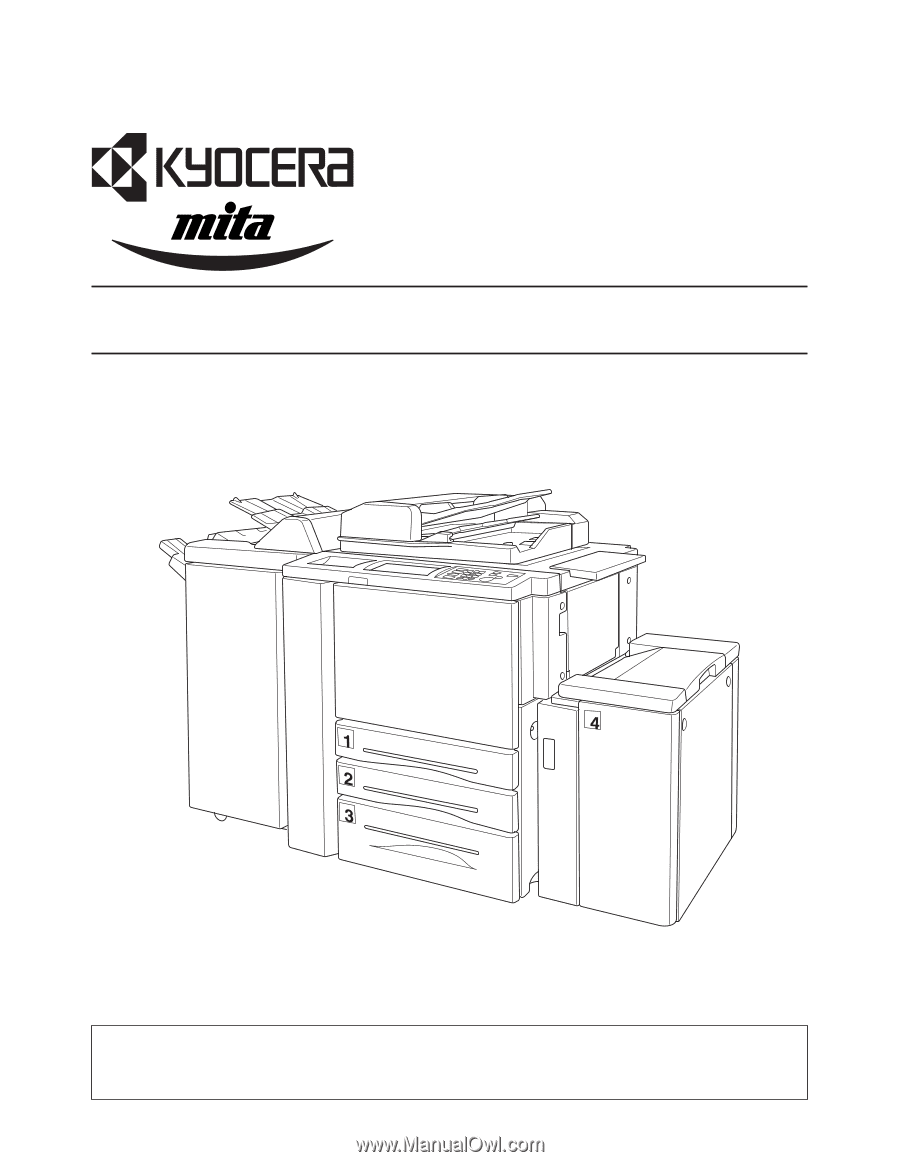
OPERATION GUIDE
Please read the Operation Guide before using the copier. Keep it in the designated
location for easy reference.
KM-8530