Kyocera TASKalfa 181 Scan System (F) B Operation Guide (Functions Edition) - Page 12
Setting Scanner Functions, Resolution, File Format
 |
View all Kyocera TASKalfa 181 manuals
Add to My Manuals
Save this manual to your list of manuals |
Page 12 highlights
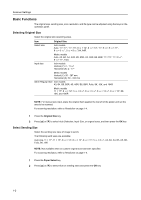
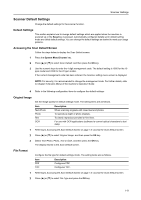
Scanner Settings Setting Scanner Functions This section explains how to configure the scanner functions from the machine. NOTE: Refer to each scanner function operation procedure as explained in Operation Guide (Setup Edition) for information how to display the scanner function settings screen. The available settings may vary depending on the sending method. Resolution The following settings are available by pressing the Sanner Function key. • Resolution...1-4 • File Format...1-4 • Original Type...1-5 • Mixed Size Originals...1-5 • Border Erase...1-6 • Original Orientation...1-6 • Continuous Scan...1-7 • Output Per Page...1-7 Specify the degree of scanning detail. The larger the dpi value, the more details are captured, but file sizes and sending time are also increased. Specify scan resolutions of 200 dpi, 300 dpi, 400 dpi or 600 dpi. NOTE: Typical computers display images on the screen at 96 dpi (for Windows), and printers typically print at between 150 - 600 dpi. Scan images at higher resolutions if they will be later enlarged or printed. 1 Press the Scanner Function key. 2 Press [S] or [T] to select Resolution, and press the OK key. 3 Press [S] or [T] to select 200dpi, 300dpi, 400dpi,or 600dpi, and then press the OK key. NOTE: When selecting 200dpi or Book Rease, press [S] or [T] to enter the border erase width and press the OK key. 4 Press [S] or [T] to select End, and then press the OK key. File Format 1 2 3 4 Select TIFF or PDF as the image file format. Press the Scanner Function key. Press [S] or [T] to select File Format, and then press the OK key. Press [S] or [T] to select TIFF or PDF, and then press the OK key. Press [S] or [T] to select End, and then press the OK key. 1-4
-
 1
1 -
2
-
3
-
4
-
5
-
6
-
 7
7 -
 8
8 -
 9
9 -
 10
10 -
 11
11 -
 12
12 -
 13
13 -
 14
14 -
 15
15 -
 16
16 -
 17
17 -
18
-
19
-
20
-
21
-
22
-
23
-
24
-
25
-
26
-
27
-
28
-
29
-
30
-
31
-
32
-
33
-
34
-
35
-
36
-
37
-
38
-
39
-
40
-
41
-
42
-
43
-
44
-
45
-
46
-
47
-
48
-
49
-
50
-
51
-
52
-
53
-
54
-
55
-
56
-
57
-
58
-
59
-
60
-
61
-
62
-
63
-
64
-
65
-
66
-
67
-
68
-
69
-
70
-
71
-
72
-
73
-
74
-
75
-
76
-
77
-
78
-
79
-
80
-
81
-
82
-
83
-
84
-
85
-
86
-
87
-
88
-
89
-
90
-
91
-
92
-
93
-
94
-
95
-
96
-
97
-
98
-
99
-
100
-
101
-
102
-
103
-
104
-
105
-
106
-
107
-
108
 |
 |