Kyocera TASKalfa 181 Scan System (F) B Operation Guide (Functions Edition) - Page 32
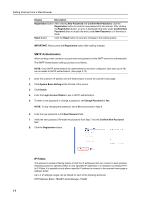
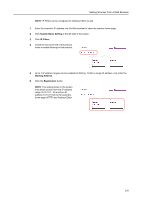
Sender List, Registration Name, Sender User Setting, IMPORTANT - network scanner
 |
View all Kyocera TASKalfa 181 manuals
Add to My Manuals
Save this manual to your list of manuals |
Page 32 highlights
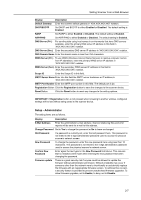
Setting Scanner from a Web Browser Sender List Configure the Sender (User) List for use with network scanner functions (Send E-mail, Scan to PC, Database Connection). Sender (User) List Click Sender List to display the Sender (User) List. Up to 40 entries (No.001 - 020, No.021 - 040) senders (users) can be added, verified, or edited. NOTE: For each number (No.) that has a Registration Name input, the name is shown in the text box. Click the Sender (User) number you would like to configure to open the Sender (User) Setting screen and add or edit Sender (User) settings. IMPORTANT: When adding or editing a sender (user), always press the Registration button when complete. 2-12
-
 1
1 -
2
-
3
-
4
-
5
-
6
-
7
-
8
-
9
-
10
-
11
-
12
-
13
-
14
-
15
-
16
-
17
-
18
-
19
-
20
-
21
-
22
-
23
-
24
-
25
-
26
-
 27
27 -
 28
28 -
 29
29 -
 30
30 -
 31
31 -
 32
32 -
 33
33 -
 34
34 -
 35
35 -
 36
36 -
 37
37 -
38
-
39
-
40
-
41
-
42
-
43
-
44
-
45
-
46
-
47
-
48
-
49
-
50
-
51
-
52
-
53
-
54
-
55
-
56
-
57
-
58
-
59
-
60
-
61
-
62
-
63
-
64
-
65
-
66
-
67
-
68
-
69
-
70
-
71
-
72
-
73
-
74
-
75
-
76
-
77
-
78
-
79
-
80
-
81
-
82
-
83
-
84
-
85
-
86
-
87
-
88
-
89
-
90
-
91
-
92
-
93
-
94
-
95
-
96
-
97
-
98
-
99
-
100
-
101
-
102
-
103
-
104
-
105
-
106
-
107
-
108
 |
 |
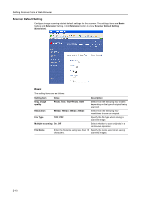
Setting Scanner from a Web Browser
2-12
Sender List
Configure the Sender (User) List for use with network scanner functions (Send E-mail, Scan to PC,
Database Connection).
Sender (User) List
Click
Sender List
to display the Sender (User) List. Up to 40 entries (No.001 - 020, No.021 - 040)
senders (users) can be added, verified, or edited.
NOTE:
For each number (No.) that has a
Registration Name
input, the name is shown in the text
box.
Click the Sender (User) number you would like to configure to open the
Sender (User) Setting
screen and add or edit Sender (User) settings.
IMPORTANT:
When adding or editing a sender (user), always press the
Registration
button when
complete.