Kyocera TASKalfa 181 Scan System (F) B Operation Guide (Functions Edition) - Page 28
SMTP Authentication, IP-Filters, System Basic Setting
 |
View all Kyocera TASKalfa 181 manuals
Add to My Manuals
Save this manual to your list of manuals |
Page 28 highlights
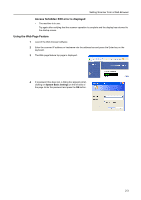
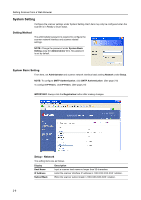
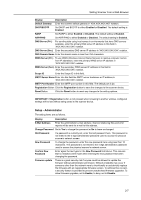
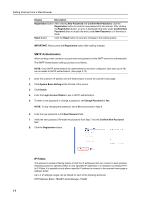
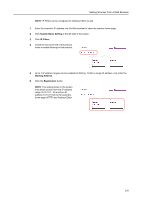
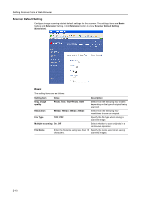
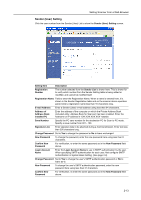
Setting Scanner from a Web Browser Display Description Registration Button After entering New Password and Confirm New Password, click the Registration button to save the new password to the scanner. After clicking the Registration button, an error is displayed if the entry under Confirm New Password does not match the entry under New Password, or if the entry is blank. Reset Button Click the Reset button to reset any changes to the setting options. IMPORTANT: Always press the Registration button after making changes. SMTP Authentication When sending e-mail, sends an account name and password to the SMTP server for authentication. The SMTP Authentication settings process is as follows. NOTE: Once SMTP authentication (for administrators) has been configured, each user (up to 40) can be added to SMTP authentication. (See page 2-12) 1 Enter the scanner's IP address into the Web browser to show the scanner home page. 2 Click System Basic Setting at the left side of the screen. 3 Click Enable. 4 Enter the Login Account Name to use in SMTP authentication. 5 To enter a new password or change a password, set Change Password to Yes. NOTE: To skip changing the password, set to No and proceed to Step 8. 6 Enter the new password in the New Password field. 7 Verify the new password. Re-enter the password from Step 7 into the Confirm New Password field. 8 Click the Registration button. IP-Filters This scanner includes a filtering feature to limit the IP addresses that can connect to each protocol, restricting access to specific profiles to only specified IP addresses. For example, by setting HTTP in IP-Filters, it is possible to only allow a specific IP address to connect to the scanner home page or Address Editor. Up to 4 IP address ranges can be filtered for each of the following protocols. HTTP/Address Editor, TELNET, AdminManager, TWAIN 2-8
-
 1
1 -
2
-
3
-
4
-
5
-
6
-
7
-
8
-
9
-
10
-
11
-
12
-
13
-
14
-
15
-
16
-
17
-
18
-
19
-
20
-
21
-
22
-
 23
23 -
 24
24 -
 25
25 -
 26
26 -
 27
27 -
 28
28 -
 29
29 -
 30
30 -
 31
31 -
 32
32 -
 33
33 -
34
-
35
-
36
-
37
-
38
-
39
-
40
-
41
-
42
-
43
-
44
-
45
-
46
-
47
-
48
-
49
-
50
-
51
-
52
-
53
-
54
-
55
-
56
-
57
-
58
-
59
-
60
-
61
-
62
-
63
-
64
-
65
-
66
-
67
-
68
-
69
-
70
-
71
-
72
-
73
-
74
-
75
-
76
-
77
-
78
-
79
-
80
-
81
-
82
-
83
-
84
-
85
-
86
-
87
-
88
-
89
-
90
-
91
-
92
-
93
-
94
-
95
-
96
-
97
-
98
-
99
-
100
-
101
-
102
-
103
-
104
-
105
-
106
-
107
-
108
 |
 |