Kyocera TASKalfa 181 Scan System (F) B Operation Guide (Functions Edition) - Page 80
PC Destination List, Registering and Editing Destination PC, Address Book, Destination Registration PC
 |
View all Kyocera TASKalfa 181 manuals
Add to My Manuals
Save this manual to your list of manuals |
Page 80 highlights
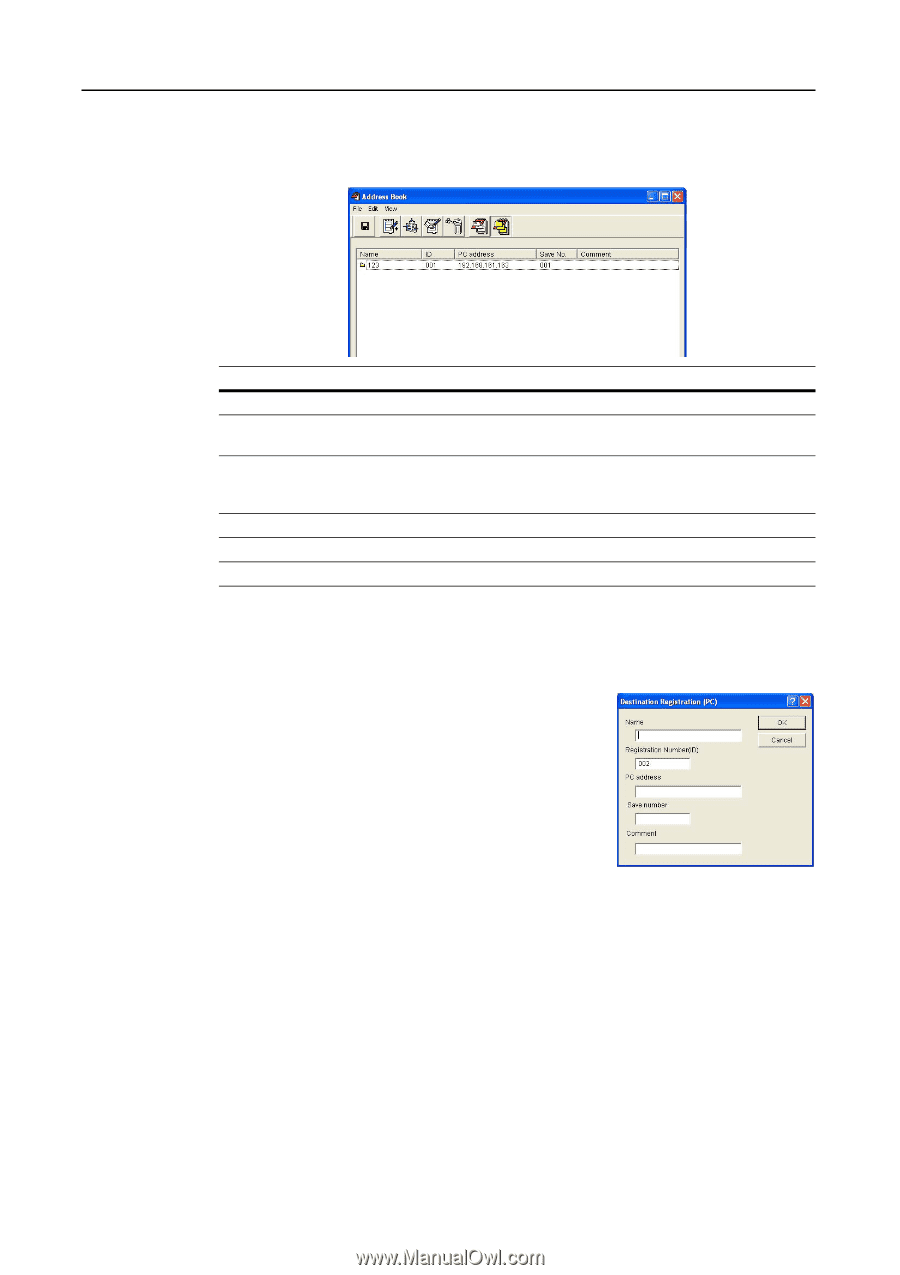
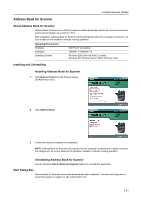
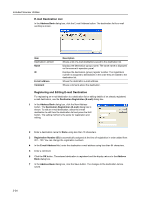
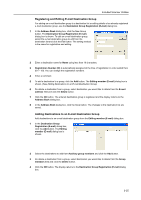
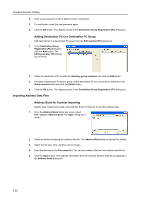
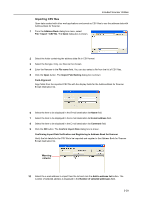
Included Scanner Utilities PC Destination List In the Address Book dialog box, click the PC Address button. The destination list for Scan to PC is shown. Item Destination List field Name ID PC address Save No. Comment Description Shows a list of destination PCs saved to the destination list. Displays the destination (group) name. The same name is displayed on the scanner's operation panel. Displays the destination (group) register number. The registration number is assigned to destinations in the order they are added to the destination list. Displays the hostname or IP address of the destination PC. Enter the folder number for the save destination PC. Shows comments about the destination. Registering and Editing Destination PC For registering a destination PC to a destination list or editing details of an already registered destination PC, use the Destination Registration (PC) dialog box. 1 In the Address Book dialog box, click the New Address button. The Destination Registration (PC) dialog box is shown. To edit destination PC, select the destination PC to edit from the destination list and click the Edit button. The setting method is the same for registration and editing. 3-36 2 Enter a destination name for Name using less than 16 characters. 3 Registration Number (ID) is automatically assigned at the time of registration in order and added from 001 - 100. You can change the registration numbers. 4 Under PC address, enter the PC address (IP address or host name) for the destination PC using 32 characters or less. 5 Under Save number enter the destination PC's save folder number from 001 - 100, using numeric characters. 6 Enter a comment. 7 Click the OK button. The entered destination PC is registered and the display returns to the Address Book dialog box.
-
 1
1 -
2
-
3
-
4
-
5
-
6
-
7
-
8
-
9
-
10
-
11
-
12
-
13
-
14
-
15
-
16
-
17
-
18
-
19
-
20
-
21
-
22
-
23
-
24
-
25
-
26
-
27
-
28
-
29
-
30
-
31
-
32
-
33
-
34
-
35
-
36
-
37
-
38
-
39
-
40
-
41
-
42
-
43
-
44
-
45
-
46
-
47
-
48
-
49
-
50
-
51
-
52
-
53
-
54
-
55
-
56
-
57
-
58
-
59
-
60
-
61
-
62
-
63
-
64
-
65
-
66
-
67
-
68
-
69
-
70
-
71
-
72
-
73
-
74
-
 75
75 -
 76
76 -
 77
77 -
 78
78 -
 79
79 -
 80
80 -
 81
81 -
 82
82 -
 83
83 -
 84
84 -
 85
85 -
86
-
87
-
88
-
89
-
90
-
91
-
92
-
93
-
94
-
95
-
96
-
97
-
98
-
99
-
100
-
101
-
102
-
103
-
104
-
105
-
106
-
107
-
108
 |
 |