Kyocera TASKalfa 181 Scan System (F) B Operation Guide (Functions Edition) - Page 70
Scan to PC Setting, Click this button to create a new destination PC group. The destination group
 |
View all Kyocera TASKalfa 181 manuals
Add to My Manuals
Save this manual to your list of manuals |
Page 70 highlights
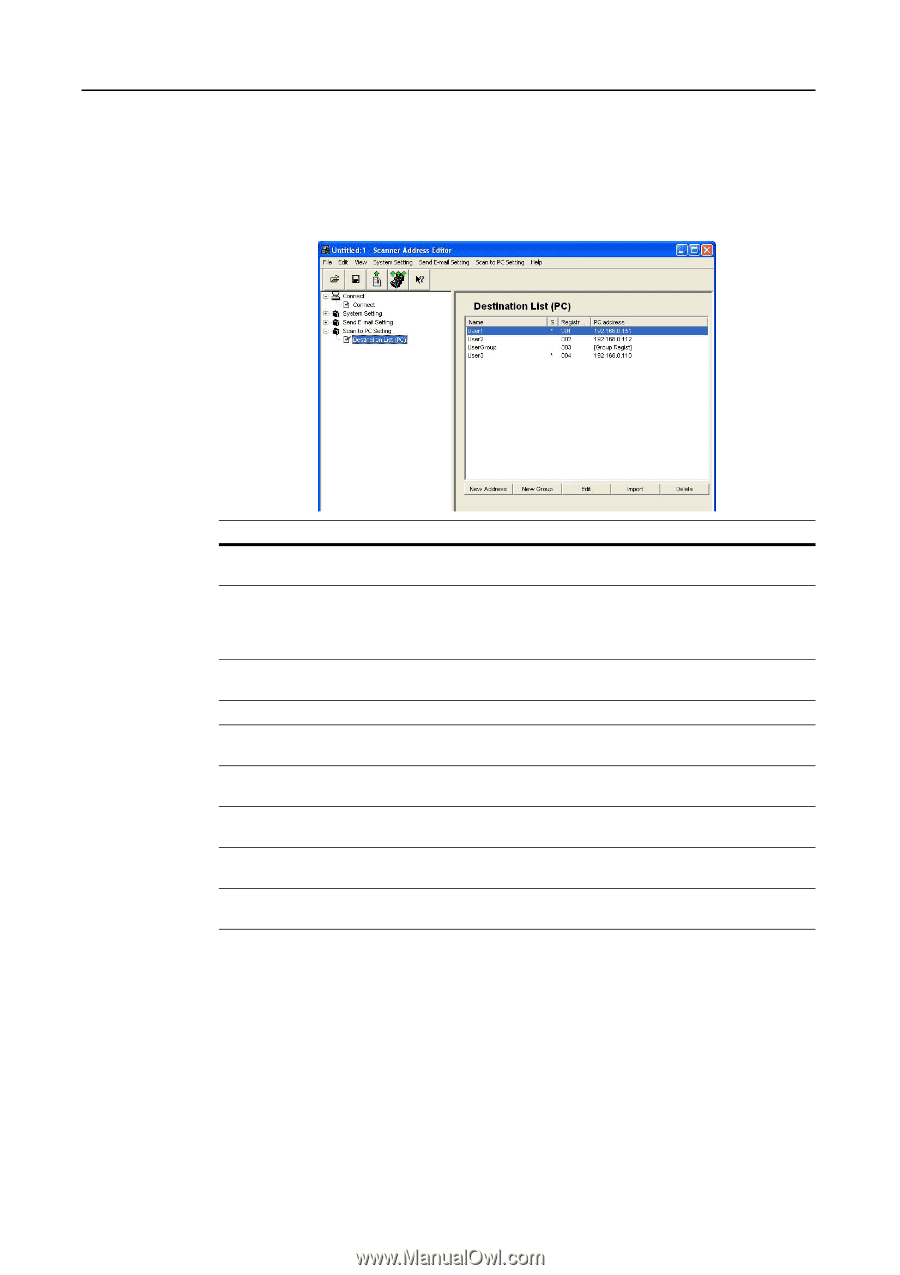
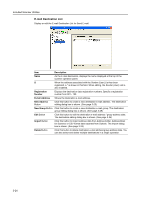
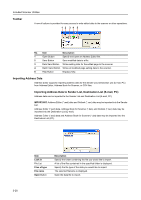
Included Scanner Utilities Scan to PC Setting Set basic settings and register/edit destinations for sending scanned images to computers. Sender List Display or edit the Destination List for Scan to PC. Item Description Name As the Scan to PC destination, displays the name at the top of the scanner operation panel. S When the address associated with the Sender (User) List has been registered, a * is shown in this field. When editing, the Sender (User) List is also modified. As the destination, displays the name at the top of the scanner operation panel. Registration Number Displays the destination PC data registration numbers. Specify a registration number from 001 - 100. PC address Displays the hostname or IP address of the destination PC. New Address Button Click this button to create a new destination PC address. The destination editing dialog box is shown. (See page 3-27) New Group Button Click this button to create a new destination PC group. The destination group editing dialog box is shown. (See page 3-27) Edit Button Click this button to edit a destination PC address/group. The destination editing dialog box is shown. (See page 3-27) Import Button Click this button to import address data from Address Editor or Address Book for Scanner. The Import dialog box is shown. (See page 3-28) Delete Button Click this button to remove the selected destination PC address/group data. You can also select and delete multiple destinations in a single operation. 3-26
-
 1
1 -
2
-
3
-
4
-
5
-
6
-
7
-
8
-
9
-
10
-
11
-
12
-
13
-
14
-
15
-
16
-
17
-
18
-
19
-
20
-
21
-
22
-
23
-
24
-
25
-
26
-
27
-
28
-
29
-
30
-
31
-
32
-
33
-
34
-
35
-
36
-
37
-
38
-
39
-
40
-
41
-
42
-
43
-
44
-
45
-
46
-
47
-
48
-
49
-
50
-
51
-
52
-
53
-
54
-
55
-
56
-
57
-
58
-
59
-
60
-
61
-
62
-
63
-
64
-
 65
65 -
 66
66 -
 67
67 -
 68
68 -
 69
69 -
 70
70 -
 71
71 -
 72
72 -
 73
73 -
 74
74 -
 75
75 -
76
-
77
-
78
-
79
-
80
-
81
-
82
-
83
-
84
-
85
-
86
-
87
-
88
-
89
-
90
-
91
-
92
-
93
-
94
-
95
-
96
-
97
-
98
-
99
-
100
-
101
-
102
-
103
-
104
-
105
-
106
-
107
-
108
 |
 |