Kyocera TASKalfa 181 Scan System (F) B Operation Guide (Functions Edition) - Page 35
Scan to PC Setting, Sender List - scanner file utility
 |
View all Kyocera TASKalfa 181 manuals
Add to My Manuals
Save this manual to your list of manuals |
Page 35 highlights
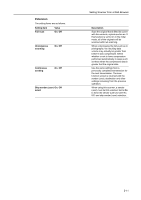
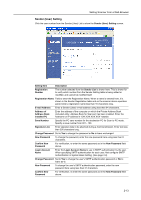
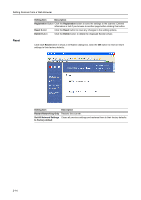
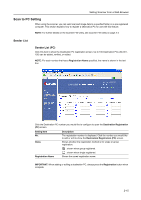
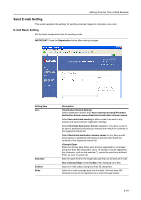
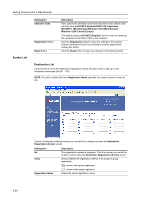
Setting Scanner from a Web Browser Scan to PC Setting When using the scanner, you can send scanned image data to a specified folder on a pre-registered computer. This section explains how to register a destination PC for use with this feature. NOTE: For further details on the Scanner File Utility, see Scanner File Utility on page 3-3. Sender List Sender List (PC) Click this item to show the Destination PC registration screen. Up to 100 Destination PCs (No.001 100) can be added, verified, or edited. NOTE: For each number that has a Registration Name specified, the name is shown in the text box. Click the Destination PC number you would like to configure to open the Destination Registration (PC) screen. Setting Item No. Class Registration Name Description The registration number is displayed. Click the number you would like to add or edit to show the Destination Registration (PC) screen. Shows whether the registration method is for single or group registration. : shown when group registered. : shown when single registered. Shows the saved registration name. IMPORTANT: When adding or editing a destination PC, always press the Registration button when complete. 2-15
-
 1
1 -
2
-
3
-
4
-
5
-
6
-
7
-
8
-
9
-
10
-
11
-
12
-
13
-
14
-
15
-
16
-
17
-
18
-
19
-
20
-
21
-
22
-
23
-
24
-
25
-
26
-
27
-
28
-
29
-
 30
30 -
 31
31 -
 32
32 -
 33
33 -
 34
34 -
 35
35 -
 36
36 -
 37
37 -
 38
38 -
 39
39 -
 40
40 -
41
-
42
-
43
-
44
-
45
-
46
-
47
-
48
-
49
-
50
-
51
-
52
-
53
-
54
-
55
-
56
-
57
-
58
-
59
-
60
-
61
-
62
-
63
-
64
-
65
-
66
-
67
-
68
-
69
-
70
-
71
-
72
-
73
-
74
-
75
-
76
-
77
-
78
-
79
-
80
-
81
-
82
-
83
-
84
-
85
-
86
-
87
-
88
-
89
-
90
-
91
-
92
-
93
-
94
-
95
-
96
-
97
-
98
-
99
-
100
-
101
-
102
-
103
-
104
-
105
-
106
-
107
-
108
 |
 |