Kyocera TASKalfa 181 Scan System (F) B Operation Guide (Functions Edition) - Page 82
Importing Address Data Files, Destination Group Registration PC
 |
View all Kyocera TASKalfa 181 manuals
Add to My Manuals
Save this manual to your list of manuals |
Page 82 highlights
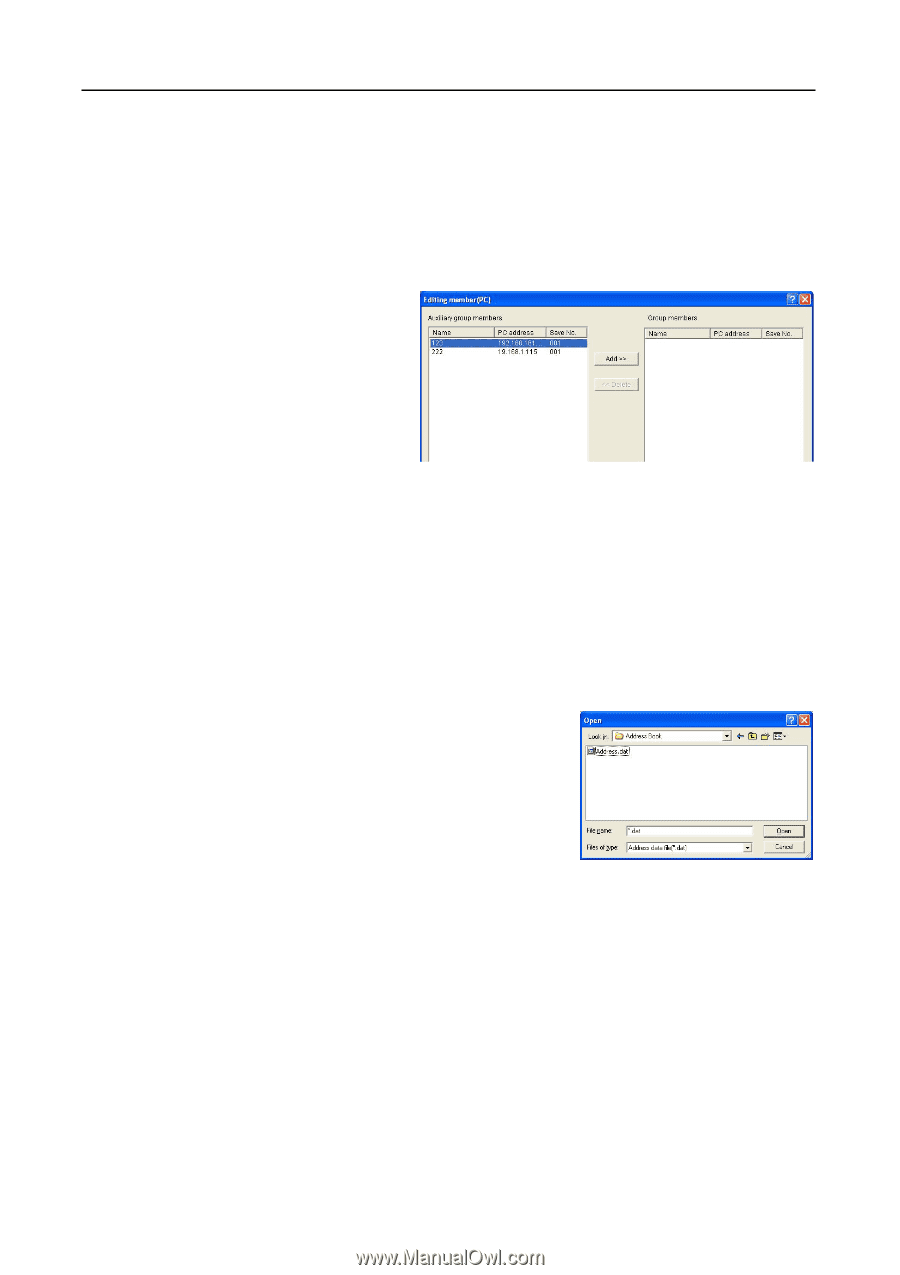
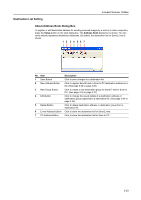
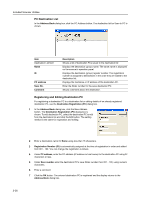
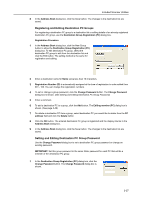
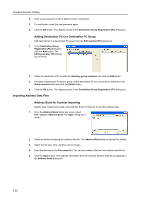
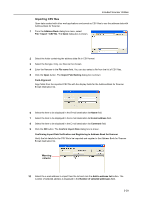
Included Scanner Utilities 2 Enter a new password under 8 digits (numeric characters). 3 For verification, enter the new password again. 4 Click the OK button. The display returns to the Destination Group Registration (PC) dialog box. Adding Destination PC to a Destination PC Group Add destinations to a destination PC group from the Edit member (PC) dialog box. 1 In the Destination Group Registration (PC) dialog box, click the Add button. The Editing member (PC) dialog box is shown. 2 Select the destination PCs to add from Auxiliary group members and click the Add button. 3 Do delete a destination PC from a group, select destination PC you would like to delete from the Group members field and click the Delete button. 4 Click the OK button. The display returns to the Destination Group Registration (PC) dialog box. Importing Address Data Files Address Book for Scanner Importing Specify data created and saved using Address Book for Scanner to use that address data. 1 From the Address Book dialog box menu, select FileJImportJAddress Book. The Open dialog box is shown. 2 Select the folder containing the address data file. The Address Book folder is selected by default. 3 Select the file type. Only .dat files can be chosen. 4 Enter the filename in the File name field. You can also select a file from the Address data file list. 5 Click the Open button. The address information from the selected address data file is displayed in the Address Book dialog box. 3-38
-
 1
1 -
2
-
3
-
4
-
5
-
6
-
7
-
8
-
9
-
10
-
11
-
12
-
13
-
14
-
15
-
16
-
17
-
18
-
19
-
20
-
21
-
22
-
23
-
24
-
25
-
26
-
27
-
28
-
29
-
30
-
31
-
32
-
33
-
34
-
35
-
36
-
37
-
38
-
39
-
40
-
41
-
42
-
43
-
44
-
45
-
46
-
47
-
48
-
49
-
50
-
51
-
52
-
53
-
54
-
55
-
56
-
57
-
58
-
59
-
60
-
61
-
62
-
63
-
64
-
65
-
66
-
67
-
68
-
69
-
70
-
71
-
72
-
73
-
74
-
75
-
76
-
 77
77 -
 78
78 -
 79
79 -
 80
80 -
 81
81 -
 82
82 -
 83
83 -
 84
84 -
 85
85 -
 86
86 -
 87
87 -
88
-
89
-
90
-
91
-
92
-
93
-
94
-
95
-
96
-
97
-
98
-
99
-
100
-
101
-
102
-
103
-
104
-
105
-
106
-
107
-
108
 |
 |