Lexmark C524 User's Guide - Page 62
Setting the Paper Type and Paper Size, Ready, Paper, Paper Size/Type, Submitting Selection
 |
View all Lexmark C524 manuals
Add to My Manuals
Save this manual to your list of manuals |
Page 62 highlights
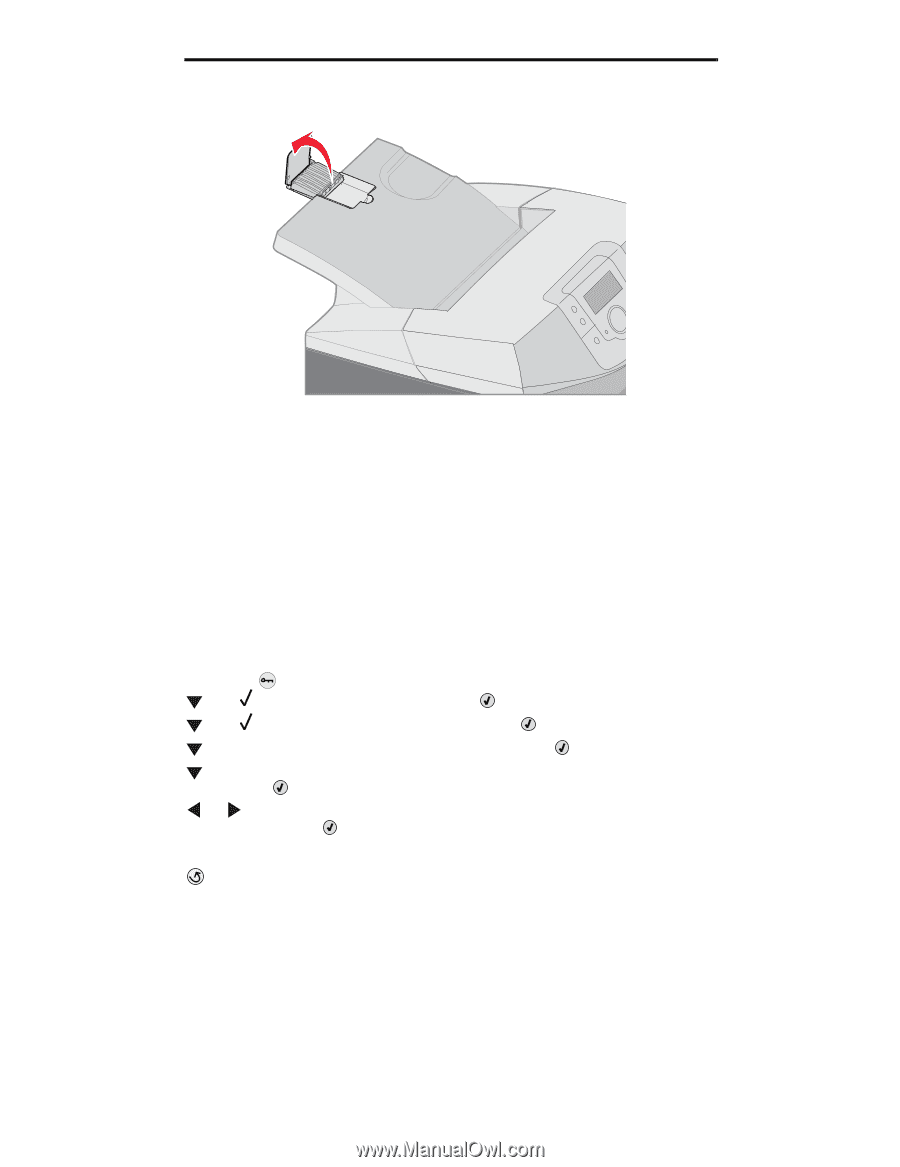
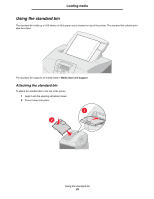
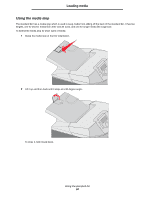
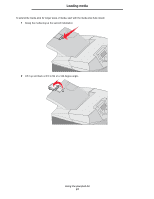
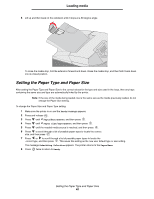
Loading media 3 Lift up and then back on the extension until it stops at a 90 degree angle. To close the media stop, fold the extension forward and down. Raise the media stop, and then fold it back down into its closed position. Setting the Paper Type and Paper Size After setting the Paper Type and Paper Size to the correct values for the type and size used in the trays, then any trays containing the same size and type are automatically linked by the printer. Note: If the size of the media being loaded now is the same size as the media previously loaded, do not change the Paper Size setting. To change the Paper Size and Paper Type setting: 1 Make sure the printer is on and the Ready message appears. 2 Press and release . 3 Press until Paper Menu appears, and then press . 4 Press until Paper Size/Type appears, and then press . 5 Press until the needed media source is reached, and then press . 6 Press to scroll through a list of possible paper sizes to locate the correct size, and then press . 7 Press or to scroll through a list of possible paper types to locate the correct type, and then press . This saves this setting as the new user default type or size setting. The message Submitting Selection appears. The printer returns to the Paper Menu. 8 Press twice to return to Ready. Setting the Paper Type and Paper Size 62
-
 1
1 -
2
-
3
-
4
-
5
-
6
-
7
-
8
-
9
-
10
-
11
-
12
-
13
-
14
-
15
-
16
-
17
-
18
-
19
-
20
-
21
-
22
-
23
-
24
-
25
-
26
-
27
-
28
-
29
-
30
-
31
-
32
-
33
-
34
-
35
-
36
-
37
-
38
-
39
-
40
-
41
-
42
-
43
-
44
-
45
-
46
-
47
-
48
-
49
-
50
-
51
-
52
-
53
-
54
-
55
-
56
-
 57
57 -
 58
58 -
 59
59 -
 60
60 -
 61
61 -
 62
62 -
 63
63 -
 64
64 -
 65
65 -
 66
66 -
 67
67 -
68
-
69
-
70
-
71
-
72
-
73
-
74
-
75
-
76
-
77
-
78
-
79
-
80
-
81
-
82
-
83
-
84
-
85
-
86
-
87
-
88
-
89
-
90
-
91
-
92
-
93
-
94
-
95
-
96
-
97
-
98
-
99
-
100
-
101
-
102
-
103
-
104
-
105
-
106
-
107
-
108
-
109
-
110
-
111
-
112
-
113
-
114
-
115
-
116
-
117
-
118
-
119
-
120
-
121
-
122
-
123
-
124
-
125
-
126
-
127
-
128
-
129
-
130
-
131
-
132
-
133
-
134
-
135
-
136
-
137
-
138
-
139
-
140
-
141
-
142
-
143
-
144
-
145
-
146
 |
 |