Lexmark C524 User's Guide - Page 85
Aligning the toner cartridges for color registration, CONFIG MENU, Color Alignment - transfer belt part
 |
View all Lexmark C524 manuals
Add to My Manuals
Save this manual to your list of manuals |
Page 85 highlights
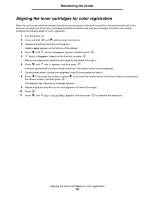
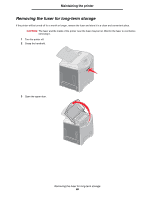
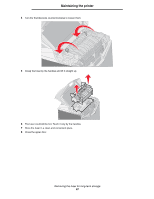
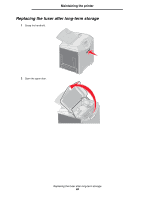
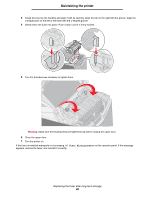
Maintaining the printer Aligning the toner cartridges for color registration When the new transfer belt was installed and all the photoconductor units were moved from the used transfer belt to the new one, the alignment of the toner cartridges and photoconductor units may have changed. For better color quality, complete the following steps for color registration: 1 Turn the printer off. 2 Press and hold and while turning the printer on. 3 Release the buttons when the clock appears. CONFIG MENU appears on the first line of the display. 4 Press until Color Alignment appears, and then press . 5 Print Alignment Page is on the first line, so press . Wait as four pages print. Examine each page for the letters A through L. 6 Press until Set A appears, and then press . A screen appears with a number shown in the box. The number is the current alignment. 7 On the printed sheet, choose the straightest of the 20 lines beside the letter A. 8 Press to decrease the number, or press the chosen number, and then press . to increase the number shown in the box to make it correspond to The Submitting Selection message appears. 9 Repeat step 6 and step 8 to set the new alignment for letters B through L. 10 Press . 11 Press until Exit Config Menu appears, and then press to complete this procedure. Aligning the toner cartridges for color registration 85
-
 1
1 -
2
-
3
-
4
-
5
-
6
-
7
-
8
-
9
-
10
-
11
-
12
-
13
-
14
-
15
-
16
-
17
-
18
-
19
-
20
-
21
-
22
-
23
-
24
-
25
-
26
-
27
-
28
-
29
-
30
-
31
-
32
-
33
-
34
-
35
-
36
-
37
-
38
-
39
-
40
-
41
-
42
-
43
-
44
-
45
-
46
-
47
-
48
-
49
-
50
-
51
-
52
-
53
-
54
-
55
-
56
-
57
-
58
-
59
-
60
-
61
-
62
-
63
-
64
-
65
-
66
-
67
-
68
-
69
-
70
-
71
-
72
-
73
-
74
-
75
-
76
-
77
-
78
-
79
-
 80
80 -
 81
81 -
 82
82 -
 83
83 -
 84
84 -
 85
85 -
 86
86 -
 87
87 -
 88
88 -
 89
89 -
 90
90 -
91
-
92
-
93
-
94
-
95
-
96
-
97
-
98
-
99
-
100
-
101
-
102
-
103
-
104
-
105
-
106
-
107
-
108
-
109
-
110
-
111
-
112
-
113
-
114
-
115
-
116
-
117
-
118
-
119
-
120
-
121
-
122
-
123
-
124
-
125
-
126
-
127
-
128
-
129
-
130
-
131
-
132
-
133
-
134
-
135
-
136
-
137
-
138
-
139
-
140
-
141
-
142
-
143
-
144
-
145
-
146
 |
 |