Lexmark C524 User's Guide - Page 9
Con d model, Illustrations in this publication
 |
View all Lexmark C524 manuals
Add to My Manuals
Save this manual to your list of manuals |
Page 9 highlights
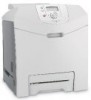
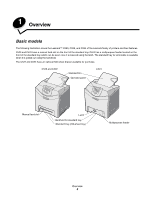
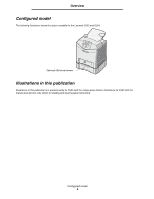
Overview Configured model The following illustration shows the option available for the Lexmark C522 and C524. Optional 500-sheet drawer Illustrations in this publication Illustrations in this publication are predominantly for C524 with the multipurpose feeder. Illustrations for C522 with the manual feed slot are only shown for loading and clearing jams instructions. Configured model 9
-
 1
1 -
2
-
3
-
 4
4 -
 5
5 -
 6
6 -
 7
7 -
 8
8 -
 9
9 -
 10
10 -
 11
11 -
 12
12 -
 13
13 -
 14
14 -
15
-
16
-
17
-
18
-
19
-
20
-
21
-
22
-
23
-
24
-
25
-
26
-
27
-
28
-
29
-
30
-
31
-
32
-
33
-
34
-
35
-
36
-
37
-
38
-
39
-
40
-
41
-
42
-
43
-
44
-
45
-
46
-
47
-
48
-
49
-
50
-
51
-
52
-
53
-
54
-
55
-
56
-
57
-
58
-
59
-
60
-
61
-
62
-
63
-
64
-
65
-
66
-
67
-
68
-
69
-
70
-
71
-
72
-
73
-
74
-
75
-
76
-
77
-
78
-
79
-
80
-
81
-
82
-
83
-
84
-
85
-
86
-
87
-
88
-
89
-
90
-
91
-
92
-
93
-
94
-
95
-
96
-
97
-
98
-
99
-
100
-
101
-
102
-
103
-
104
-
105
-
106
-
107
-
108
-
109
-
110
-
111
-
112
-
113
-
114
-
115
-
116
-
117
-
118
-
119
-
120
-
121
-
122
-
123
-
124
-
125
-
126
-
127
-
128
-
129
-
130
-
131
-
132
-
133
-
134
-
135
-
136
-
137
-
138
-
139
-
140
-
141
-
142
-
143
-
144
-
145
-
146
 |
 |
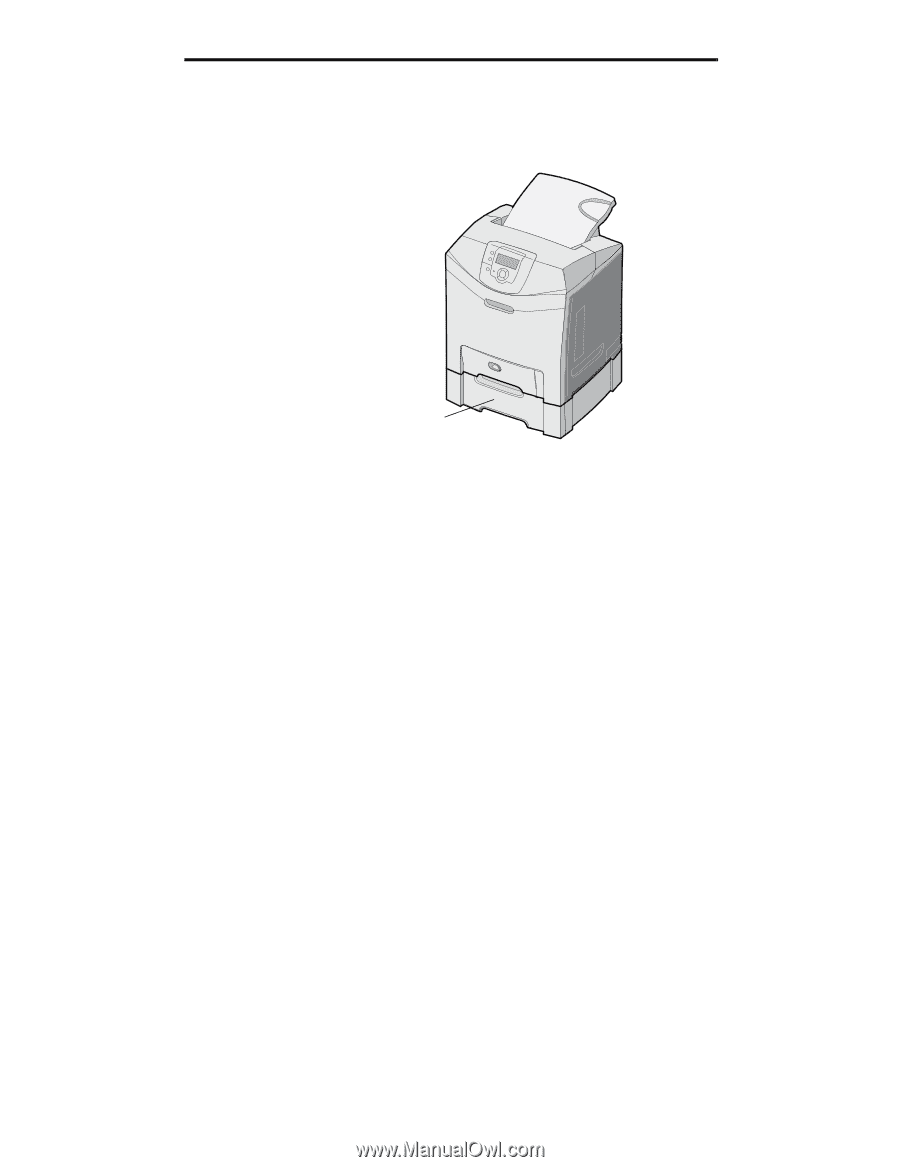
Configured model
9
Overview
Configured model
The following illustration shows the option available for the Lexmark C522 and C524.
Illustrations in this publication
Illustrations in this publication are predominantly for C524 with the multipurpose feeder. Illustrations for C522 with the
manual feed slot are only shown for loading and clearing jams instructions.
Optional 500-sheet drawer