Motorola i870 User Guide - Page 51
Accessing Contacts, Creating Entries, Contacts, Contacts > [New Contact], Browse
 |
View all Motorola i870 manuals
Add to My Manuals
Save this manual to your list of manuals |
Page 51 highlights
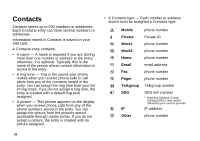
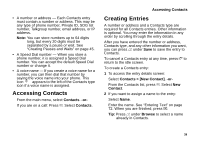
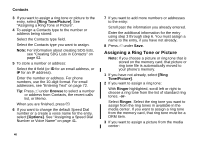
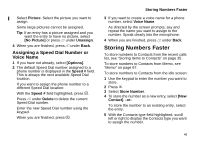
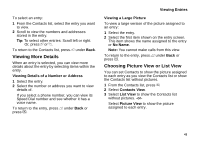
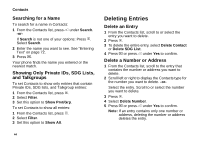
• A number or address - Each Contacts entry must contain a number or address. This may be any type of phone number, Private ID, SDG list number, Talkgroup number, email address, or IP address. Note: You can store numbers up to 64 digits long, but every 20 digits must be separated by a pause or wait. See "Creating Pauses and Waits" on page 45. • A Speed Dial number - When you store a phone number, it is assigned a Speed Dial number. You can accept the default Speed Dial number or change it. • A voice name - If you create a voice name for a number, you can then dial that number by saying the voice name into your phone. This icon P appears to the left of the Contacts type icon if a voice name is assigned. Accessing Contacts From the main menu, select Contacts. -or- If you are on a call: Press m. Select Contacts. Accessing Contacts Creating Entries A number or address and a Contacts type are required for all Contacts entries. Other information is optional. You may enter the information in any order by scrolling through the entry details. After you have entered the number or address, Contacts type, and any other information you want, you can press A under Save to save the entry to Contacts. To cancel a Contacts entry at any time, press e to return to the idle screen. To create a Contacts entry: 1 To access the entry details screen: Select Contacts > [New Contact]. -or- From the Contacts list, press m. Select New Contact. 2 If you want to assign a name to the entry: Select Name. Enter the name. See "Entering Text" on page 72. When you are finished, press O. Tip: Press A under Browse to select a name already in Contacts. 39
-
 1
1 -
2
-
3
-
4
-
5
-
6
-
7
-
8
-
9
-
10
-
11
-
12
-
13
-
14
-
15
-
16
-
17
-
18
-
19
-
20
-
21
-
22
-
23
-
24
-
25
-
26
-
27
-
28
-
29
-
30
-
31
-
32
-
33
-
34
-
35
-
36
-
37
-
38
-
39
-
40
-
41
-
42
-
43
-
44
-
45
-
 46
46 -
 47
47 -
 48
48 -
 49
49 -
 50
50 -
 51
51 -
 52
52 -
 53
53 -
 54
54 -
 55
55 -
 56
56 -
57
-
58
-
59
-
60
-
61
-
62
-
63
-
64
-
65
-
66
-
67
-
68
-
69
-
70
-
71
-
72
-
73
-
74
-
75
-
76
-
77
-
78
-
79
-
80
-
81
-
82
-
83
-
84
-
85
-
86
-
87
-
88
-
89
-
90
-
91
-
92
-
93
-
94
-
95
-
96
-
97
-
98
-
99
-
100
-
101
-
102
-
103
-
104
-
105
-
106
-
107
-
108
-
109
-
110
-
111
-
112
-
113
-
114
-
115
-
116
-
117
-
118
-
119
-
120
-
121
-
122
-
123
-
124
-
125
-
126
-
127
-
128
-
129
-
130
-
131
-
132
-
133
-
134
-
135
-
136
-
137
-
138
-
139
-
140
-
141
-
142
-
143
-
144
-
145
-
146
-
147
-
148
-
149
-
150
-
151
-
152
-
153
-
154
-
155
-
156
-
157
-
158
-
159
-
160
-
161
-
162
-
163
-
164
-
165
-
166
-
167
-
168
-
169
-
170
-
171
-
172
-
173
-
174
-
175
-
176
-
177
-
178
-
179
-
180
-
181
-
182
-
183
-
184
-
185
-
186
-
187
-
188
-
189
-
190
-
191
-
192
-
193
-
194
-
195
-
196
-
197
-
198
-
199
-
200
-
201
-
202
-
203
-
204
-
205
-
206
-
207
-
208
-
209
-
210
-
211
-
212
-
213
-
214
-
215
-
216
-
217
-
218
-
219
 |
 |