Netgear WC7600 Reference Manual - Page 54
Roadmap for Initial Configuration, Configuration > System > IP/VLAN
 |
View all Netgear WC7600 manuals
Add to My Manuals
Save this manual to your list of manuals |
Page 54 highlights
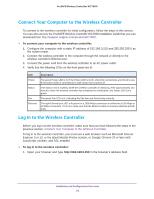
ProSAFE Wireless Controller WC7600 Roadmap for Initial Configuration After you have connected and logged in to the wireless controller, perform the initial configuration. If you are not sure how you are going to deploy the wireless controller in your network, NETGEAR recommends that you read Chapter 2, System Planning and Deployment Scenarios. This section is a roadmap for basic configuration only: It provides high-level configuration steps with references to the sections or chapters that provide detailed configuration steps. To perform the initial configuration of the wireless controller: 1. Open a web browser. In the browser's address field, type the http:// followed by the IP address that you assigned to the wireless controller. By default, the IP address is 192.168.0.250. If you have not yet assigned another IP address to the wireless controller, type http://192.168.0.250. The wireless controller's login screen displays. 2. Enter your user name and password. If you have not yet personalized your user name and password, enter admin for the user name and password for the password, both in lowercase letters. 3. Click the Login button. The wireless controller's web management interface opens and displays the Summary screen. 4. Select Configuration > System > General. The General Settings screen displays. 5. Enter a name for the wireless controller and select the country in which the wireless controller is used. 6. Click the Apply button. 7. Select Configuration > System > Time. The Time Setting screen displays. 8. Select the time zone in which the wireless controller is used. Optionally, configure the NTP settings. For more information, see Manage the Time Settings on page 61. 9. Click the Apply button. 10. Select Configuration > System > IP/VLAN. The IP Settings screen displays. 11. Enter the IP settings for your network and the VLANs that you want to assign to the wireless controller. Installation and Configuration Overview 54
-
 1
1 -
2
-
3
-
4
-
5
-
6
-
7
-
8
-
9
-
10
-
11
-
12
-
13
-
14
-
15
-
16
-
17
-
18
-
19
-
20
-
21
-
22
-
23
-
24
-
25
-
26
-
27
-
28
-
29
-
30
-
31
-
32
-
33
-
34
-
35
-
36
-
37
-
38
-
39
-
40
-
41
-
42
-
43
-
44
-
45
-
46
-
47
-
48
-
 49
49 -
 50
50 -
 51
51 -
 52
52 -
 53
53 -
 54
54 -
 55
55 -
 56
56 -
 57
57 -
 58
58 -
 59
59 -
60
-
61
-
62
-
63
-
64
-
65
-
66
-
67
-
68
-
69
-
70
-
71
-
72
-
73
-
74
-
75
-
76
-
77
-
78
-
79
-
80
-
81
-
82
-
83
-
84
-
85
-
86
-
87
-
88
-
89
-
90
-
91
-
92
-
93
-
94
-
95
-
96
-
97
-
98
-
99
-
100
-
101
-
102
-
103
-
104
-
105
-
106
-
107
-
108
-
109
-
110
-
111
-
112
-
113
-
114
-
115
-
116
-
117
-
118
-
119
-
120
-
121
-
122
-
123
-
124
-
125
-
126
-
127
-
128
-
129
-
130
-
131
-
132
-
133
-
134
-
135
-
136
-
137
-
138
-
139
-
140
-
141
-
142
-
143
-
144
-
145
-
146
-
147
-
148
-
149
-
150
-
151
-
152
-
153
-
154
-
155
-
156
-
157
-
158
-
159
-
160
-
161
-
162
-
163
-
164
-
165
-
166
-
167
-
168
-
169
-
170
-
171
-
172
-
173
-
174
-
175
-
176
-
177
-
178
-
179
-
180
-
181
-
182
-
183
-
184
-
185
-
186
-
187
-
188
-
189
-
190
-
191
-
192
-
193
-
194
-
195
-
196
-
197
-
198
-
199
-
200
-
201
-
202
-
203
-
204
-
205
-
206
-
207
-
208
-
209
-
210
-
211
-
212
-
213
-
214
-
215
-
216
-
217
-
218
-
219
-
220
-
221
-
222
-
223
-
224
-
225
-
226
-
227
-
228
-
229
-
230
-
231
-
232
-
233
-
234
-
235
-
236
-
237
-
238
-
239
-
240
-
241
-
242
-
243
-
244
-
245
-
246
-
247
-
248
-
249
-
250
-
251
-
252
-
253
-
254
-
255
-
256
-
257
-
258
-
259
-
260
-
261
-
262
-
263
-
264
-
265
-
266
-
267
-
268
-
269
-
270
-
271
-
272
-
273
-
274
-
275
-
276
-
277
-
278
-
279
-
280
-
281
-
282
-
283
-
284
-
285
-
286
-
287
-
288
-
289
-
290
-
291
-
292
-
293
-
294
-
295
-
296
-
297
-
298
-
299
-
300
-
301
-
302
-
303
-
304
-
305
-
306
-
307
 |
 |
