Netgear WC7600 Reference Manual - Page 56
admin, password, Login, Optional Con MAC authentication.
 |
View all Netgear WC7600 manuals
Add to My Manuals
Save this manual to your list of manuals |
Page 56 highlights
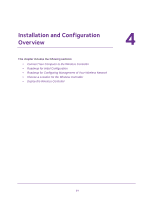
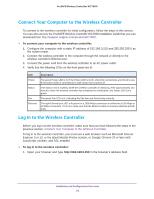
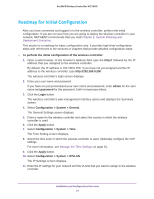
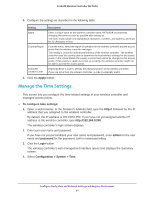
ProSAFE Wireless Controller WC7600 If you have not yet personalized your user name and password, enter admin for the user name and password for the password, both in lowercase letters. 3. Click the Login button. The wireless controller's web management interface opens and displays the Summary screen. 4. Register the licenses. For more information, see Register Your Licenses on page 70. 5. (Optional but recommended) Replace the default certificate with a custom certificate for certificate-based authentication of the internal authentication server. For more information, see Manage Certificates on page 74. 6. (Optional but recommended) Configure logs, alerts, and alarms. For more information, see Configure Log, Syslog, Alarm Notification, and Email Settings on page 75. 7. Configure security profiles: a. Configure the security profiles for the basic profile group or for advanced profile groups. For detailed configuration steps, see: • Manage Security Profiles for the Basic Profile Group on page 86. • Manage Security Profiles for Advanced Profile Groups on page 91. b. (Optional) Configure authentication servers. For more information, see Manage Authentication Servers and Authentication Server Groups on page 104. c. (Optional) Configure MAC authentication. For more information, see Manage MAC Authentication and MAC Authentication Groups on page 109. d. (Optional) Assign the authentication servers and MAC ACLs to the security profiles. For more information, see: • Manage Security Profiles for the Basic Profile Group on page 86. • Manage Security Profiles for Advanced Profile Groups on page 91. 8. Configure the managed access point list: a. Run the Discovery Wizard and add access points to the managed list. For more information, see Discover Access Points with the Discovery Wizard on page 123. b. (Optional) Configure access points that are on the managed list. For more information, see Manage the Managed AP List on page 131. Installation and Configuration Overview 56
-
 1
1 -
2
-
3
-
4
-
5
-
6
-
7
-
8
-
9
-
10
-
11
-
12
-
13
-
14
-
15
-
16
-
17
-
18
-
19
-
20
-
21
-
22
-
23
-
24
-
25
-
26
-
27
-
28
-
29
-
30
-
31
-
32
-
33
-
34
-
35
-
36
-
37
-
38
-
39
-
40
-
41
-
42
-
43
-
44
-
45
-
46
-
47
-
48
-
49
-
50
-
 51
51 -
 52
52 -
 53
53 -
 54
54 -
 55
55 -
 56
56 -
 57
57 -
 58
58 -
 59
59 -
 60
60 -
 61
61 -
62
-
63
-
64
-
65
-
66
-
67
-
68
-
69
-
70
-
71
-
72
-
73
-
74
-
75
-
76
-
77
-
78
-
79
-
80
-
81
-
82
-
83
-
84
-
85
-
86
-
87
-
88
-
89
-
90
-
91
-
92
-
93
-
94
-
95
-
96
-
97
-
98
-
99
-
100
-
101
-
102
-
103
-
104
-
105
-
106
-
107
-
108
-
109
-
110
-
111
-
112
-
113
-
114
-
115
-
116
-
117
-
118
-
119
-
120
-
121
-
122
-
123
-
124
-
125
-
126
-
127
-
128
-
129
-
130
-
131
-
132
-
133
-
134
-
135
-
136
-
137
-
138
-
139
-
140
-
141
-
142
-
143
-
144
-
145
-
146
-
147
-
148
-
149
-
150
-
151
-
152
-
153
-
154
-
155
-
156
-
157
-
158
-
159
-
160
-
161
-
162
-
163
-
164
-
165
-
166
-
167
-
168
-
169
-
170
-
171
-
172
-
173
-
174
-
175
-
176
-
177
-
178
-
179
-
180
-
181
-
182
-
183
-
184
-
185
-
186
-
187
-
188
-
189
-
190
-
191
-
192
-
193
-
194
-
195
-
196
-
197
-
198
-
199
-
200
-
201
-
202
-
203
-
204
-
205
-
206
-
207
-
208
-
209
-
210
-
211
-
212
-
213
-
214
-
215
-
216
-
217
-
218
-
219
-
220
-
221
-
222
-
223
-
224
-
225
-
226
-
227
-
228
-
229
-
230
-
231
-
232
-
233
-
234
-
235
-
236
-
237
-
238
-
239
-
240
-
241
-
242
-
243
-
244
-
245
-
246
-
247
-
248
-
249
-
250
-
251
-
252
-
253
-
254
-
255
-
256
-
257
-
258
-
259
-
260
-
261
-
262
-
263
-
264
-
265
-
266
-
267
-
268
-
269
-
270
-
271
-
272
-
273
-
274
-
275
-
276
-
277
-
278
-
279
-
280
-
281
-
282
-
283
-
284
-
285
-
286
-
287
-
288
-
289
-
290
-
291
-
292
-
293
-
294
-
295
-
296
-
297
-
298
-
299
-
300
-
301
-
302
-
303
-
304
-
305
-
306
-
307
 |
 |
