Netgear WC7600 Reference Manual - Page 55
Roadmap for Configuring Management of Your Wireless Network
 |
View all Netgear WC7600 manuals
Add to My Manuals
Save this manual to your list of manuals |
Page 55 highlights
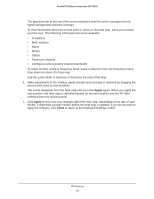
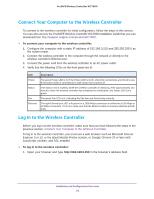
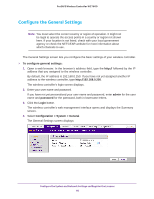
ProSAFE Wireless Controller WC7600 Note: A management VLAN is used for all SNMP and HTTP traffic to and from the wireless controller and managed access points. Note: Clear the Untagged VLAN check box only if the hubs and switches in your network support the VLAN (802.1Q) standard. Likewise, change the untagged VLAN value only if the hubs and switches in your network support the VLAN (802.1Q) standard. For more information, see Manage the IP, VLAN, and Link Aggregation Settings on page 62. 12. Click the Apply button. 13. If your network does not include a DHCP server, configure the wireless controller's DHCP server. For more information, see Manage the DHCP Server on page 65. 14. Click the Apply button. The connection to the wireless controller is terminated because you have changed its IP address. 15. Reconfigure your computer with an IP address and subnet mask that is in the same IP subnet as the new IP address of the wireless controller. 16. Log back in to the wireless controller using its new IP address. Continue with the following section, Roadmap for Configuring Management of Your Wireless Network. Roadmap for Configuring Management of Your Wireless Network After you have performed the initial configuration and changed the IP address to an address that is specific to your network (see the previous section, Roadmap for Initial Configuration), you are ready to configure the wireless controller for management of your wireless network. This section is a roadmap only: It provides high-level configuration steps with references to the sections or chapters that provide detailed configuration steps. To configure the wireless controller for management of your wireless network: 1. Open a web browser. In the browser's address field, type the http:// followed by the IP address that you assigned to the wireless controller. By default, the IP address is 192.168.0.250. If you have not yet assigned another IP address to the wireless controller, type http://192.168.0.250. The wireless controller's login screen displays. 2. Enter your user name and password. Installation and Configuration Overview 55
-
 1
1 -
2
-
3
-
4
-
5
-
6
-
7
-
8
-
9
-
10
-
11
-
12
-
13
-
14
-
15
-
16
-
17
-
18
-
19
-
20
-
21
-
22
-
23
-
24
-
25
-
26
-
27
-
28
-
29
-
30
-
31
-
32
-
33
-
34
-
35
-
36
-
37
-
38
-
39
-
40
-
41
-
42
-
43
-
44
-
45
-
46
-
47
-
48
-
49
-
 50
50 -
 51
51 -
 52
52 -
 53
53 -
 54
54 -
 55
55 -
 56
56 -
 57
57 -
 58
58 -
 59
59 -
 60
60 -
61
-
62
-
63
-
64
-
65
-
66
-
67
-
68
-
69
-
70
-
71
-
72
-
73
-
74
-
75
-
76
-
77
-
78
-
79
-
80
-
81
-
82
-
83
-
84
-
85
-
86
-
87
-
88
-
89
-
90
-
91
-
92
-
93
-
94
-
95
-
96
-
97
-
98
-
99
-
100
-
101
-
102
-
103
-
104
-
105
-
106
-
107
-
108
-
109
-
110
-
111
-
112
-
113
-
114
-
115
-
116
-
117
-
118
-
119
-
120
-
121
-
122
-
123
-
124
-
125
-
126
-
127
-
128
-
129
-
130
-
131
-
132
-
133
-
134
-
135
-
136
-
137
-
138
-
139
-
140
-
141
-
142
-
143
-
144
-
145
-
146
-
147
-
148
-
149
-
150
-
151
-
152
-
153
-
154
-
155
-
156
-
157
-
158
-
159
-
160
-
161
-
162
-
163
-
164
-
165
-
166
-
167
-
168
-
169
-
170
-
171
-
172
-
173
-
174
-
175
-
176
-
177
-
178
-
179
-
180
-
181
-
182
-
183
-
184
-
185
-
186
-
187
-
188
-
189
-
190
-
191
-
192
-
193
-
194
-
195
-
196
-
197
-
198
-
199
-
200
-
201
-
202
-
203
-
204
-
205
-
206
-
207
-
208
-
209
-
210
-
211
-
212
-
213
-
214
-
215
-
216
-
217
-
218
-
219
-
220
-
221
-
222
-
223
-
224
-
225
-
226
-
227
-
228
-
229
-
230
-
231
-
232
-
233
-
234
-
235
-
236
-
237
-
238
-
239
-
240
-
241
-
242
-
243
-
244
-
245
-
246
-
247
-
248
-
249
-
250
-
251
-
252
-
253
-
254
-
255
-
256
-
257
-
258
-
259
-
260
-
261
-
262
-
263
-
264
-
265
-
266
-
267
-
268
-
269
-
270
-
271
-
272
-
273
-
274
-
275
-
276
-
277
-
278
-
279
-
280
-
281
-
282
-
283
-
284
-
285
-
286
-
287
-
288
-
289
-
290
-
291
-
292
-
293
-
294
-
295
-
296
-
297
-
298
-
299
-
300
-
301
-
302
-
303
-
304
-
305
-
306
-
307
 |
 |
